
Quick Start Guide for Instructors
Are you trying to get your courses up and running in a hurry? This guide outlines some basic skills you’ll need to quickly get up to speed with Brightspace. Please note that in addition to the resources outlined below, we offer phone and email support, workshops, and drop-in hours for face to face support. Click here for more information about Brightspace Support. You may also want to check out our Video Workshops series to get a detailed tour of Brightspace and how to use the tools.
- Get to know your Brightspace dashboard
- Change your course image
- Add your syllabus and other content
- Review your Classlist
- Activate your course
- Communicate with students
Updated August 2021
Click here for a Printable version
Get to know your Brightspace dashboard
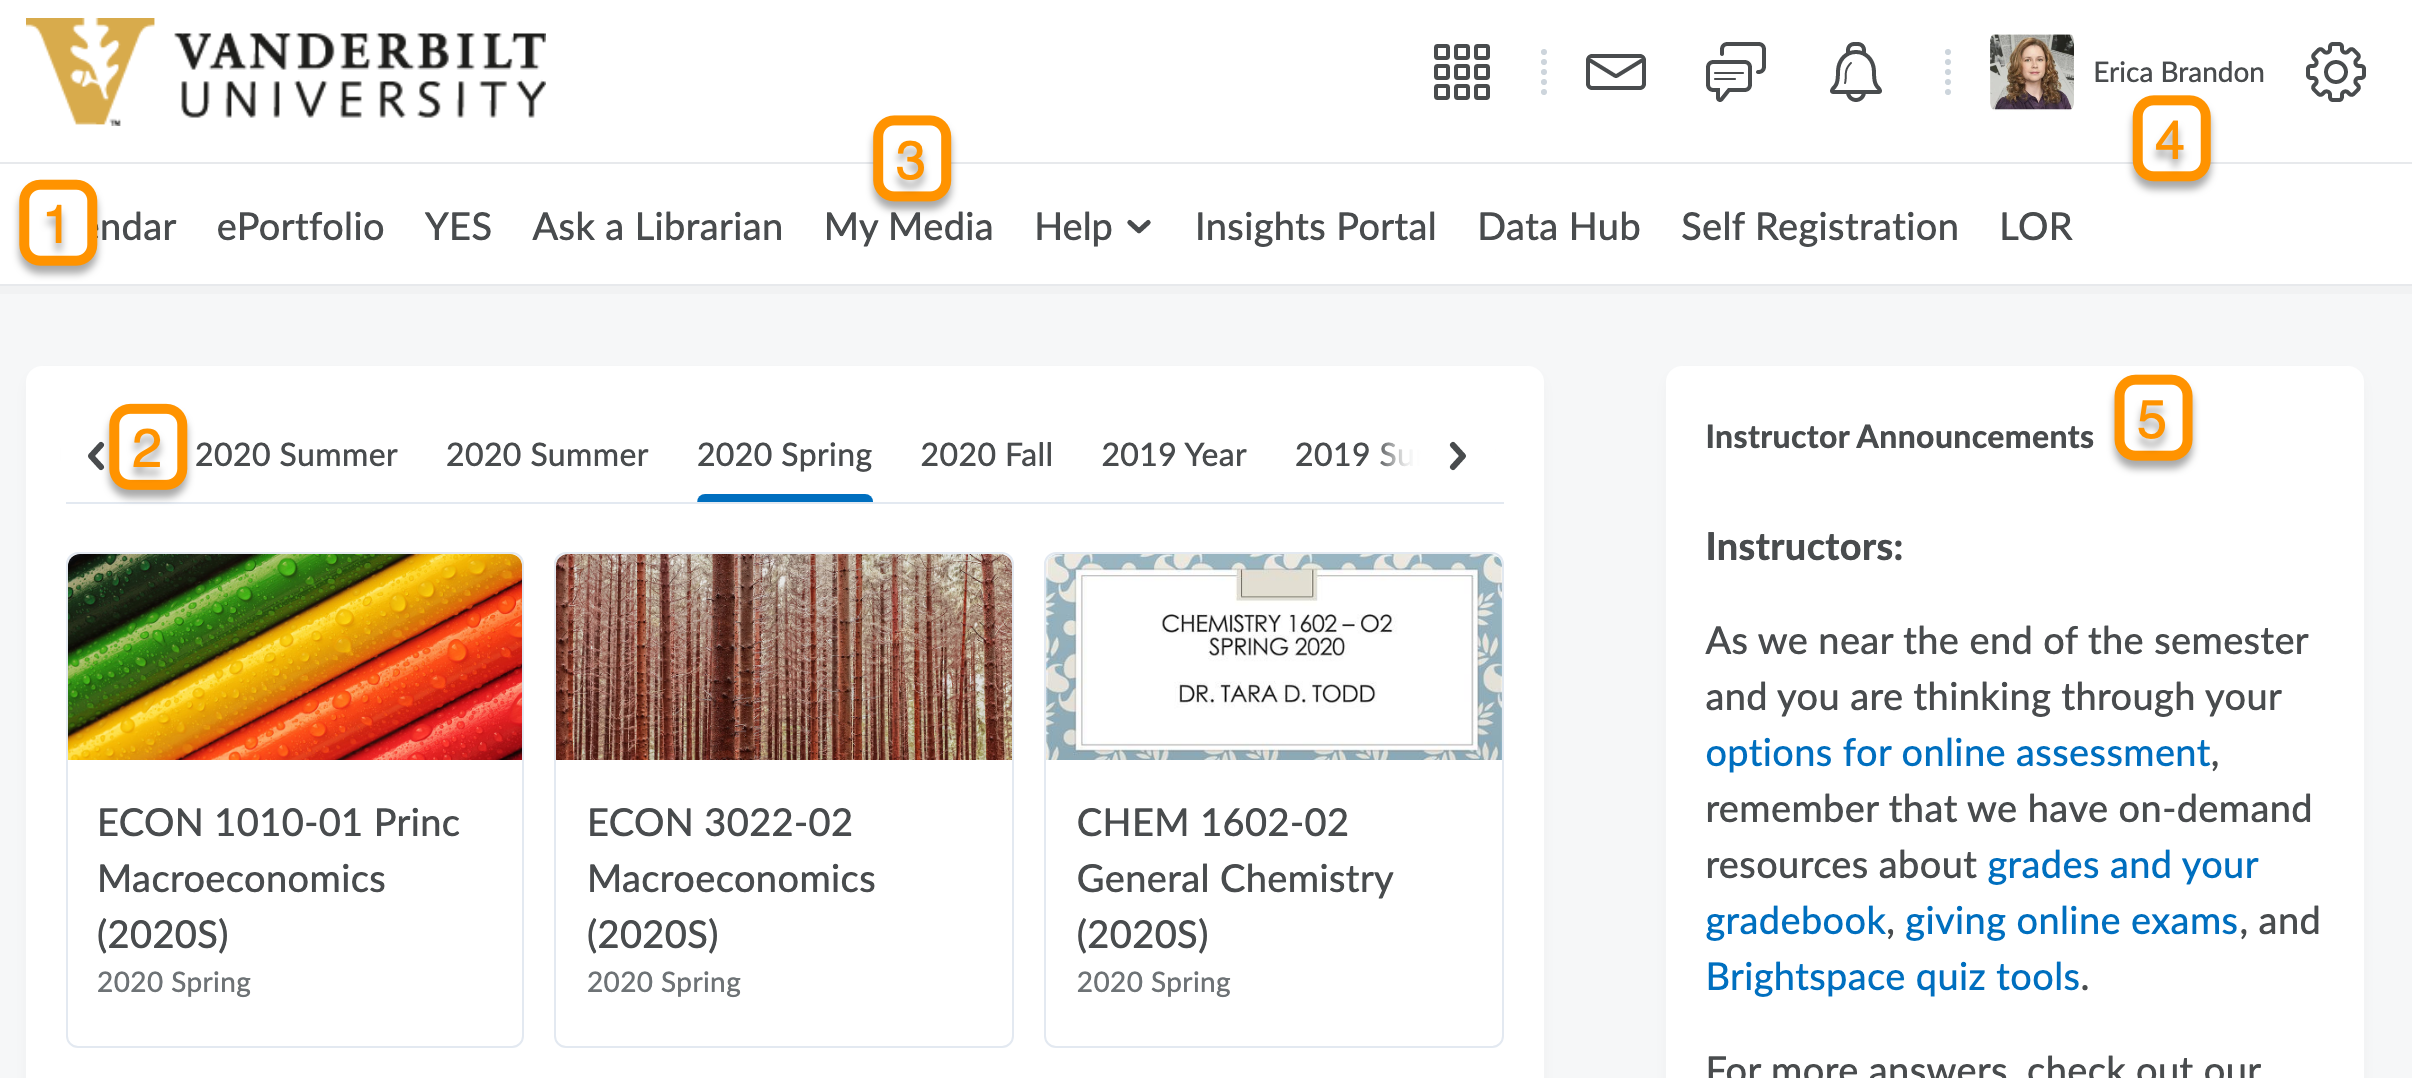
When you log into Brightspace, the first page you’ll see is your dashboard. This page shows all the courses you have access to: past and present. This image shows a few important areas of your dashboard you should be aware of:
- NavBar – The navigation bar containing useful tabs. The NavBar will look different depending on whether you are on your dashboard or in a course.
- Semester tabs – Your courses are sorted by semester. You can view “All Course” in the first semester tab. You are able to “pin” certain courses to the top of your list by following these instructions.
- My Media – This is where you will upload audio and video files that you play to use in your classes. The media in the “My Media” tab is visible only to you.
- Profile – You can view and edit profile information here, as well as uploading a photo. This is also where students will choose their notification settings.
- Announcement widget – Important announcements from the Brightspace Support team will appear here. Be sure to check this out at different times of the semester, as new announcements are posted.
Links to helpful guides for the content covered here:
- How do I locate my courses?
- How can I re-order my courses on the dashboard?
- How do I add my photo and edit my profile?
- How do I set my time zone?
Change your course image
When your course is generated in Brightspace, it is assigned a random stock image. You can choose to keep this image or change it to a new one. There are stock photos you can choose from, or upload a new one.
Option One: Choosing from a stock photo
Click on the “three dot” menu that appears on the right side of your header image. Choose Change Image. Pick the image you like best and Save.
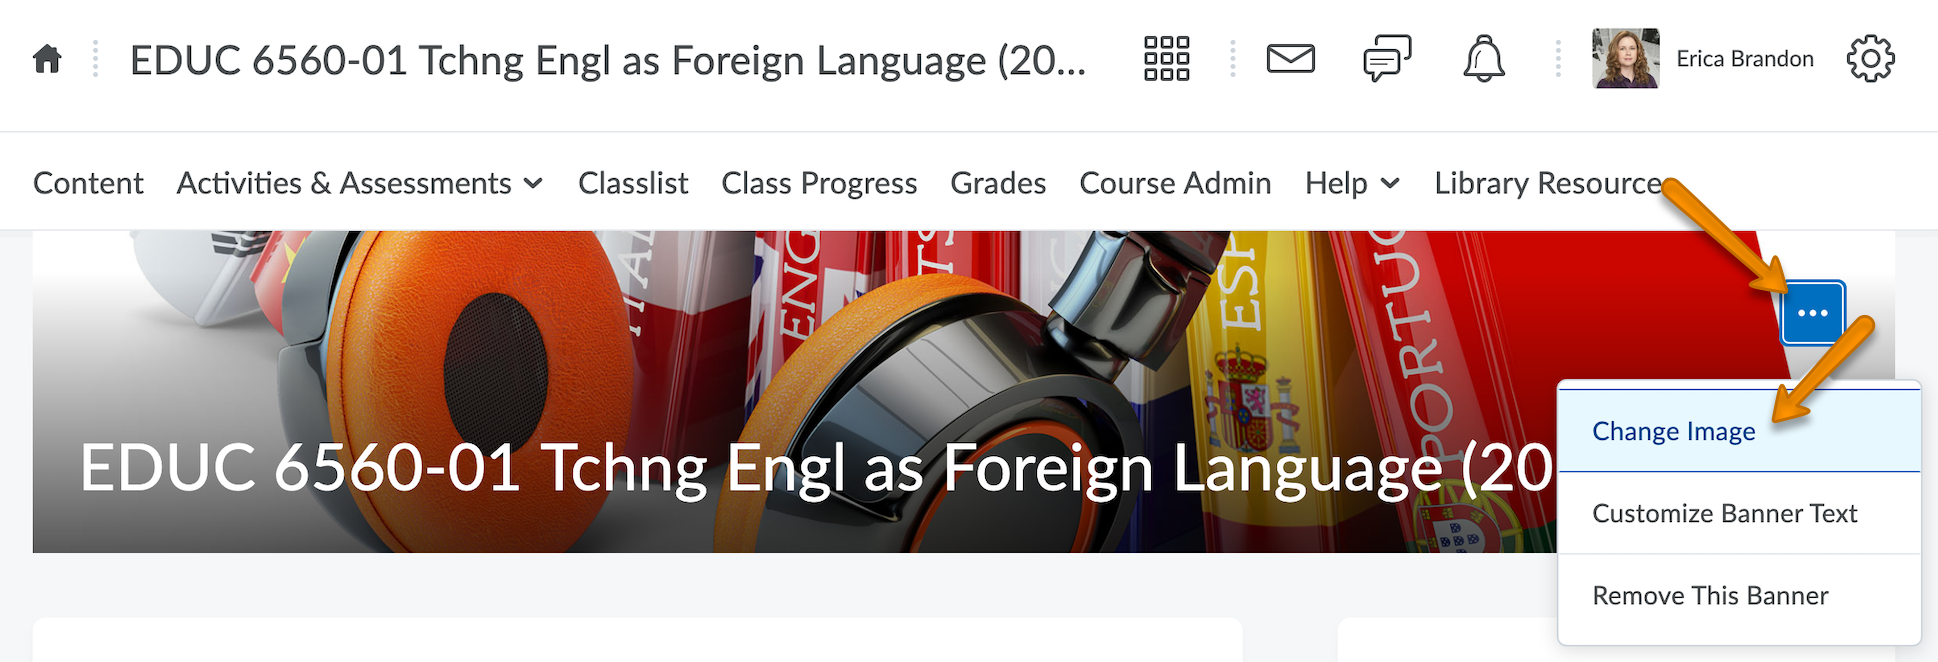
Option Two: Upload your own header image
This is done in the Course Admin area by following these directions.
Add your Syllabus and other Content
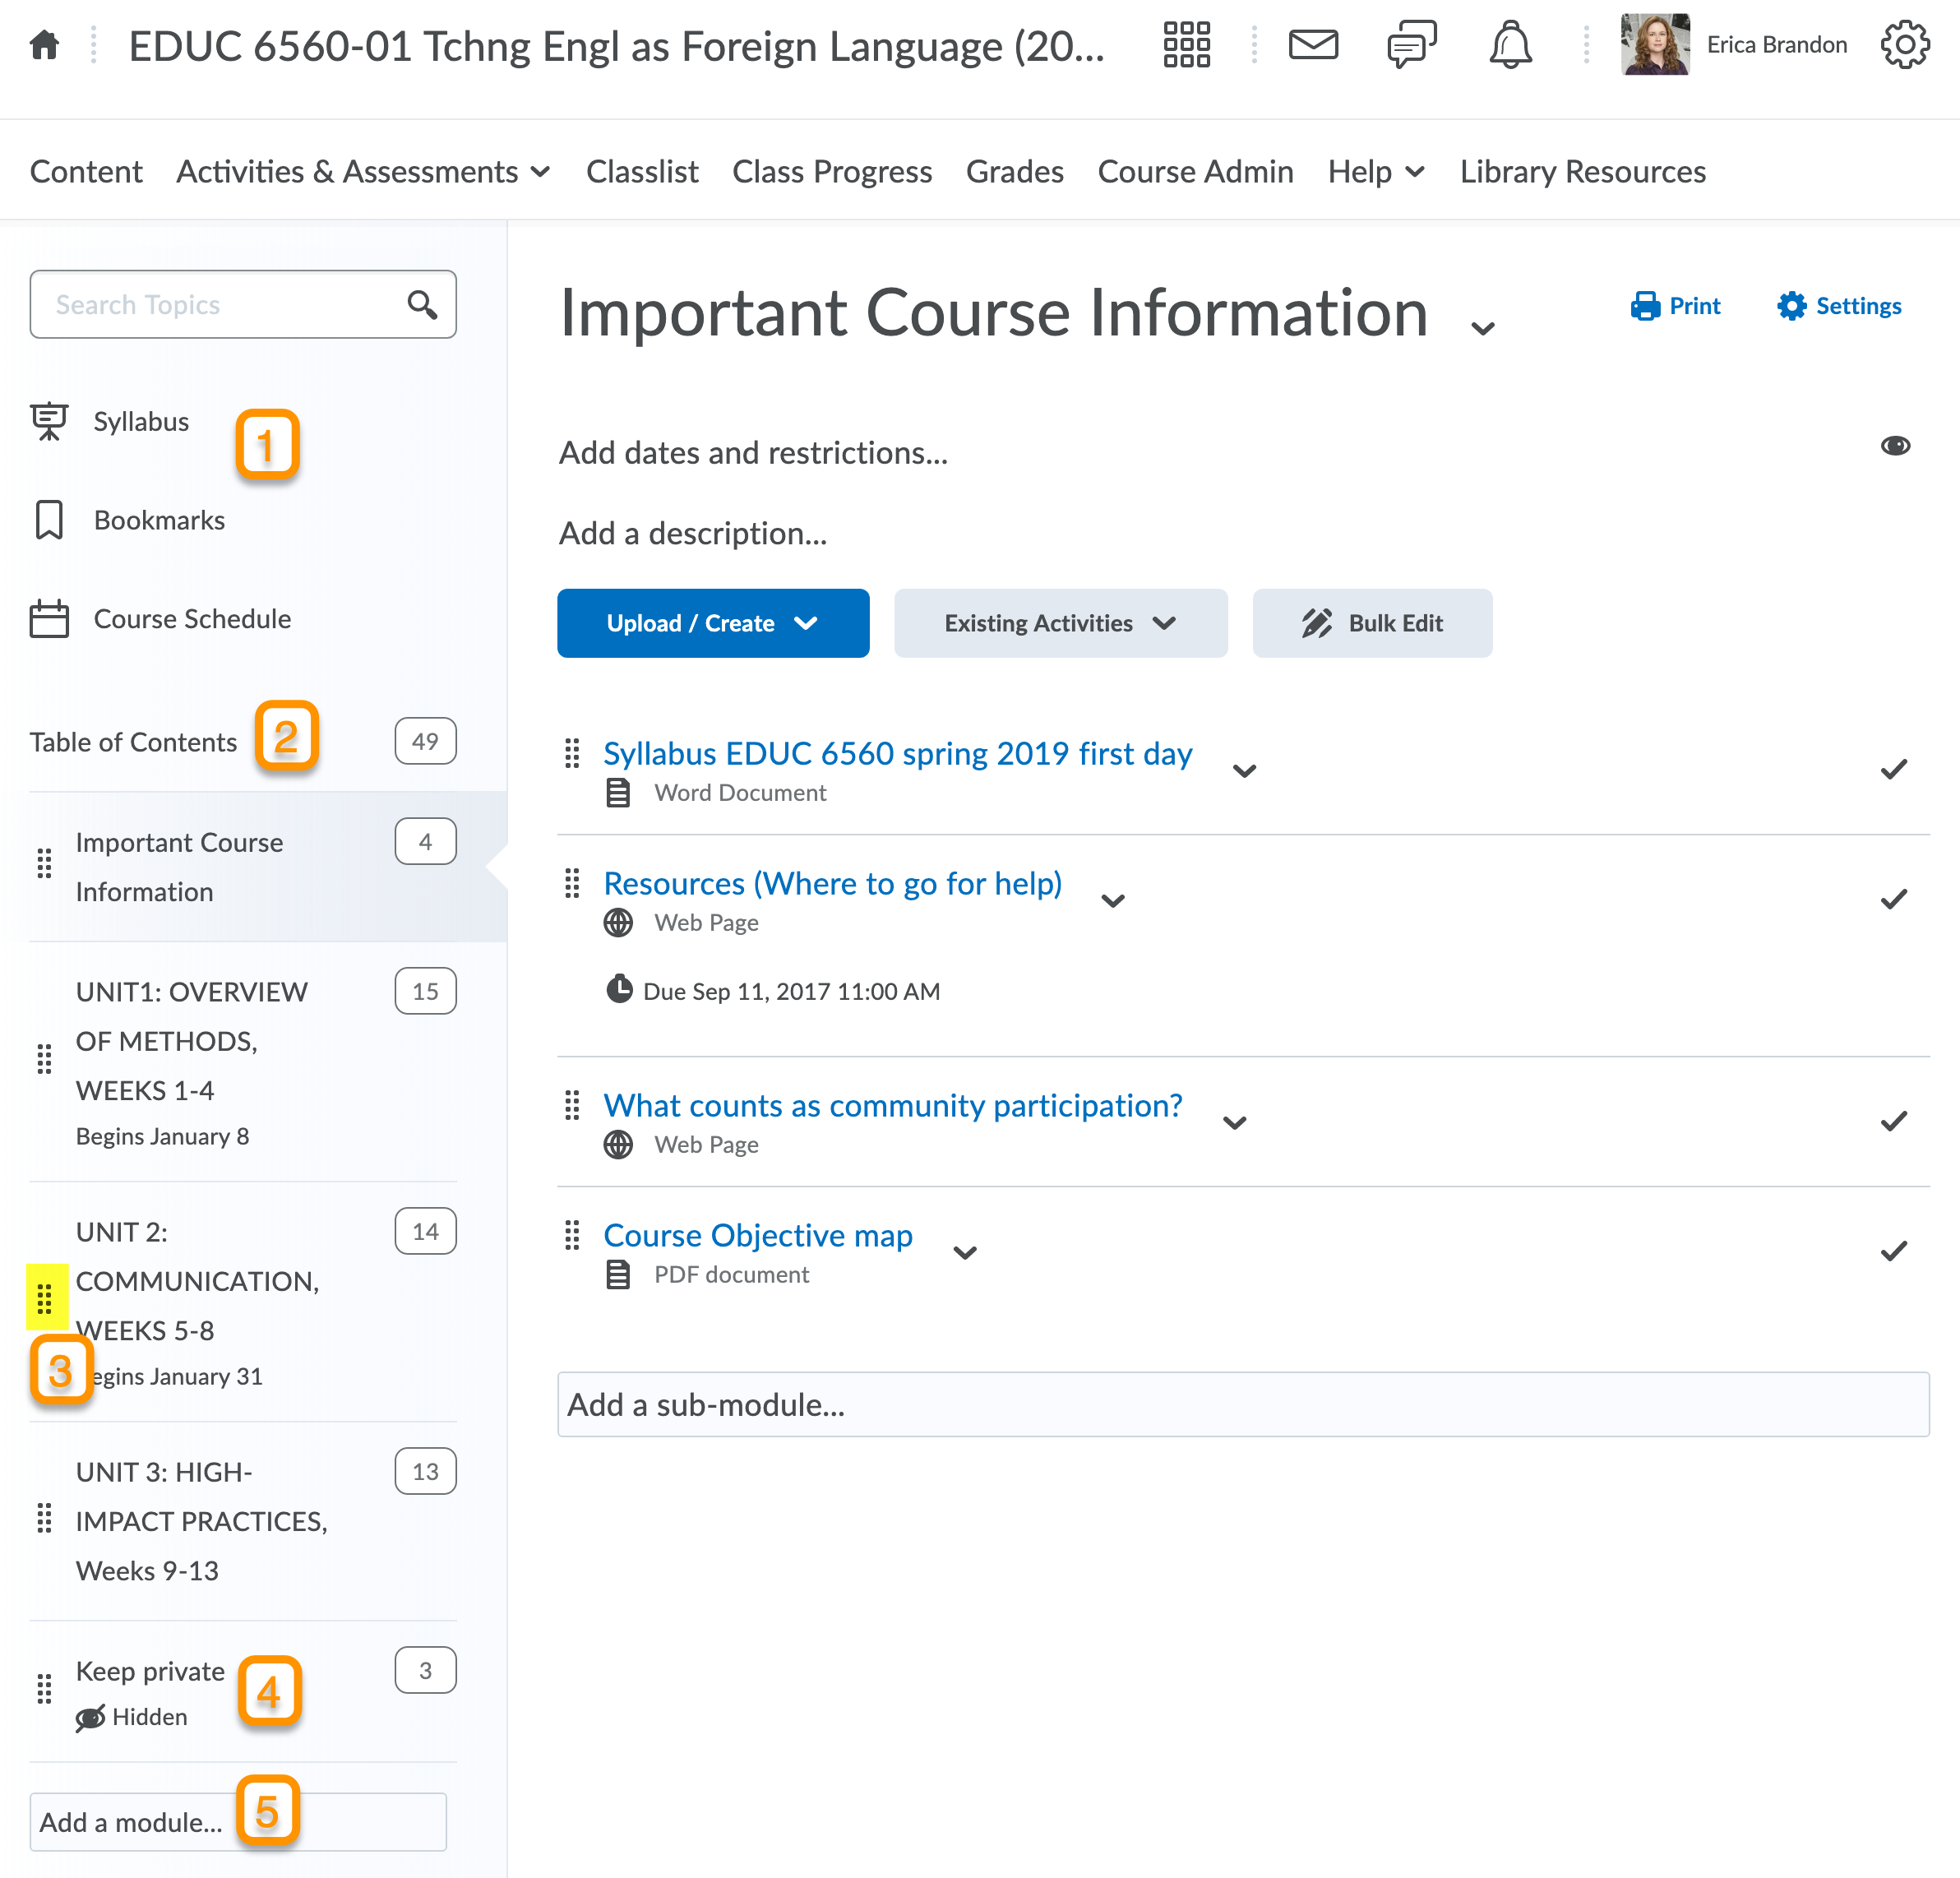
When you enter your course, locate the NavBar (navigation bar). Click on Content. This is where you will post all the materials your students will read, watch, or listen to and all the activities you have planned. This image shows a few important areas of your Content page you should be aware of:
- Syllabus – You will upload a Word document or PDF syllabus here
- Table of Contents – This contains all your modules and submodules
- Dragging/Reordering modules – Clicking on these dots and dragging will allow you to change the order of the modules and submodules
- Hidden module – You are able to hide modules from students that you want to keep unavailable to them
- Add a module – This is where you will create a new module or submodules by typing in its title. Once it’s been created, you can drag/reorder it following the instructions above.
Links to helpful guides for the content covered here:
- What is the table of contents?
- How do I upload my syllabus?
- How do I move files around in my course?
- How do I create modules and add content to them?
Review your Classlist
On your Navbar, click on “Classlist” to see all the students, instructors, and TAs enrolled in your course. You can also email your whole Classlist at once while you’re in this tool.
The Classlist is automatically updated multiple times a day by synchronizing with Vanderbilt’s YES system. Any changes that are made in YES will feed into Brightspace in a matter of hours. It’s necessary that any students be added to your Classlist through the Office of the University Registrar, who will then input the enrollment into YES. This includes students enrolled for credit, TA’s, and formal auditors. This does not include informal guests, who can be added by Brightspace Support staff members.
Links to helpful guides for the content covered here:
- How can I add TAs or other users to my course?
- How do I email my entire class, or individual students?
- Vanderbilt University’s Course Enrollment Policy
Activate your course
By default, your course will be Inactive: hidden and unavailable to your students. Once your course is ready, you will need to manually make the course Active. Here is our full step-by-step guide to the process.
Three simple steps to make your course active
- Go to Course Admin -> Course Offering Information
- Scroll down and check the box “Course is active”
- Click Save
Communicate with students
If you are wondering what students need to know about Brightspace, we are here to help. This blog post walks you through the four most important Brightspace features for students, and also provides suggestions for how to talk about Brightspace in an email or on your syllabus.
We also have a number of guides available to students on this website. They are available under the “On Demand Resources” tab at the top. Here is a link to all the student guides.
Contact Brightspace Support
Please reach out to our team whenever you have a question – no matter how big or small. We are always glad to help!