
What is Kaltura?
Kaltura is an effective tool for uploading and creating video in your course. We encourage you to always use Kaltura, rather directly uploading media files to your course modules. This guide will explain how Kaltura functions in your Brightspace course and offer some basic instructions.
Kaltura is an application in Brightspace that should be used for these tasks: Uploading large video files to stream, creating video quizzes, and creating screen recordings. We offer Kaltura because it has the ability to interpret and play many file types in different browser environments. This helps ensure that all students are able to access your media. Kaltura also has tools to help you create videos for your students.
Kaltura integrates with Brightspace in three different areas: The My Media tab, The Media Gallery tab, and by inserting it directly into your content. These are explained in detail below.
- An overview of your Kaltura workflow
- Step 1: My Media
- Step 2: Media Gallery
- Step 3: Placing media in content modules
- Additional Resources
Updated Spring 2020
Printable version
An Overview of Kaltura workflow
Your first step is to upload media (video or audio) to the My Media tab on your Brightspace dashboard. Don’t confuse this with the Media Gallery, which is on the navigation bar within a course! Your media may be something you created with Kaltura Capture, media that you have created with other software, or something you’ve downloaded from the internet. Click here to learn more about copyright.
Once you have uploaded media into the My Media tab, you can “publish” it to a specific course’s Media Gallery.
Once media has been published to a course’s Media Gallery, it is available to students on the Media Gallery tab. You can remove this tab if you don’t want its contents always available. You could then use the Insert Stuff tool to place media in the content area where you will have more control over dates, times, or other release conditions.
Read on for detailed information on how these three steps work: My Media, Media Gallery, and placing media into Content.
Step 1: My Media
My Media is your personal repository of media files. You are the only one able to access the files in your My Media tab.
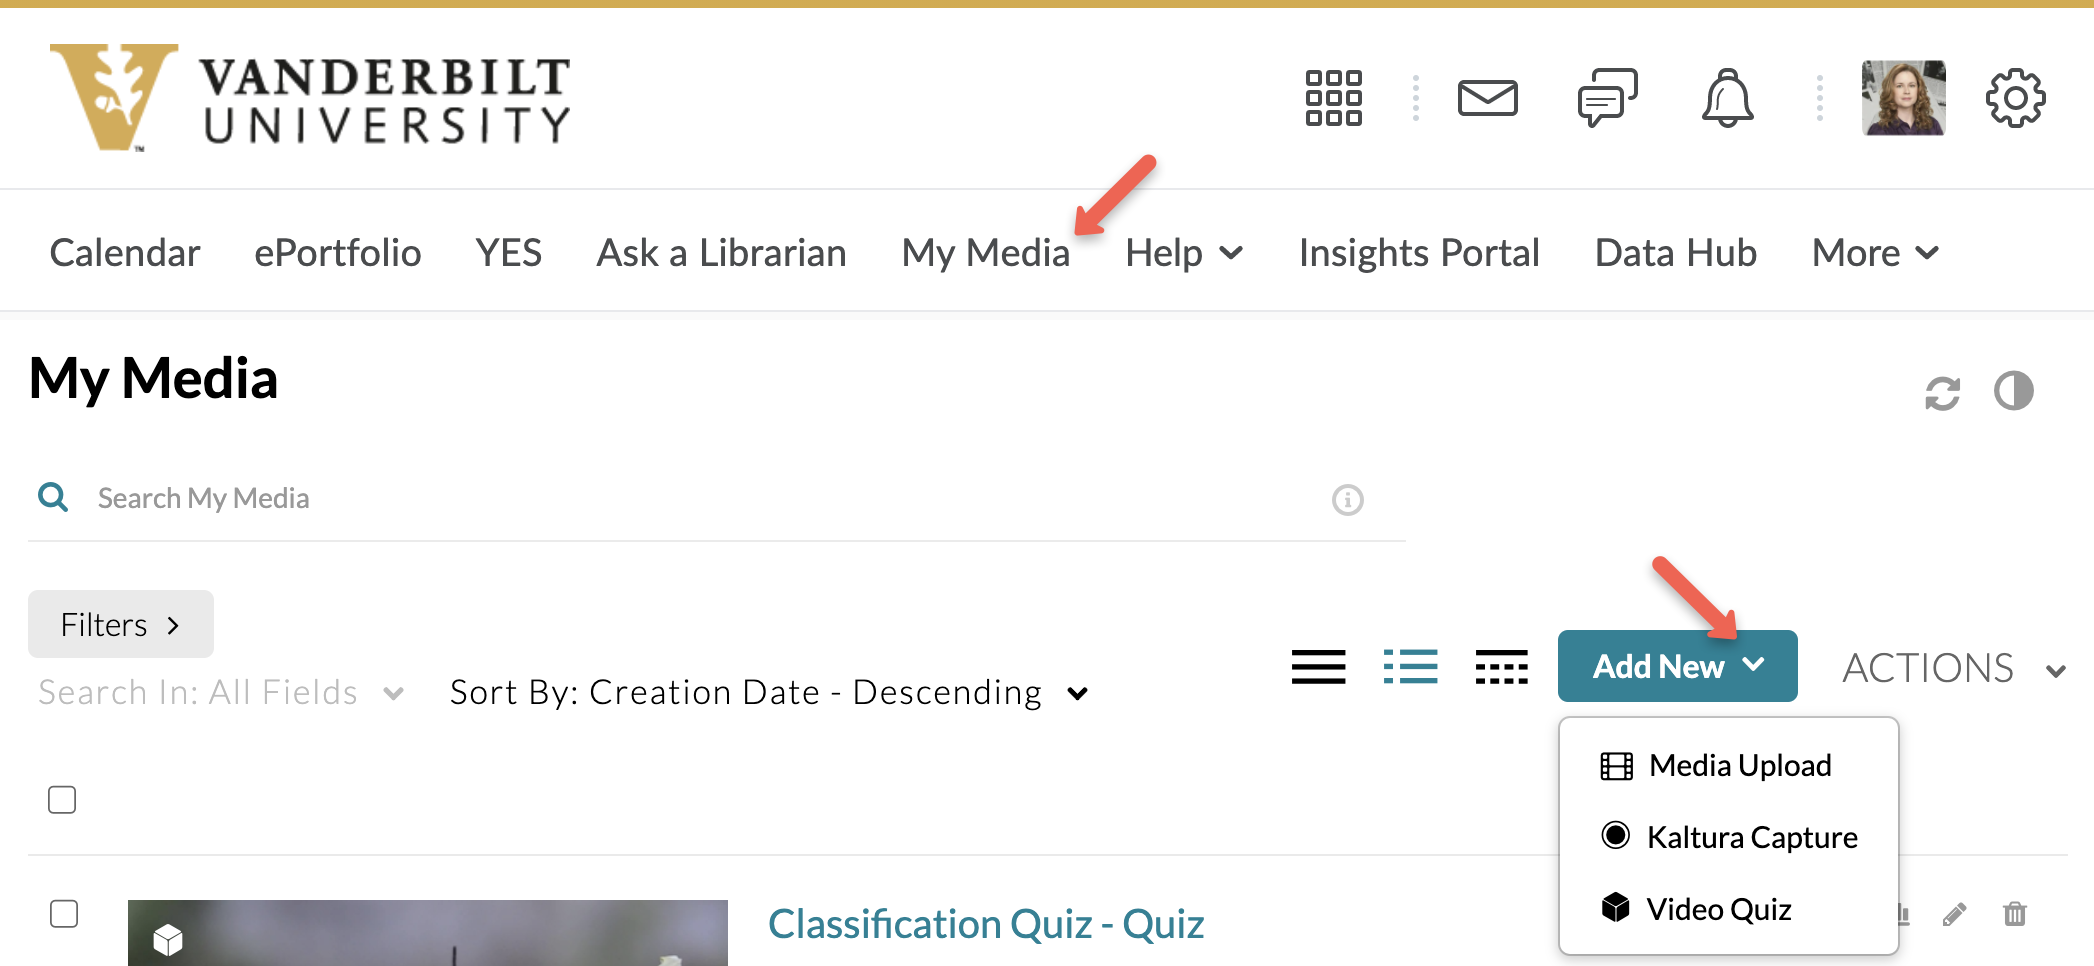
The My Media tab is located on the navigation bar of your Brightspace dashboard (before you have entered a course). You can access your dashboard by clicking the Vanderbilt logo or Home icon at the top of any Brightspace page.
This tab is where users will upload or create their media. “My Media” serves as a user’s media repository. Media remains here indefinitely so that the instructor can “publish” it to multiple courses over the years.
To put videos in the My Media tab, click Add New for options. You can:
- Upload a file from your computer
- Create a video with Kaltura Capture
- Turn an existing video into a video quiz
Once you have videos in your My Media repository, publish them to a course. Click on your video open it in a new page. Follow these steps to publish it to a course:
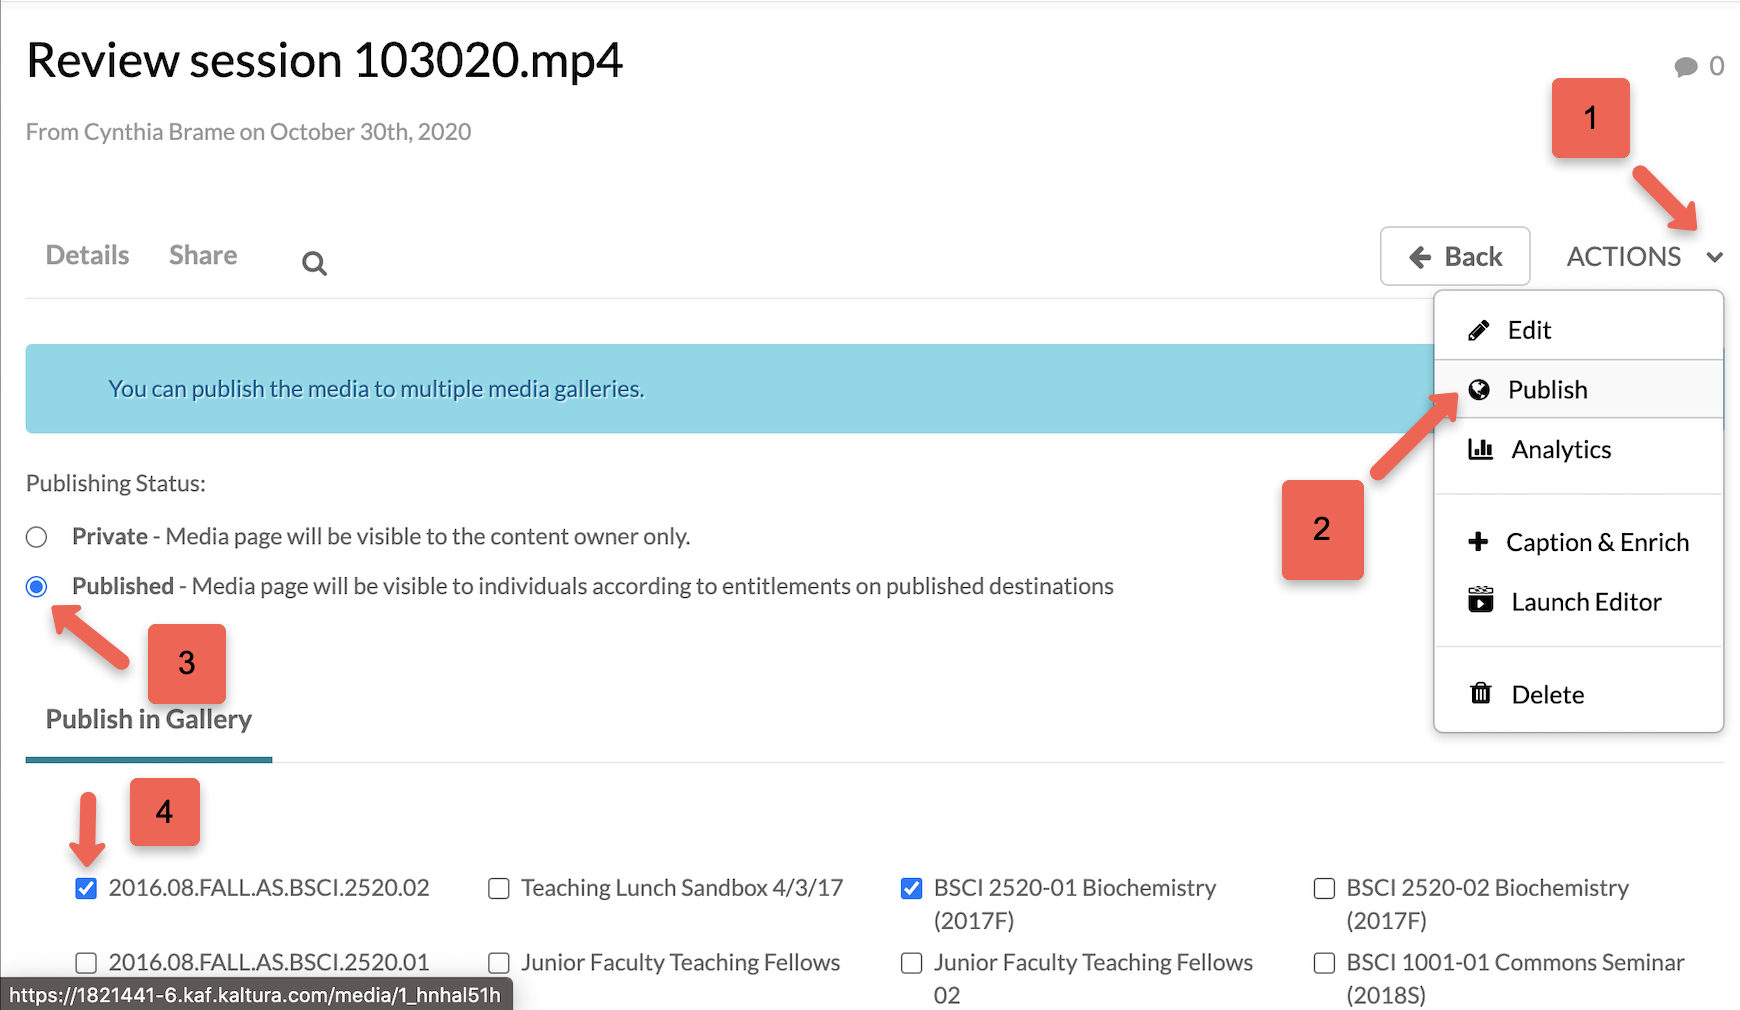
- Click on the Action
- Select Publish
- Set the publishing status to Published
- Select the courses where you would like the video to be available
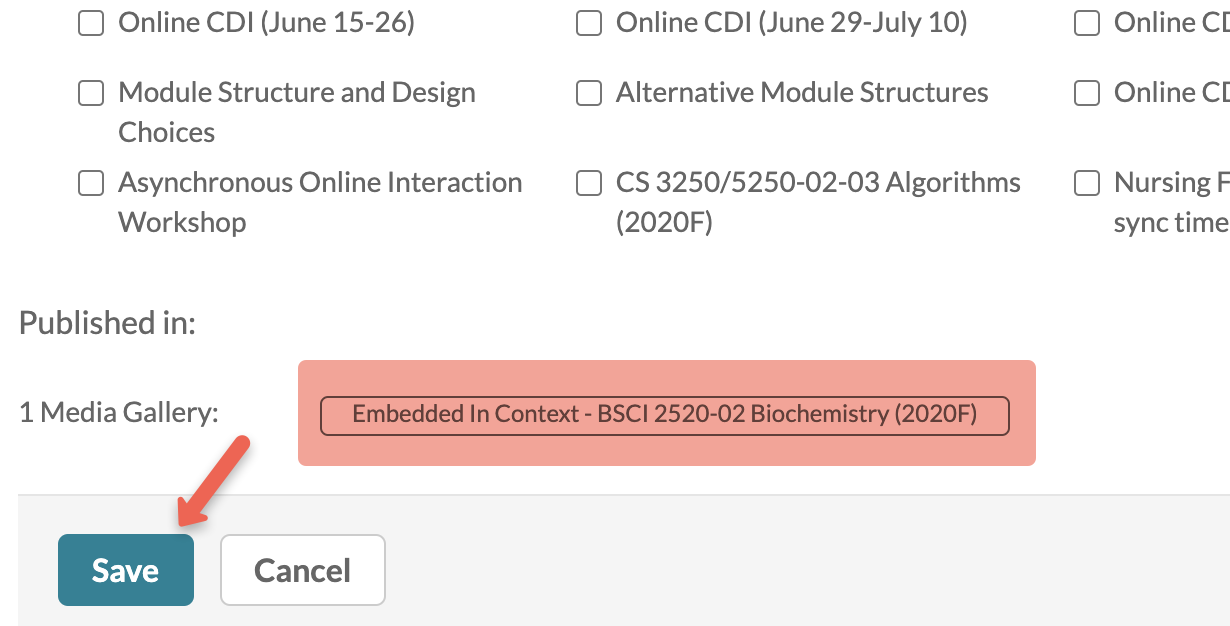
- Scroll to the bottom where you will see courses where the video is currently published (not necessarily the ones you just selected).
- Click Save
Next: Learn about the Media Gallery, where your students will access your published media.
Step 2: Media Gallery
Each Brightspace course contains its own Media Gallery. You will find this tab on the navbar within a course. Media that has been published to the Media Gallery is visible to anyone enrolled in the course.

You can publish videos directly in the Media Gallery (in addition to the My Media tab). Do this by clicking Add New and selecting the video you’d like to make available.
Remember that videos in the Media Gallery are available to your students at any time. Learn more about restricting access to videos.
Next: Learn about putting videos in a Content Module.
Step 3: Place a video in a content module
There are two methods for putting a video in your content module:
- Option 1: Existing Activities -> Add Kaltura Media
- Option 2: Create a File -> Insert Stuff
The different methods function differently in the content module.
Option 1: Existing Activities -> Add Kaltura Media
This method creates a direct link to the video.
- In your content module, click Existing activities and select Add Kaltura Media. Choose your desired video and click Save.
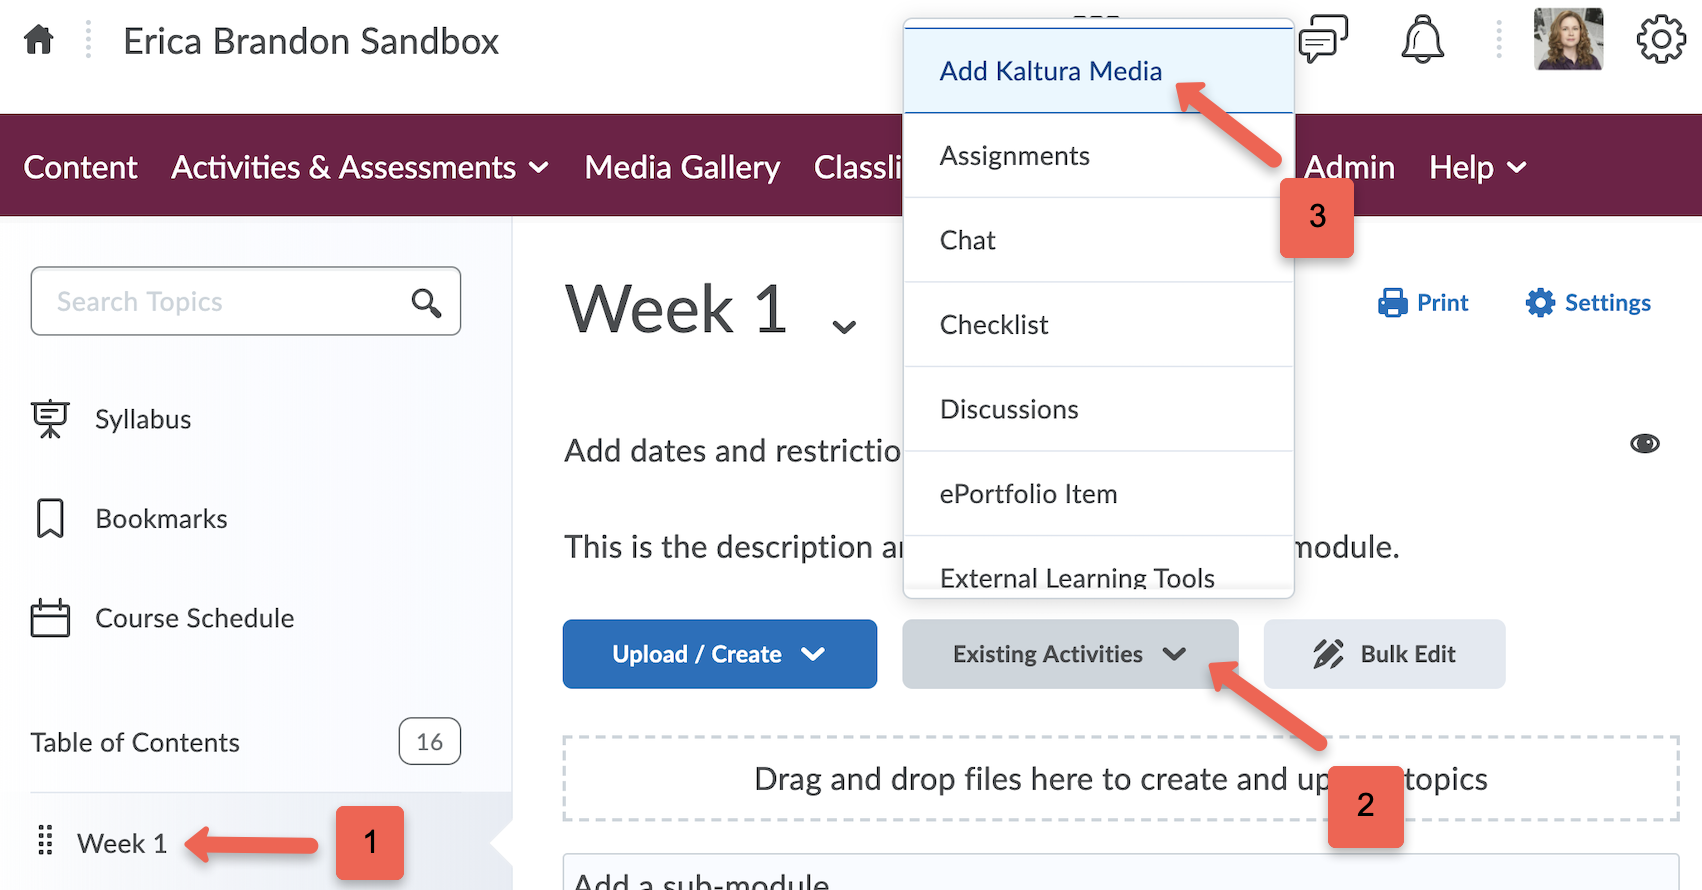
- You will see a link to the video in your module.

- This opens a page that will have a Kaltura video player with your video.
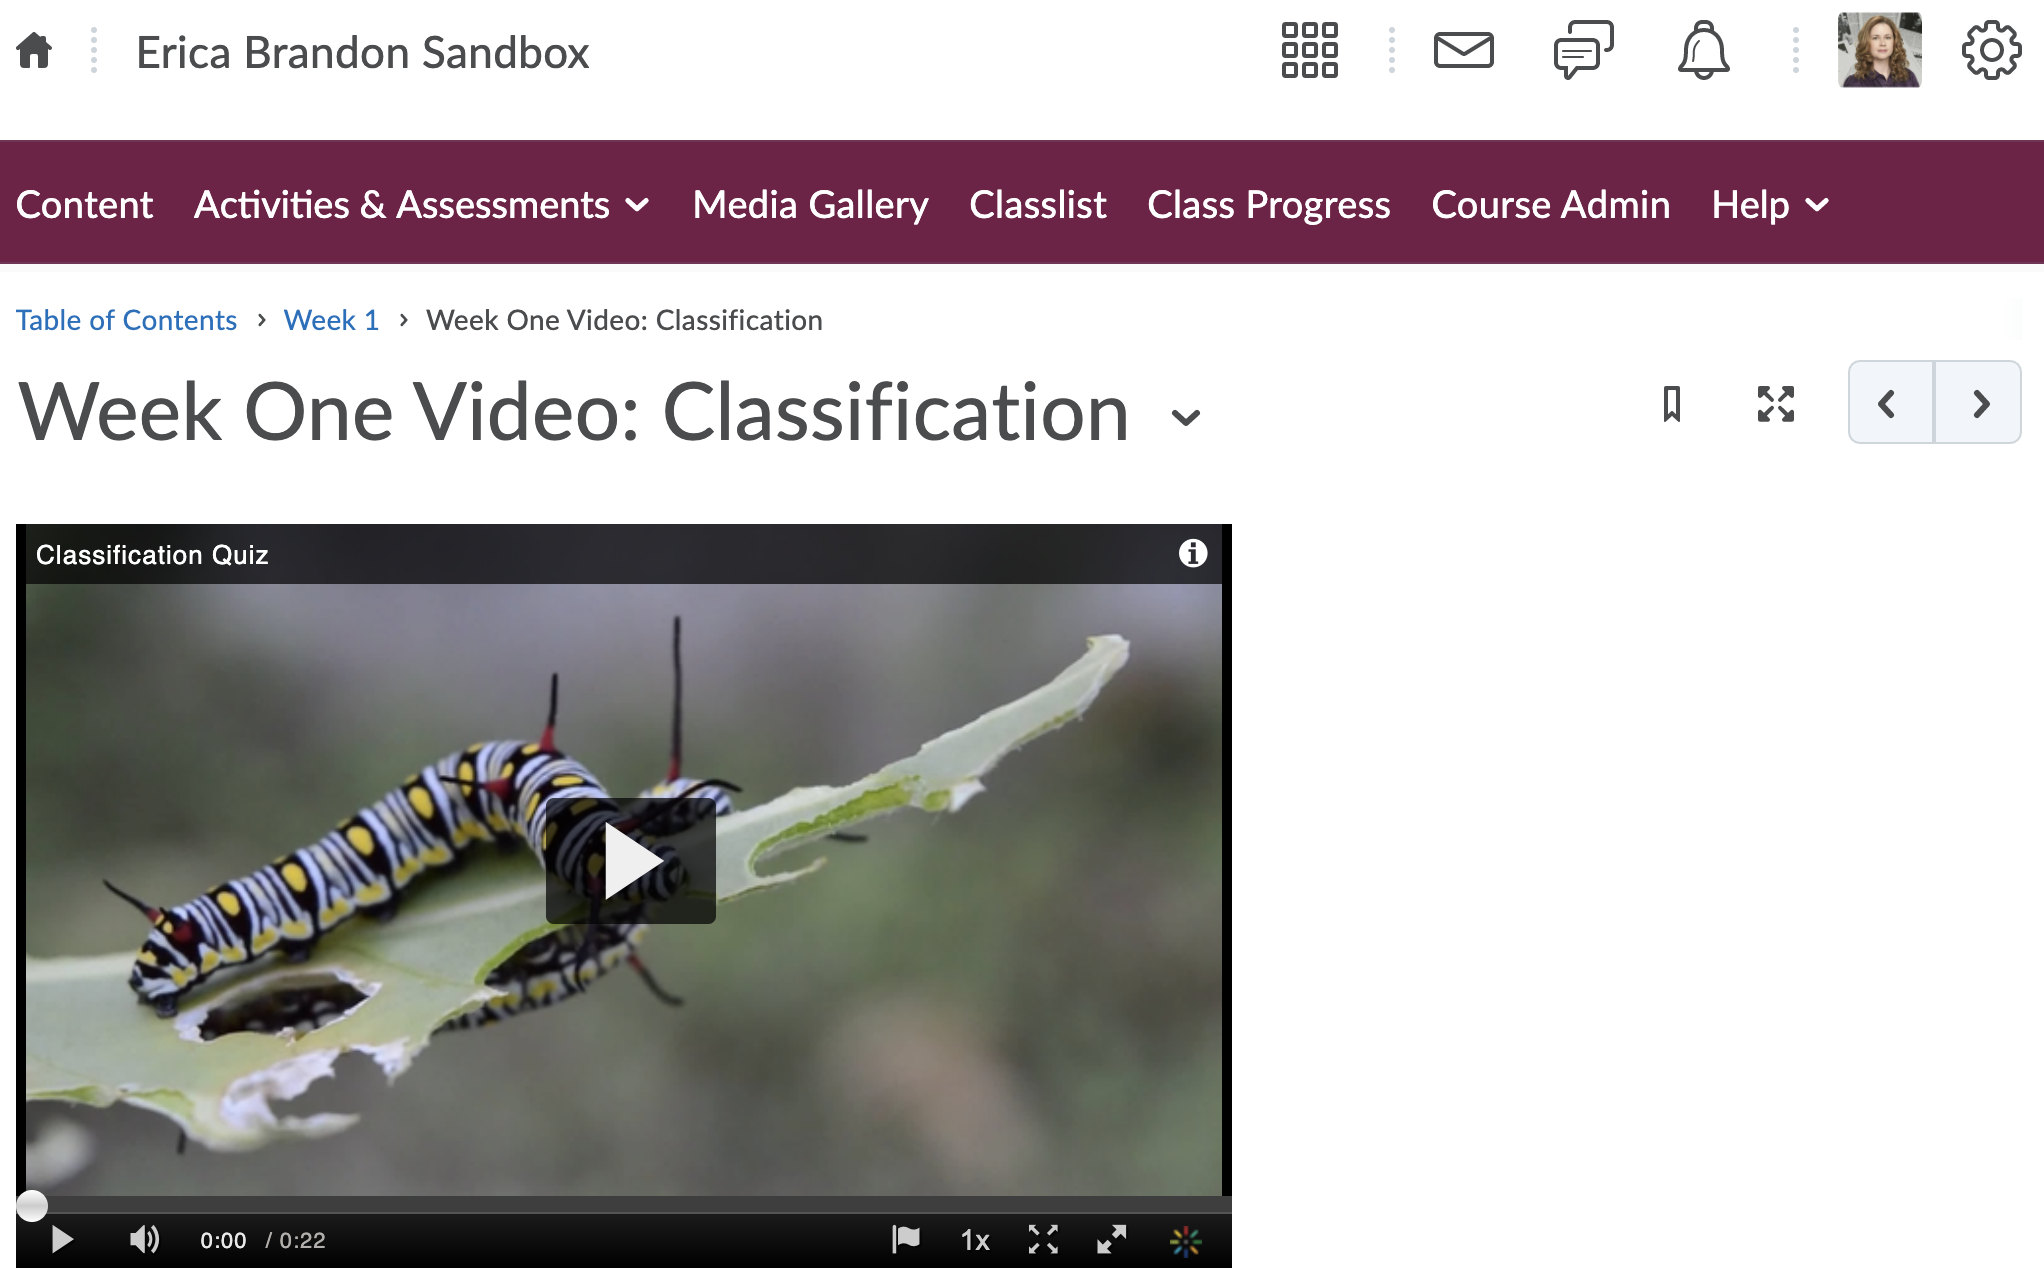
Option 2: Create a File -> Insert Stuff
This method creates a page where you can insert the video with other materials, such as lecture notes, images, or links.
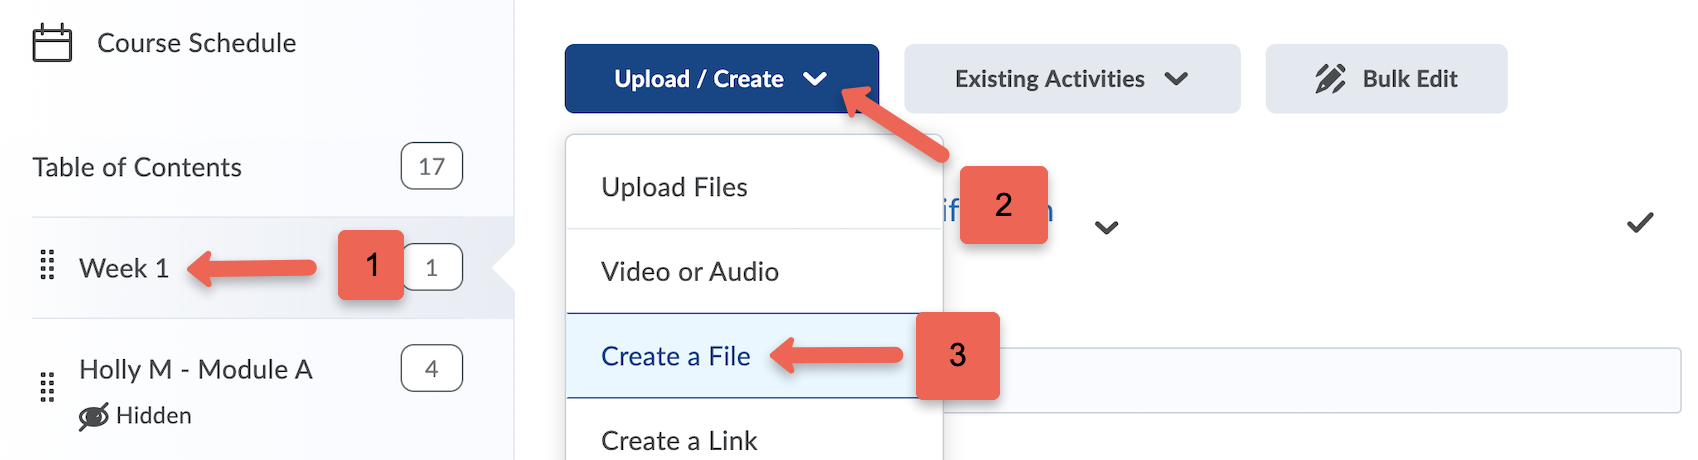
- In your content module, click Upload/Create -> Create a File. This will give you a text edit box.
- Click on the Insert Stuff icon and scroll down to select Insert Kaltura. Select your desired video and insert it into the text edit box.
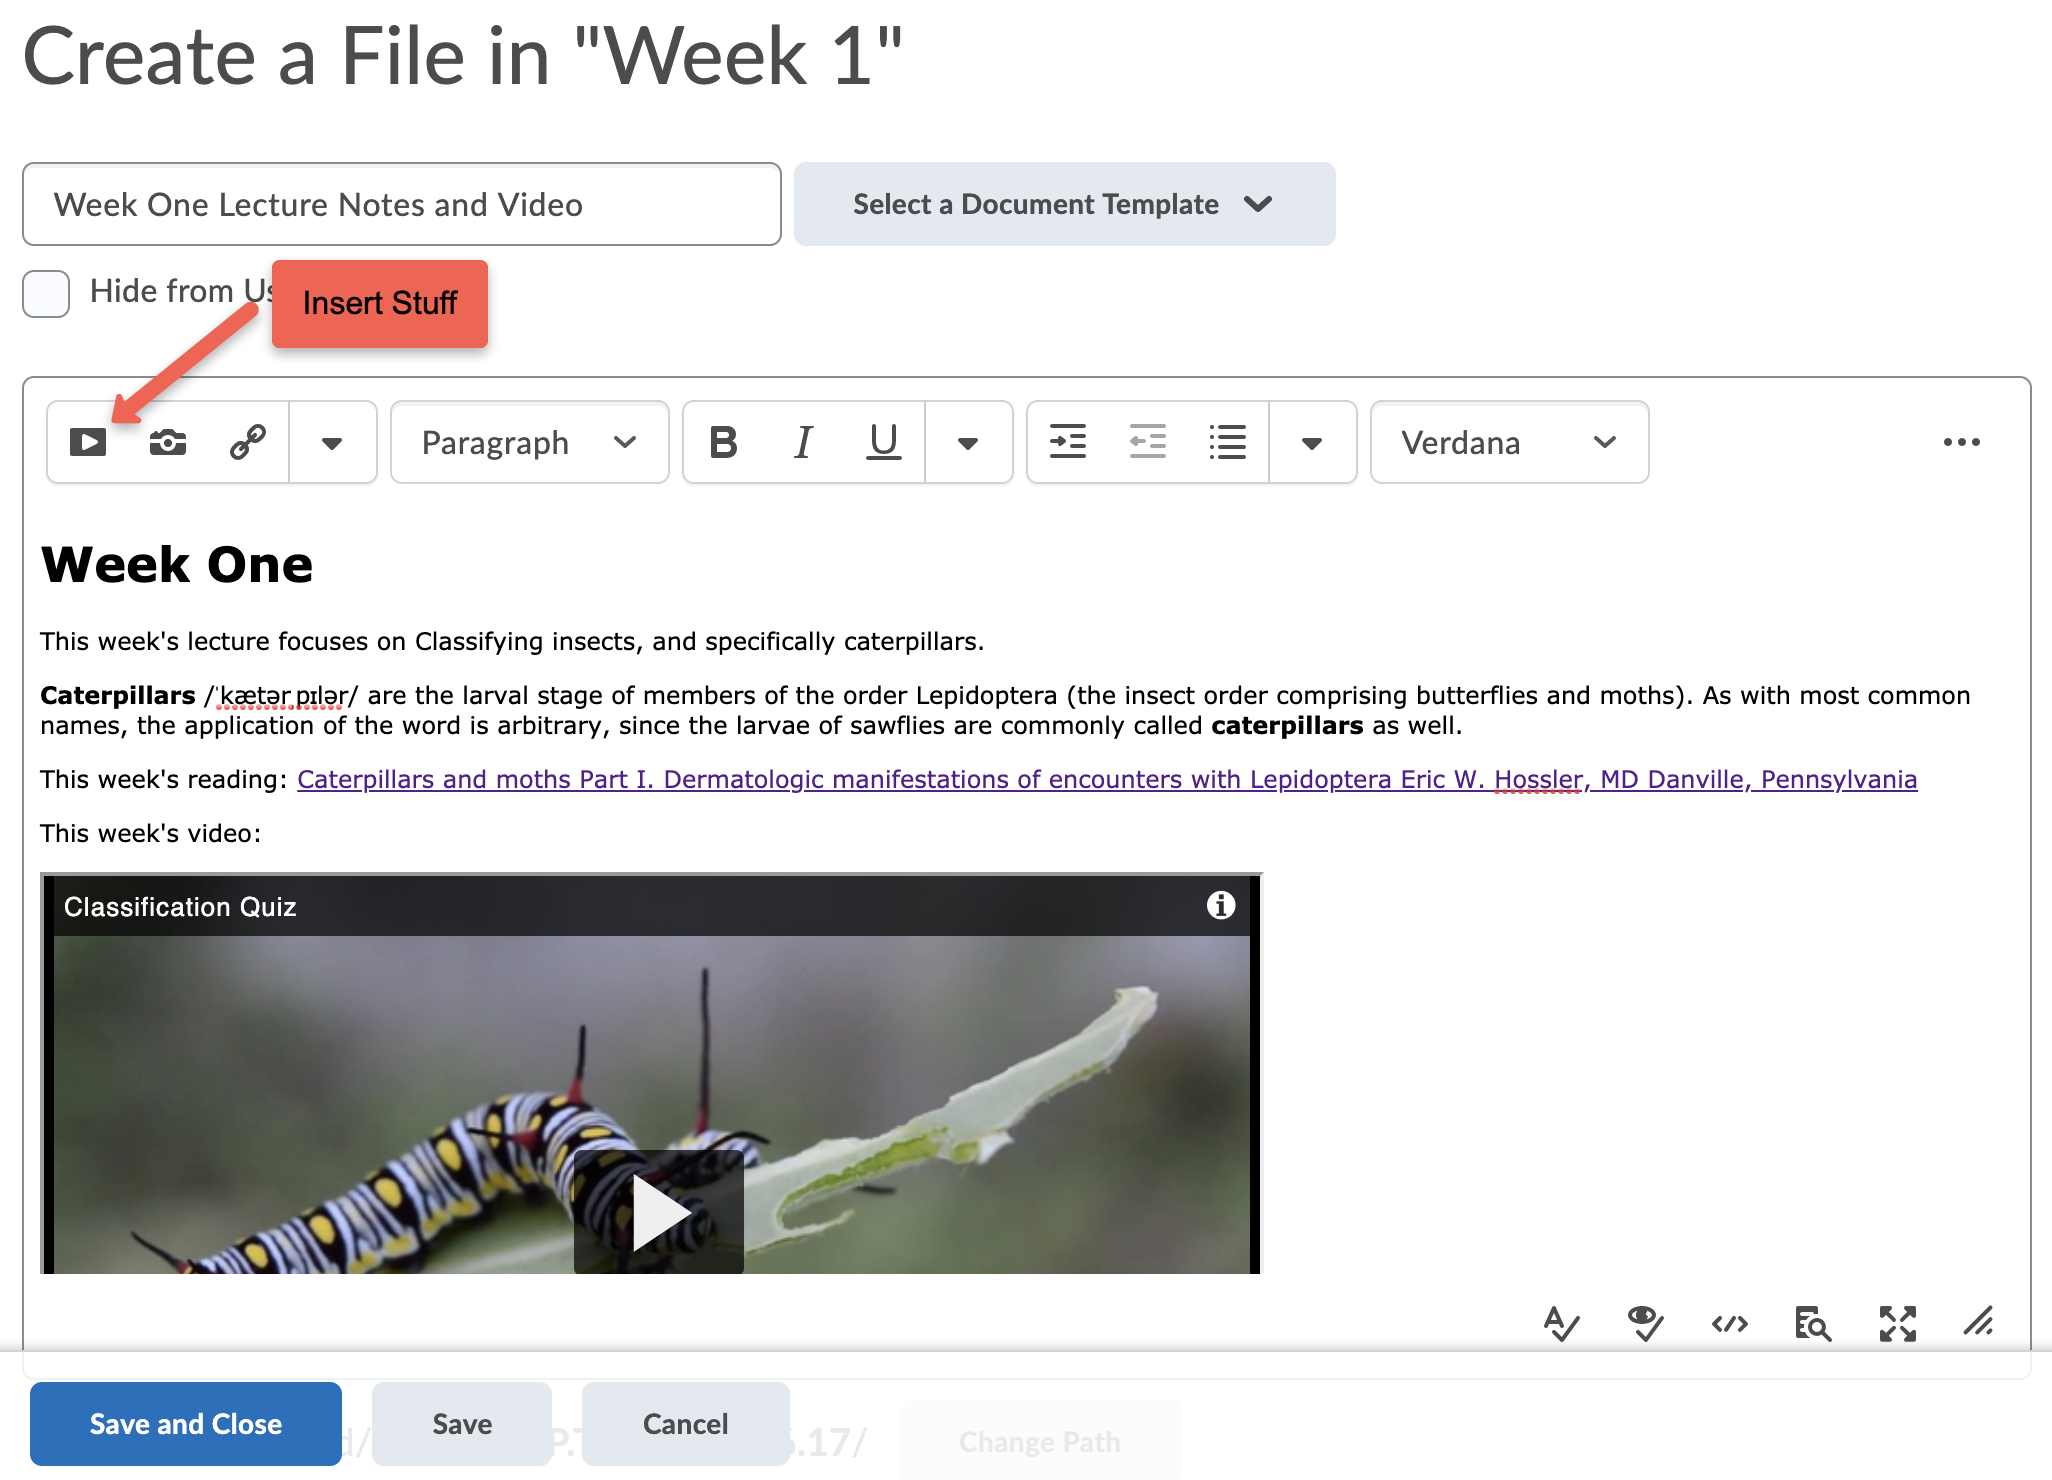
- You are also able to enter headings, text, links, images, etc. to the text edit box. Save when you are finished.
Note: Anywhere in your course that has a text edit box will have the Insert Stuff icon available to add a video. This may come in handy when creating discussions, assignments, quizzes, or other activities.