Editing the Navigation Bar (NavBar)
Your Brightspace course will have default tools available via the NavBar at the top of your course. Frequently used tools have been selected for you. If you would like to change the tools on the NavBar, you are able to do this. You are also able to create a NavBar link that goes to an external resource that may be used frequently in your course. All you need is the URL.
Notes: The Course Admin tool is only visible to Instructors and Teaching Assistants. There is no need to remove it. Students are not able to see or access the Course Admin tool.
Be aware that your college or department may have developed a custom NavBar for your course.
Updated Summer 2020
Click here for a Printable version
How to Edit Your NavBar
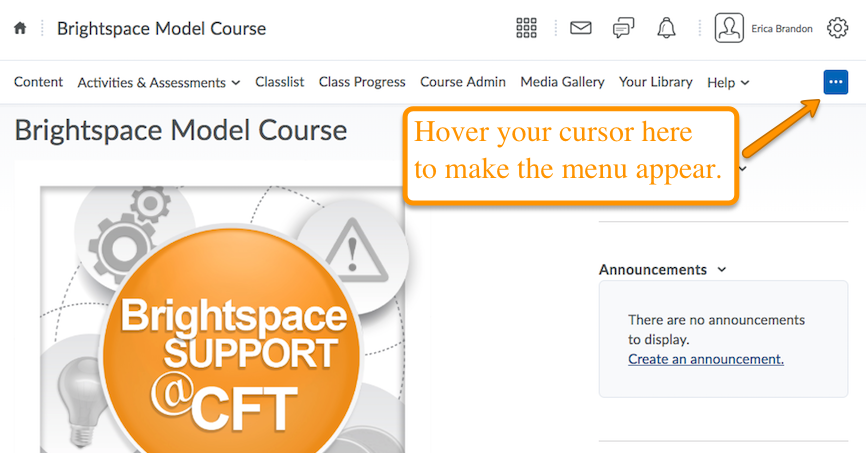
1. Locate the NavBar within your course, and move your cursor to the right end. An icon with three dots should appear, indicating that there is a menu available. Click the icon and select “Edit This Navbar”.

2. The first time you edit your navbar, a pop-up window will appear. This informs you that you are using a shared Navbar. It asks if you would like to make a copy. Click Yes, I’ll work with a copy of the navbar.
Note: You should never edit a Shared Navbar.

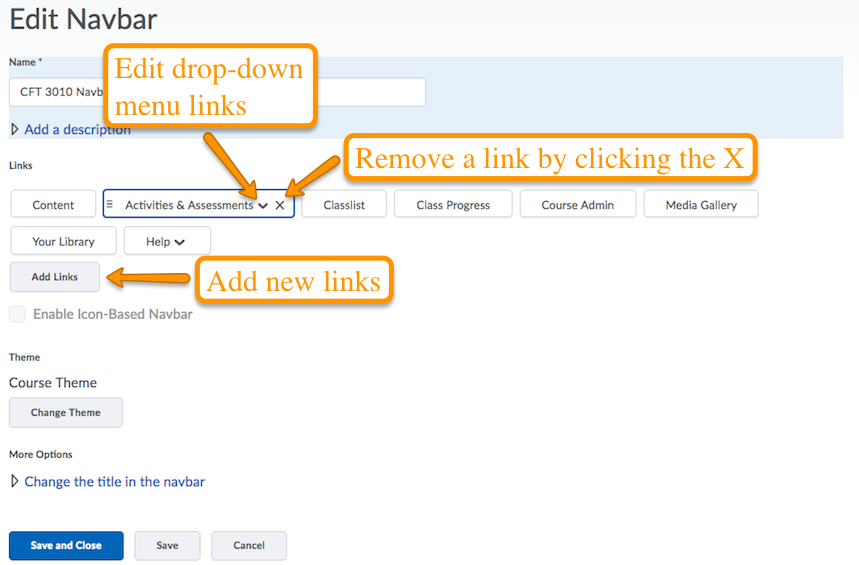
3) Edit your Navbar by deleting links, adding links, and editing the drop-down menus. Click Save & Close when you are finished.
Add an External Link to your NavBar
- Open the NavBar edit window as described above.
- Click the Add Links button
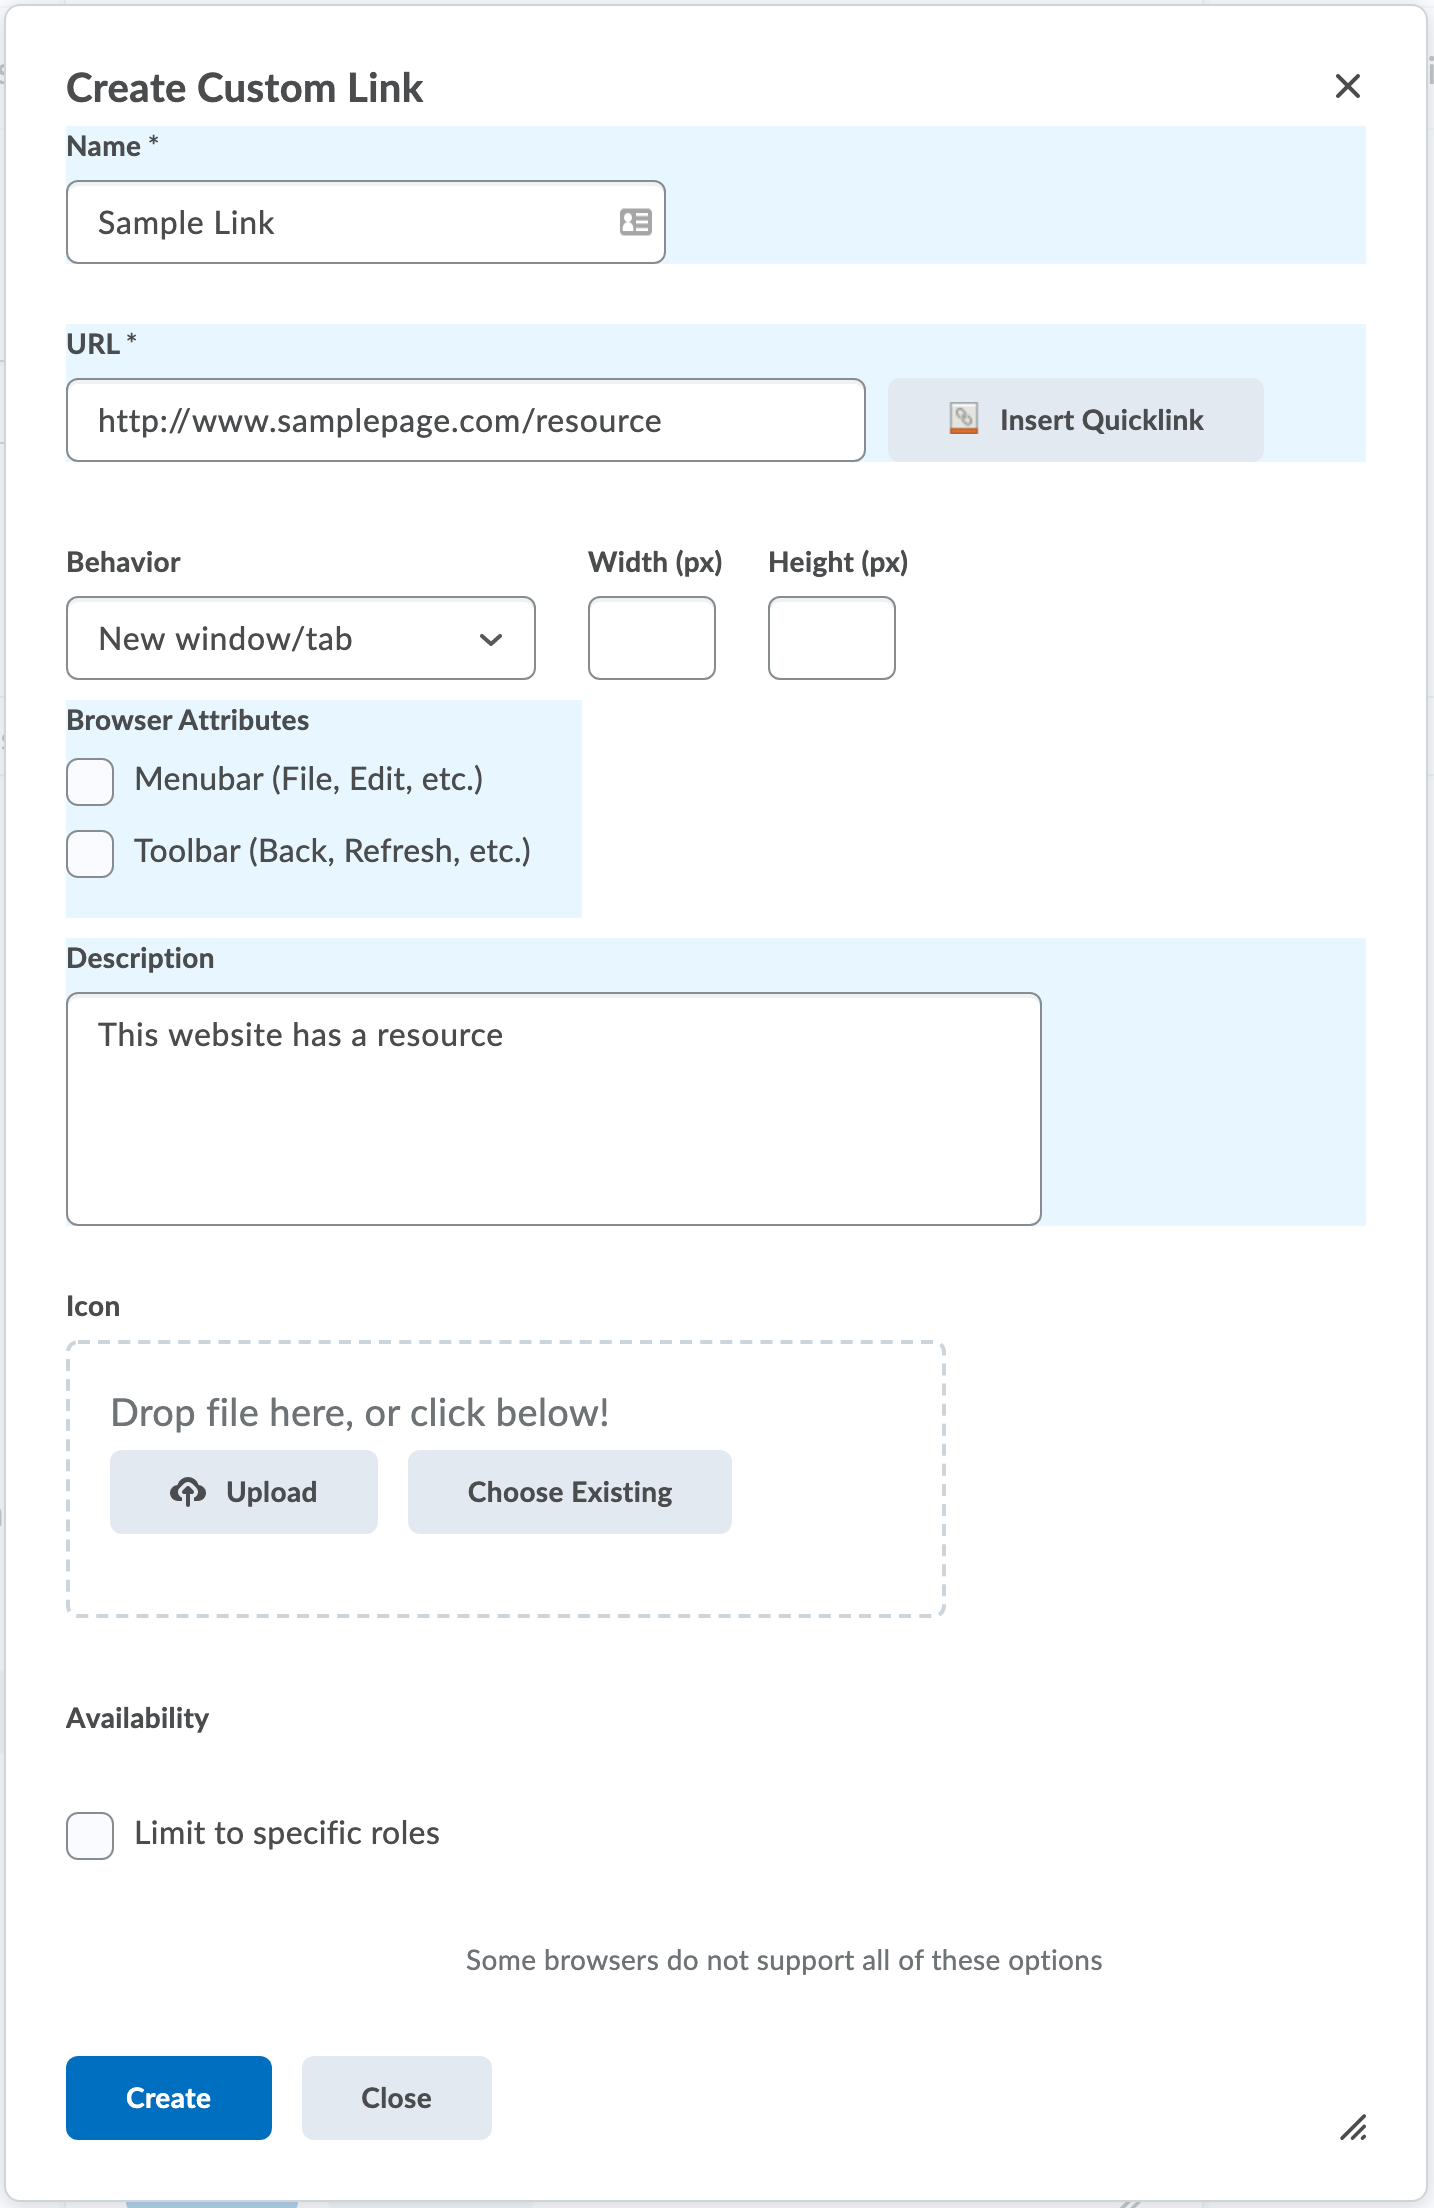
- In the window that opens, choose Create Custom Link
- Give the link a Title, and enter the URL. Indicate that the link should open in a New window/tab.
- Be sure to click Create when you are finished.

Updated Summer 2020 by Erica Brandon

