
Restricting Access to Videos you’ve Uploaded
When you upload videos to Brightspace, your students can access them in the Media Gallery tab at any time. However there may be instances where you’d like to restrict student access to videos. This can be done by removing the Media Gallery from the navigation bar, and linking to the videos from the Content area. Once the videos are in the content area, you could also restrict access to the videos by date or using Release Conditions.
- Step 1: Hide the Media Gallery tab on the navigation bar
- Step 2: Place your video in the Content area
Additional Resources:
How to make content unavailable to students
How to apply Release Conditions in Brightspace
Updated Spring 2022
Step 1: Hide the Media Gallery Tab on the Navigation Bar
- Within your course, move your cursor to the far end of the Navigation Bar. An icon with three dots will appear. Click on this icon and select Edit This Navbar.

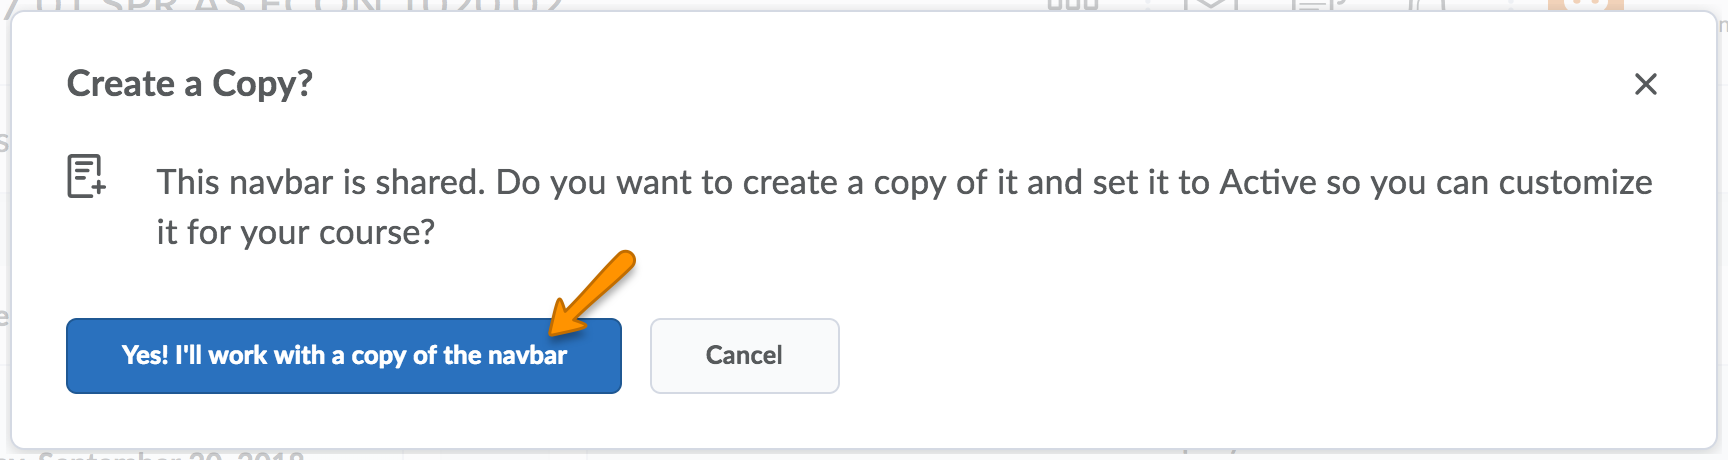
- A pop-up window may appear, telling you that this is a shared Navbar. If it asks if you would like to make a copy, click Yes, I’ll work with a copy of the navbar.
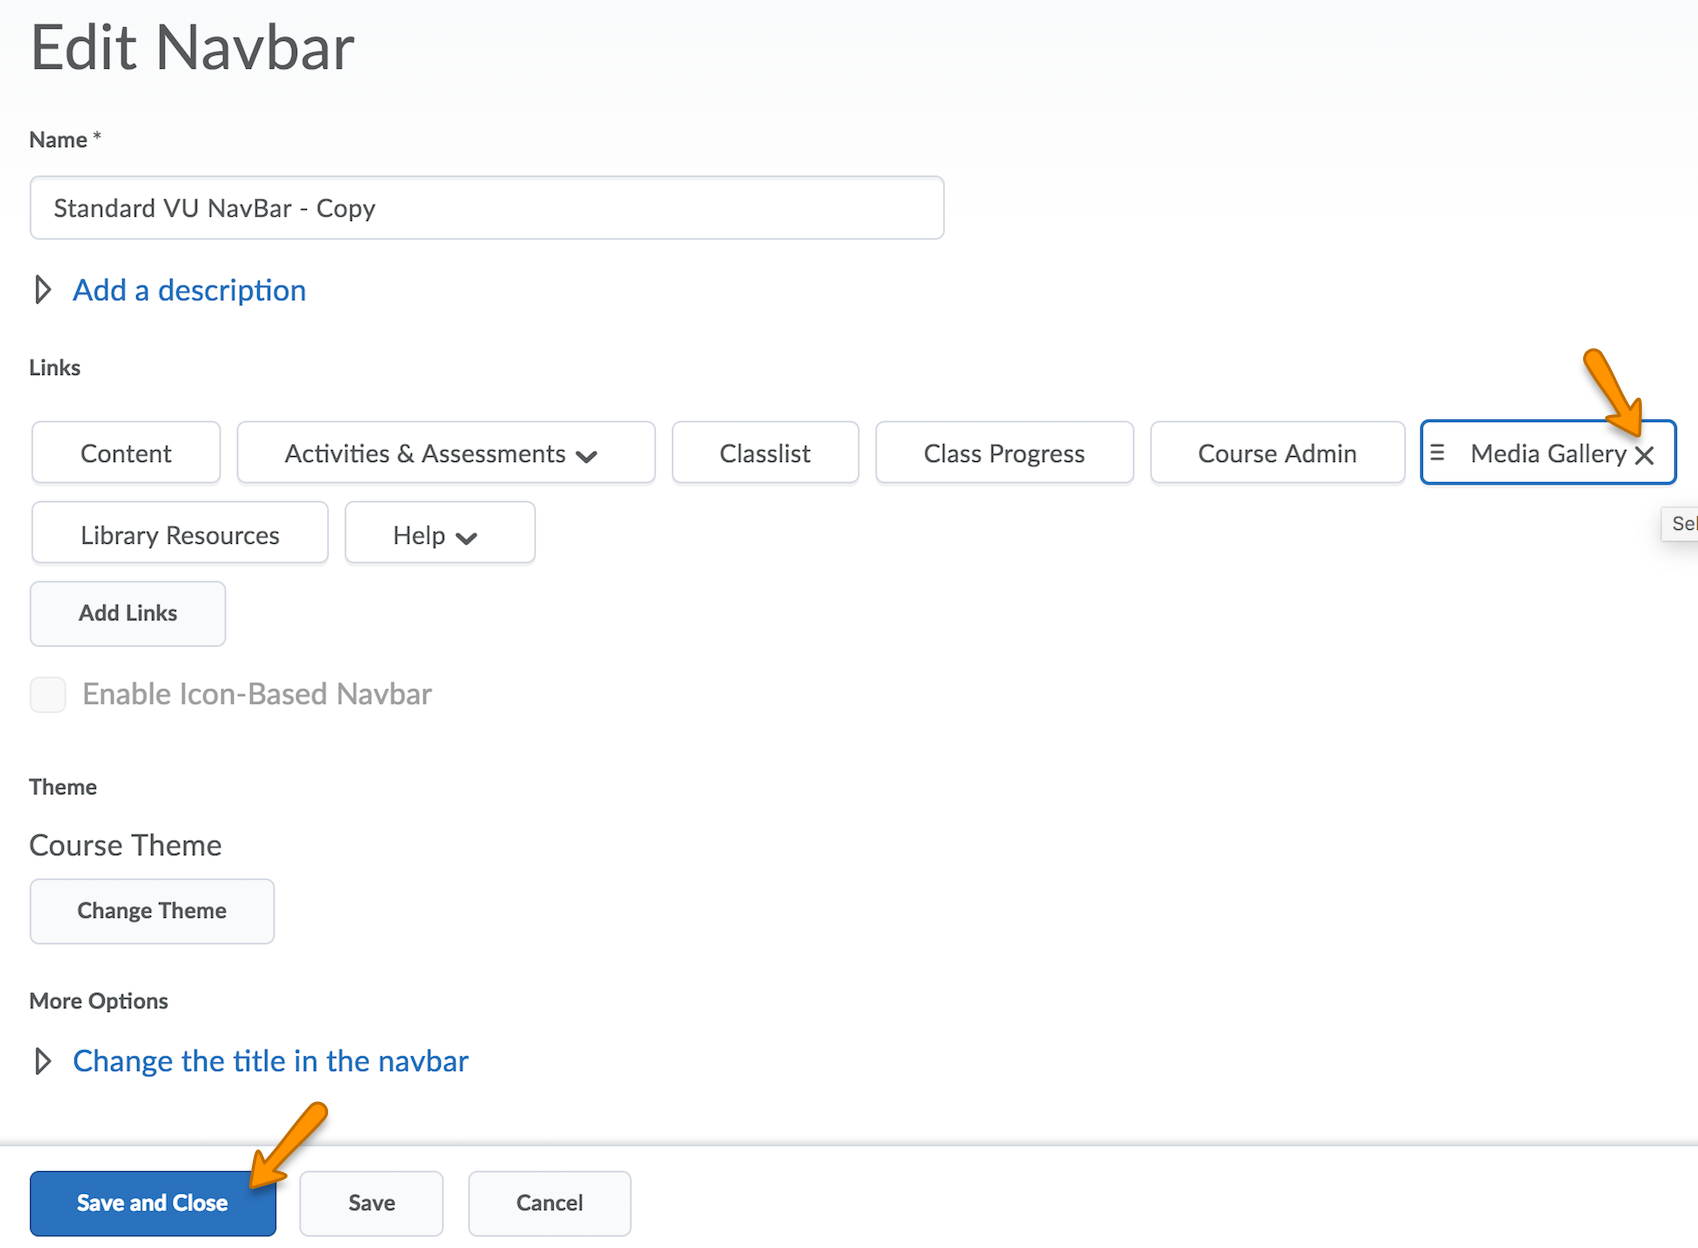
- The next window gives you options to edit your navigation bar. Find the Media Gallery tab, and click on the X to remove it. At the bottom of the page, click Save and Close.
If you’d like more information on editing the Navbar, you can find that guide here.
Step 2: Place Your Video in the Content Area
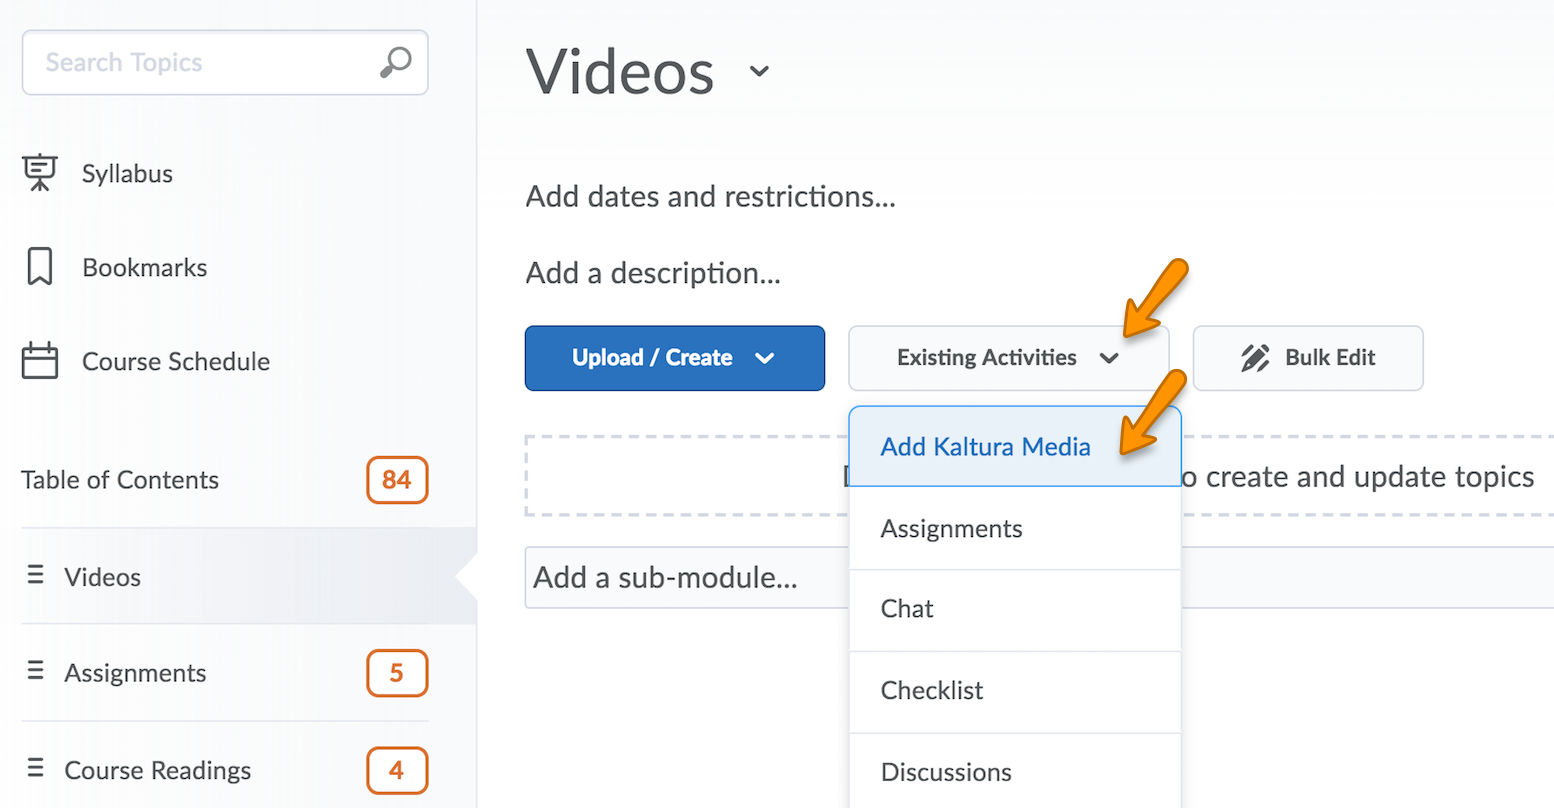
- Go to the Content area, and open the module where you’d like your video to appear. Click on Existing Activities, and select Add Kaltura Media.
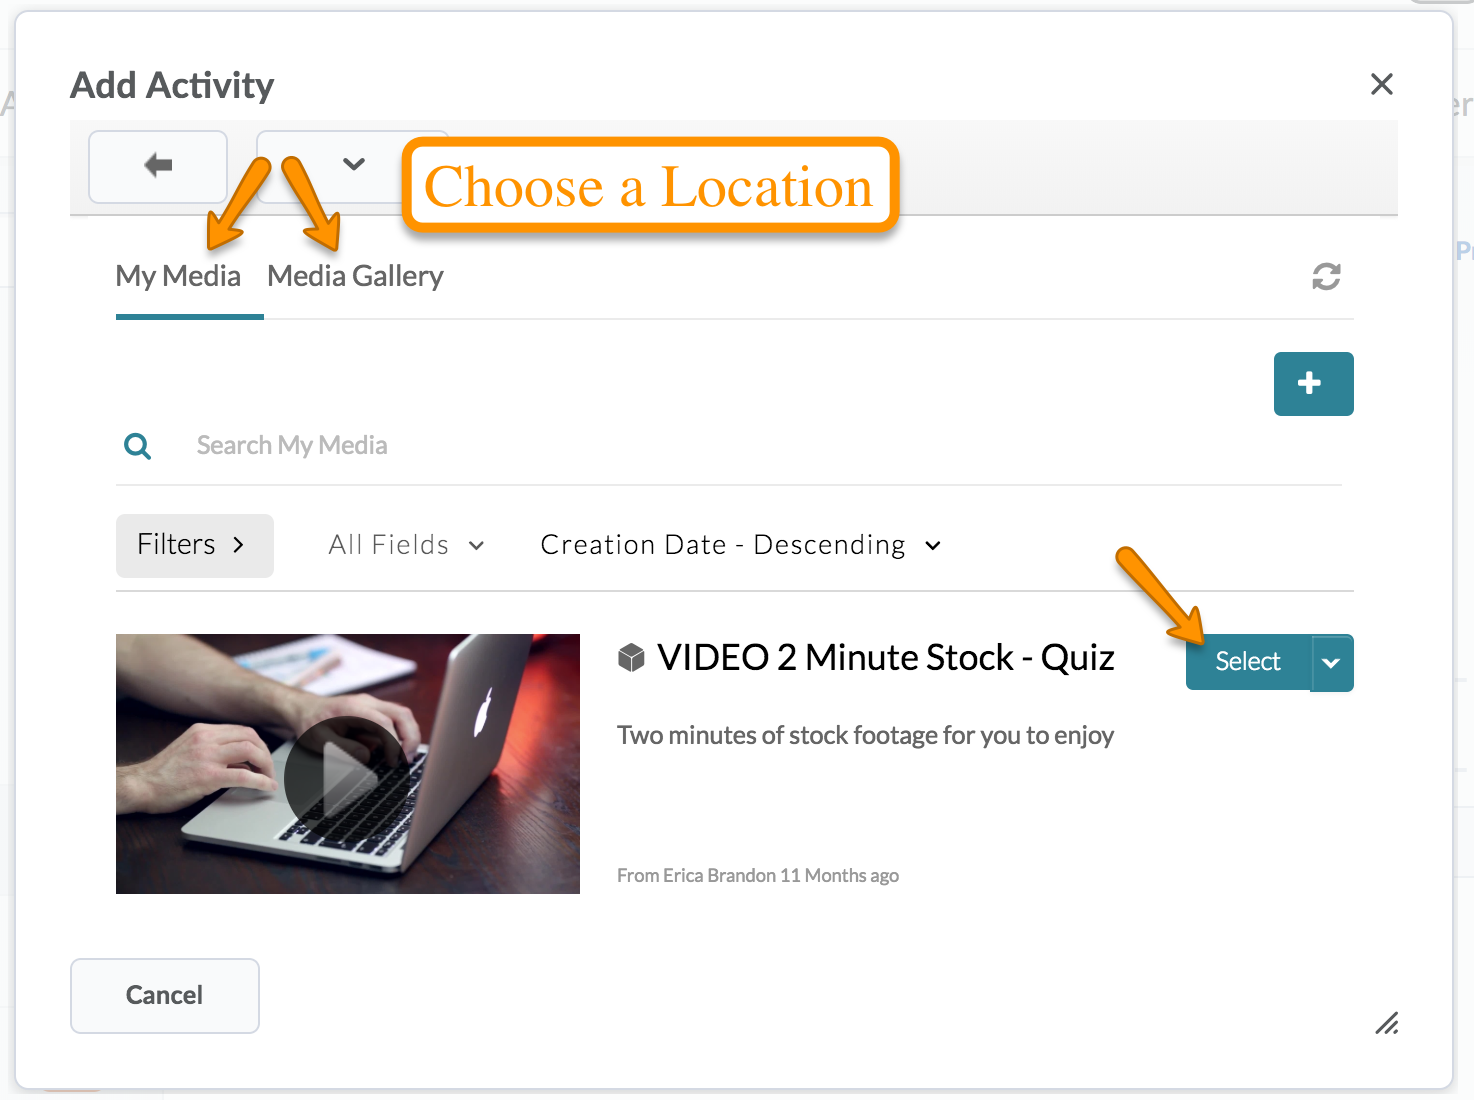
- A pop-up window titled Add Activity will appear. Click on the My Media or Media Gallery tab, depending on where your file is located. Find the desired video and click Select. The video will immediately be added to your content module.
Now that your video is in the content area, you can add date restrictions. Here is a link to the guide that details how that is done:
How to make content unavailable to students