How do I set up the Chat tool?
The chat tool is simple to set up, and follows many of the same steps you’ll find in other tools. If you would like to see a basic overview of what the chat tool does, please visit the Introduction to the Chat Tool guide.
If you are interested in a tool that allows for live audio, video, and a whiteboard tool, be sure to look at our documentation on Zoom or Virtual Classrooms. For information on robust discussion boards for students, check out our documentation on the Discussions Tool.
Note: Chats are always open and do not have enforced date/time restrictions.
- Step 1 – Set up the Chat Tool
- Step 2 – Use the Chat Tool with your students
- Step 3 – Access your Chat log
Created Spring 2020
Set up the Chat Tool
- To make the Chat tool available to students, you’ll need to add it to your Navigation bar (Navbar). Here is a link to our guide on How to add a tool to the Navbar. Once you have added the Chat tool, go to Step 2.
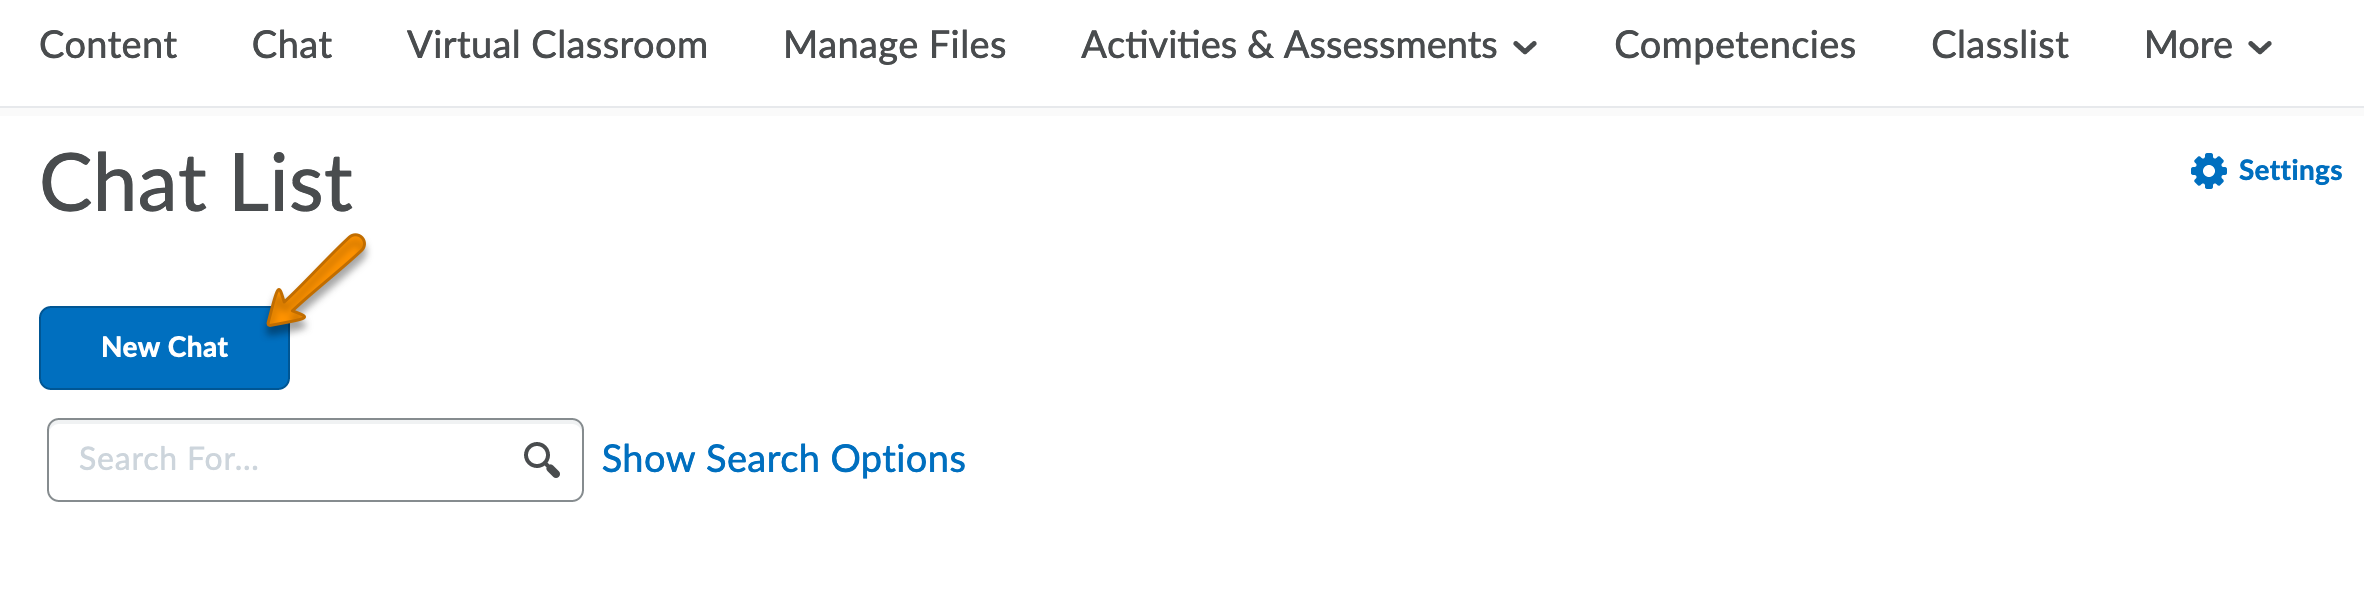
- Click on the Chat tab to create chat rooms. Remember that chat rooms are only effective if people are logged in to the Brightspace course simultaneously. We suggest creating chat rooms ahead of time and giving them a specific time and purpose, such as “Office Hours”.
- Click on New Chat.
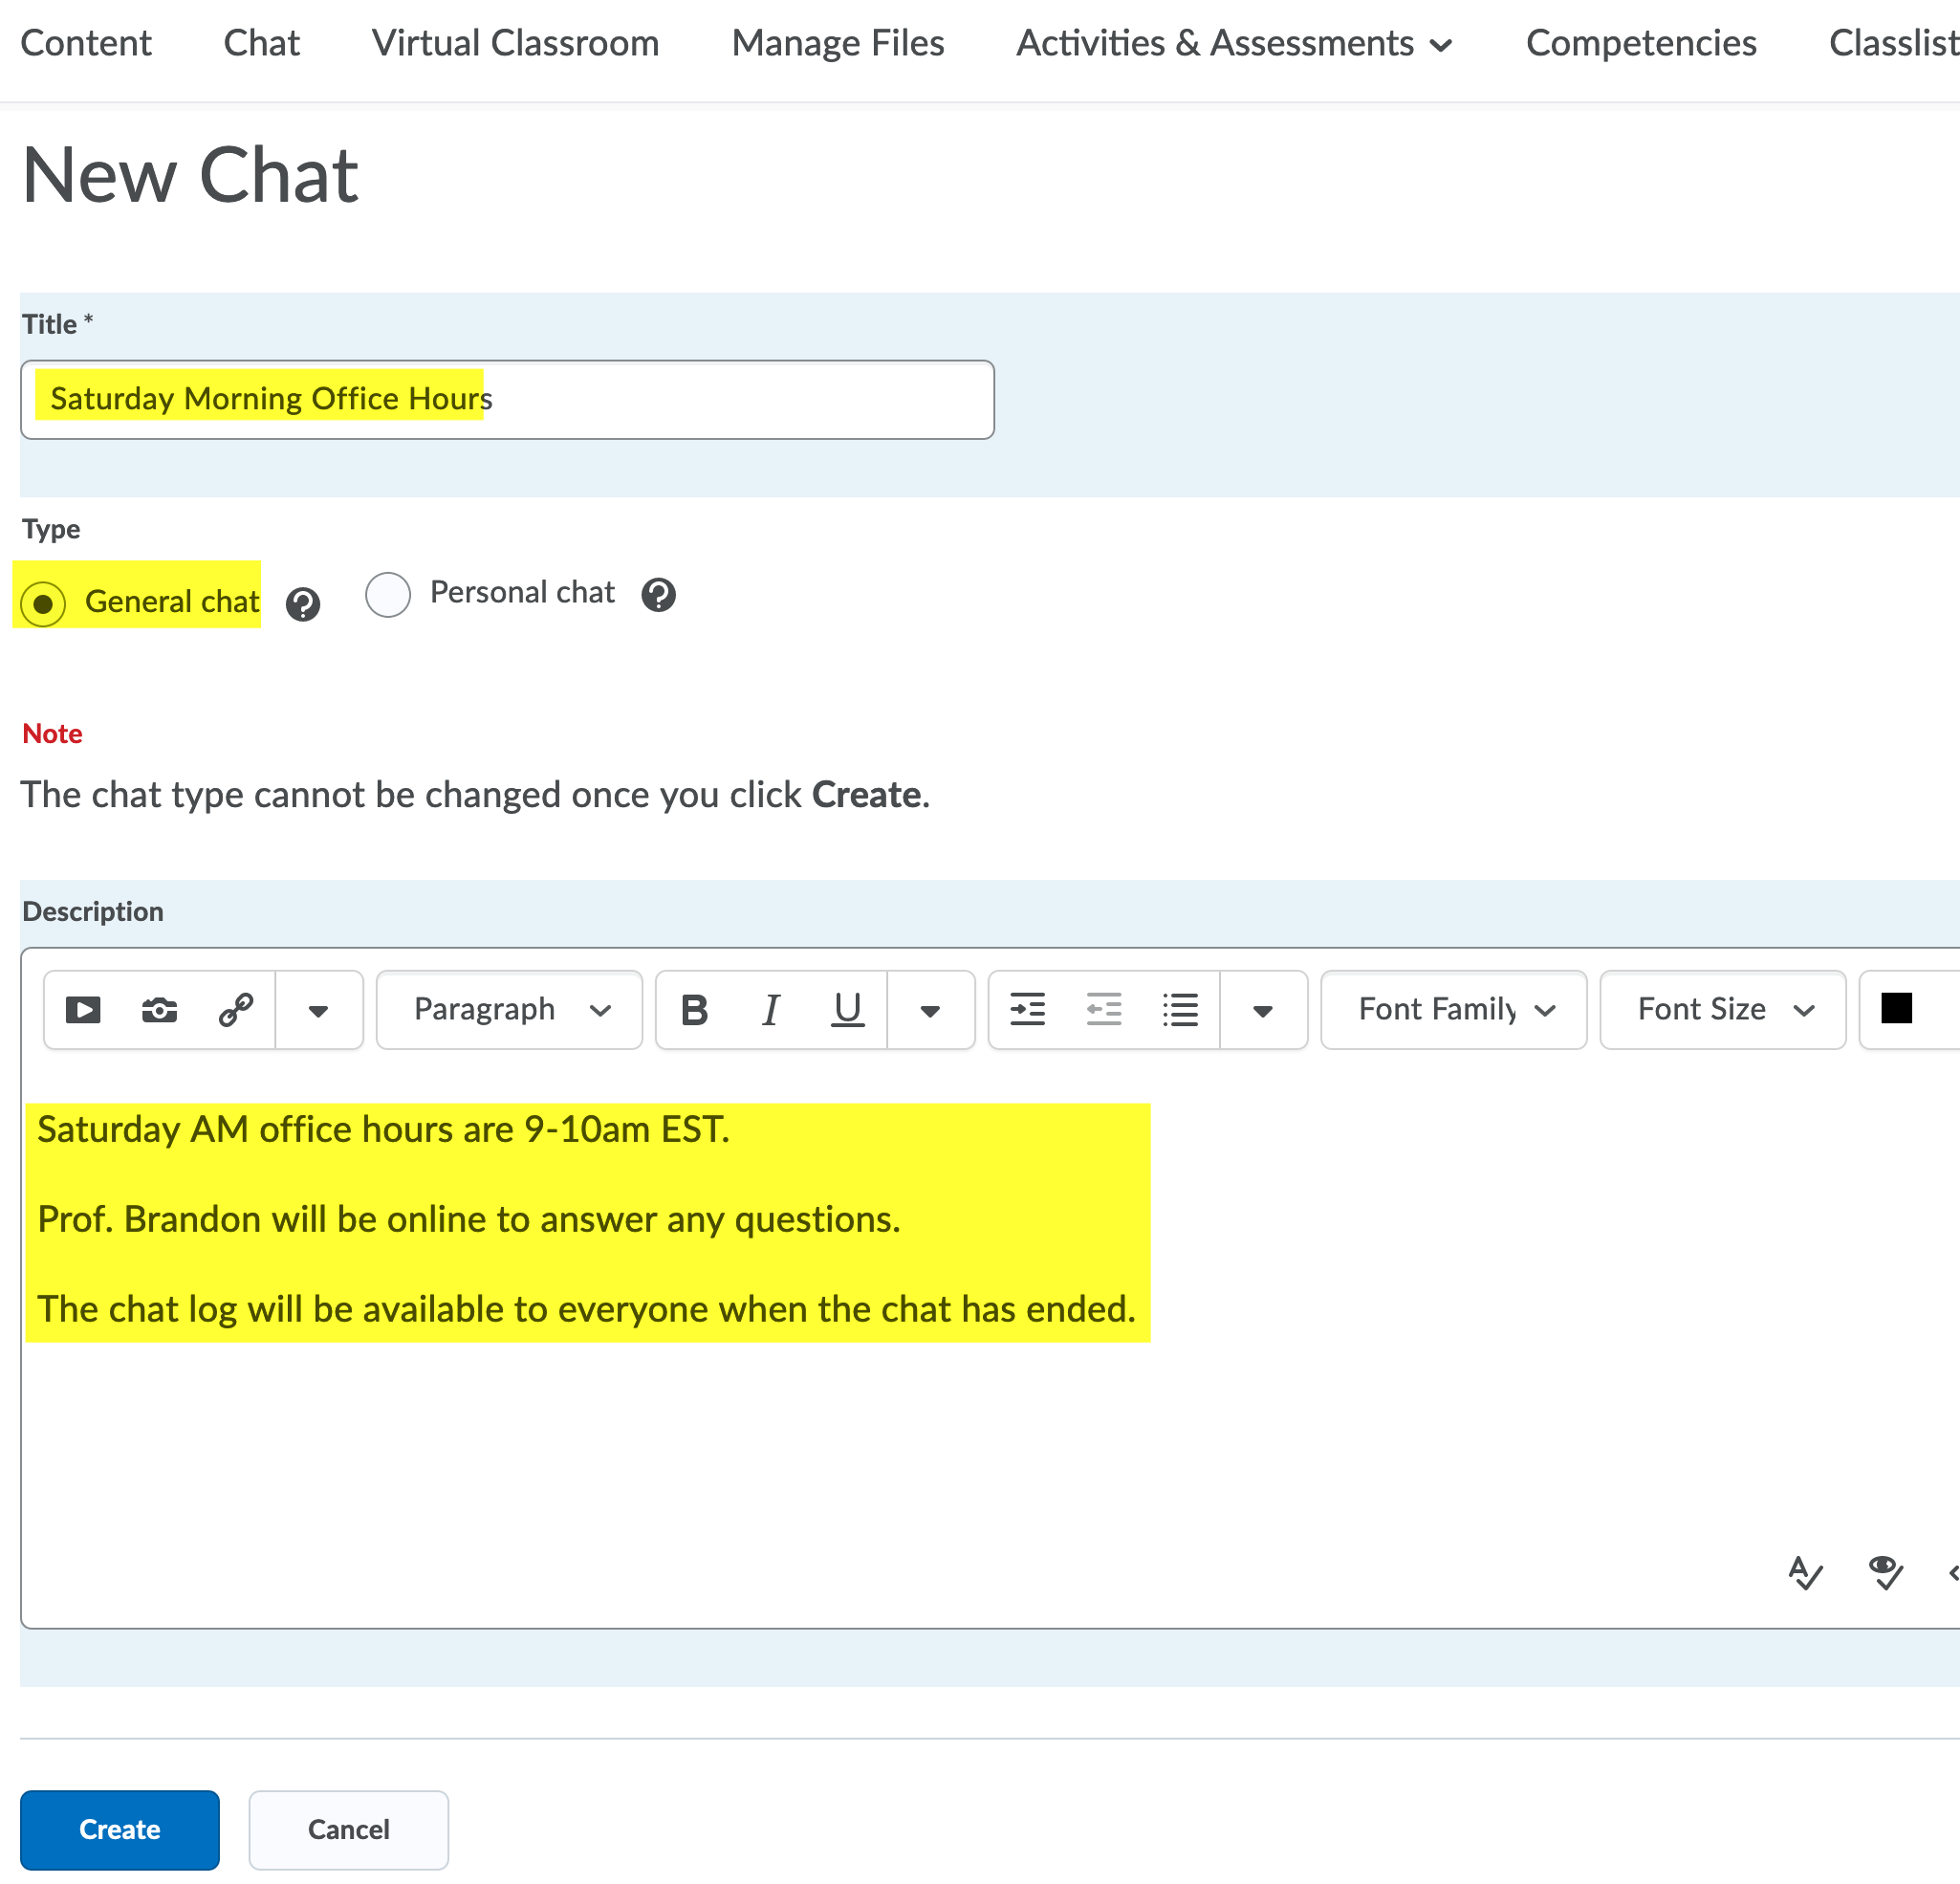
- Give your chat a name and description. We recommend stating a specific time that chat should be used, and a description stating its purpose.
- Indicate whether this chat is a General chat (all can join) or a Personal chat (you will invite individuals).
- Click Create when you are finished. The chat session will now appear as an option to students.
Use the Chat Tool with your students
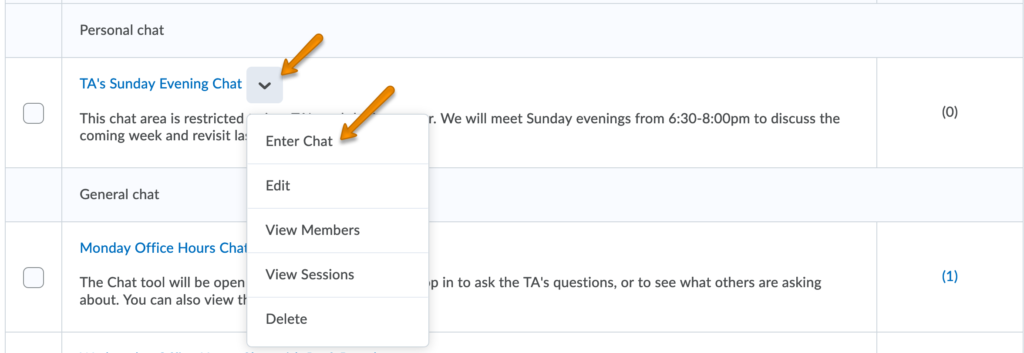
- Join the chat by clicking on it, or by selecting Enter Chat from its drop-down menu.
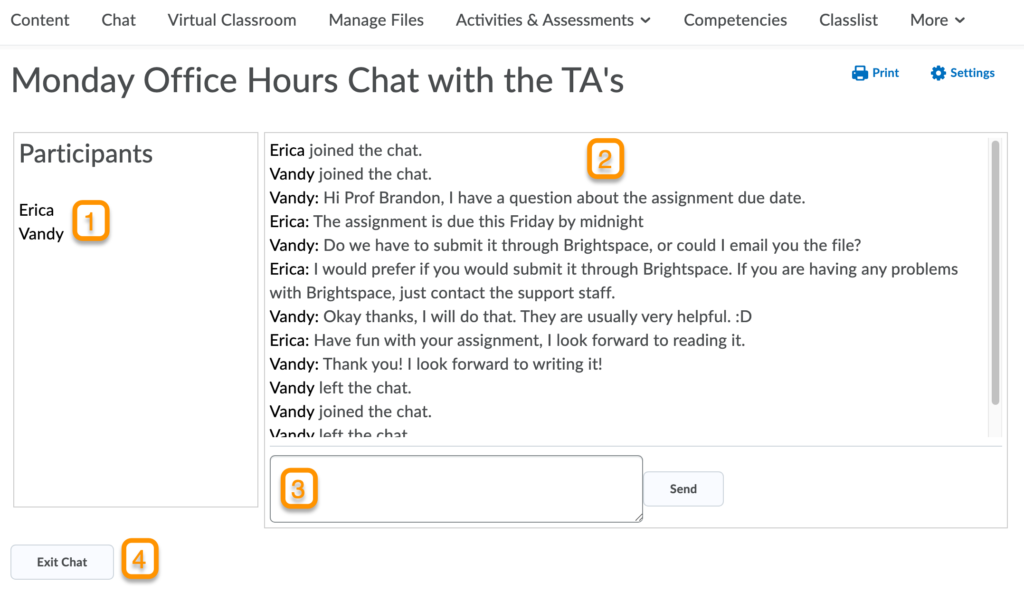
- The chat has a simple interface with only a few options.
- List of participants
- Scrolling chat log
- Your chat entry field
- Exit the chat
Access your Chat log
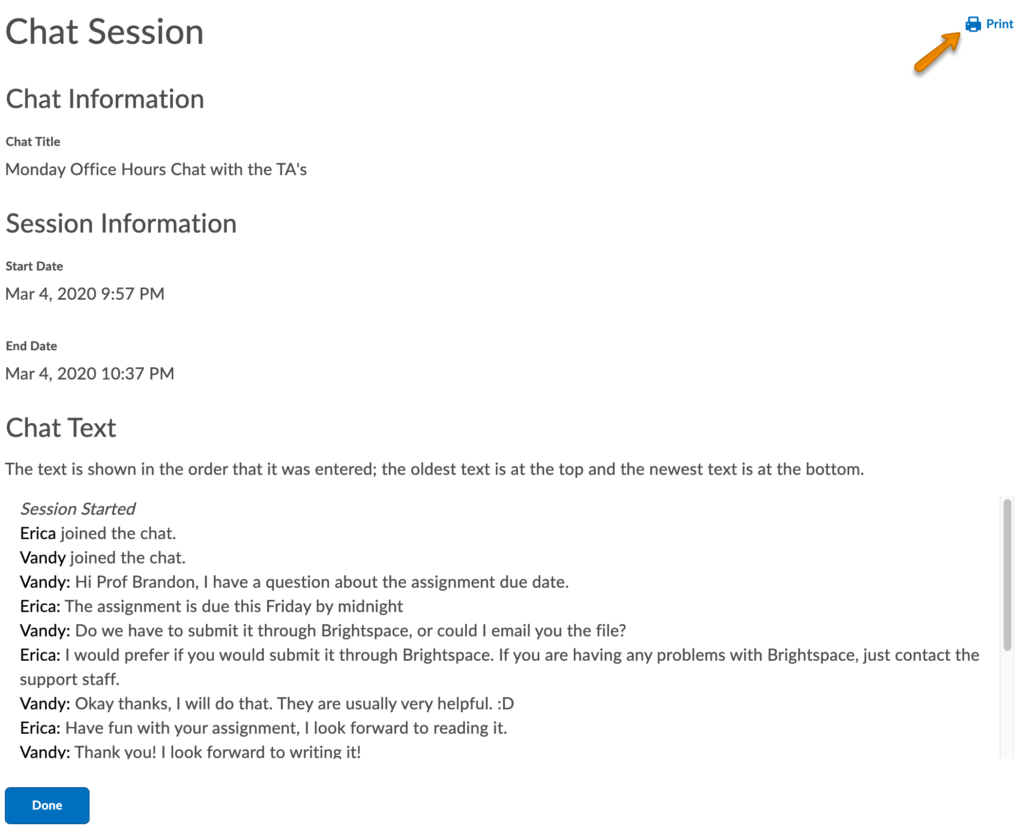
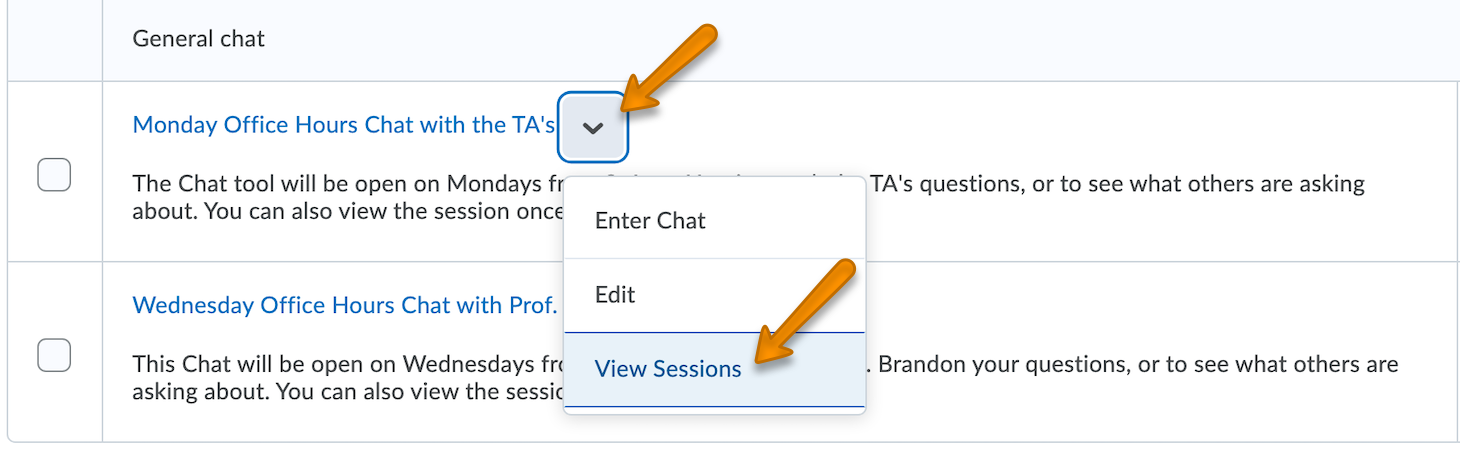
- After everyone has left the chat, you can view a log of the conversation. You can do this by selecting View Sessions from that chat’s menu of options. Note: the log will not appear if anyone is still in the chat
- Choose the session dates/time you want to view. A chat may have multiple sessions available to view. The log is identical to what was seen in the chatroom on that date/time. You also have the option to Print the chat log. Depending on your computer and browser, you may also have the option to download it as a PDF.