How do I record my Zoom meeting?
Zoom meetings can be recorded. Those recordings can then be linked in your Brightspace “Content” area for students to reference. In this guide, we’ll explain the process of recording your Zoom meeting and linking the video to Brightspace.
Updated Spring 2020
Printable version
Record your Meeting
- Begin your Zoom meeting and click the Record button in the toolbar. Select Record to the cloud. If you choose to “record to the cloud” you will be able to access the recording from multiple devices, generate an editable transcript of the meeting, and will have the option to download it to your computer.
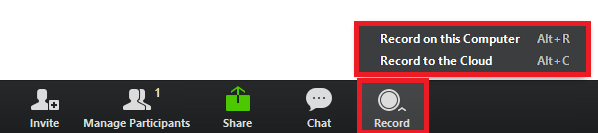
- A Recording icon will show up in the top left corner of the meeting screen. This recording can be paused or stopped using the buttons next to the Recording icon.

- Press the Stop button when you are finished recording.
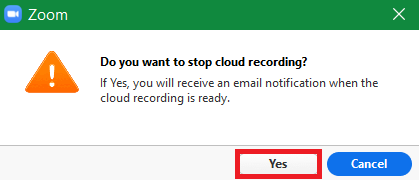
If you have recorded to the cloud, you’ll see the notification below. Press Yes to continue.
If you have recorded to your computer, you’ll see the notification below.

Access the Recording
If you’ve recorded to the cloud:
- You will receive an email once your cloud recording is processed with a link to the recordings. From this page you will be able to download your video
If you’ve recorded to your computer:
- When you end your meeting, a window will appear with several files. Zoom provides you with the audio file (audio-only) and a video file including audio (zoom_[file number])
- These files can be accessed later by navigating to Documents → Zoom on your computer
Link your Recorded Meeting in Brightspace
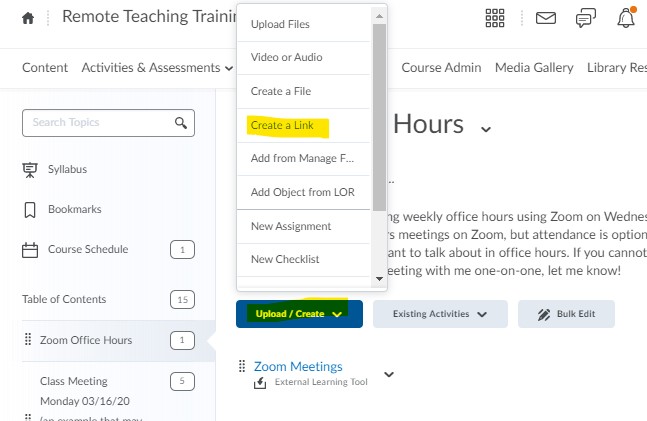
Get the link to your cloud recording. This will be in your Zoom dashboard under Cloud Recordings. You can copy that link and add to any module in your Content area by clicking Add/Create and then Create a Link.