Uploading Videos in Brightspace (Kaltura Media)
All audio and video resources in your courses should contain accurate captions to ensure accessibility. Check out our guides on creating and editing captions to learn more!
This guide will teach you how to upload videos to Brightspace using Kaltura’s My Media and Media Gallery tools. It will also explain how to link these videos into your Content area. Uploading video through My Media is the preferred way of uploading videos into Brightspace.
- Kaltura – a third party software that Vanderbilt uses to handle multimedia. The advantage to using Kaltura is that you can edit your videos, add captions, and set privacy restrictions. Kaltura also ensures that your video will work across different devices and platforms.
- My Media – a tab located on your main dashboard. This is where you will upload videos and add/edit captions. Once videos are uploaded here, then can be made available to multiple courses administered by you
- Media Gallery – a tab located within a specific course. This is a place where you can publish videos for your students to view at any time
First, you will upload videos into your “My Media” tab. Then you can make them available to specific classes in that course’s “Media Gallery”. If you want more control over when a video is available to your students, you can add videos to a Content area or use the “Insert Stuff” tool to put it in any text box.
- Upload videos to Kaltura in My Media
- Use the Media Gallery within a course
- Add Kaltura media to the Content area
Updated Spring 2022
Click here for a printable version
Upload videos to Kaltura in My Media
My Media is located on the navbar of the Brightspace homepage. It can always be easily accessed by clicking the Vanderbilt logo or Home icon at the top of any Brightspace page. My Media is a repository for all of your videos, which can then be distributed to any of your courses.
- Click on the My Media tab. When accessing “My Media” for the first time, Brightspace will ask your permission to use Kaltura. Select the checkbox and then click Continue.

- To begin adding media, click Add New
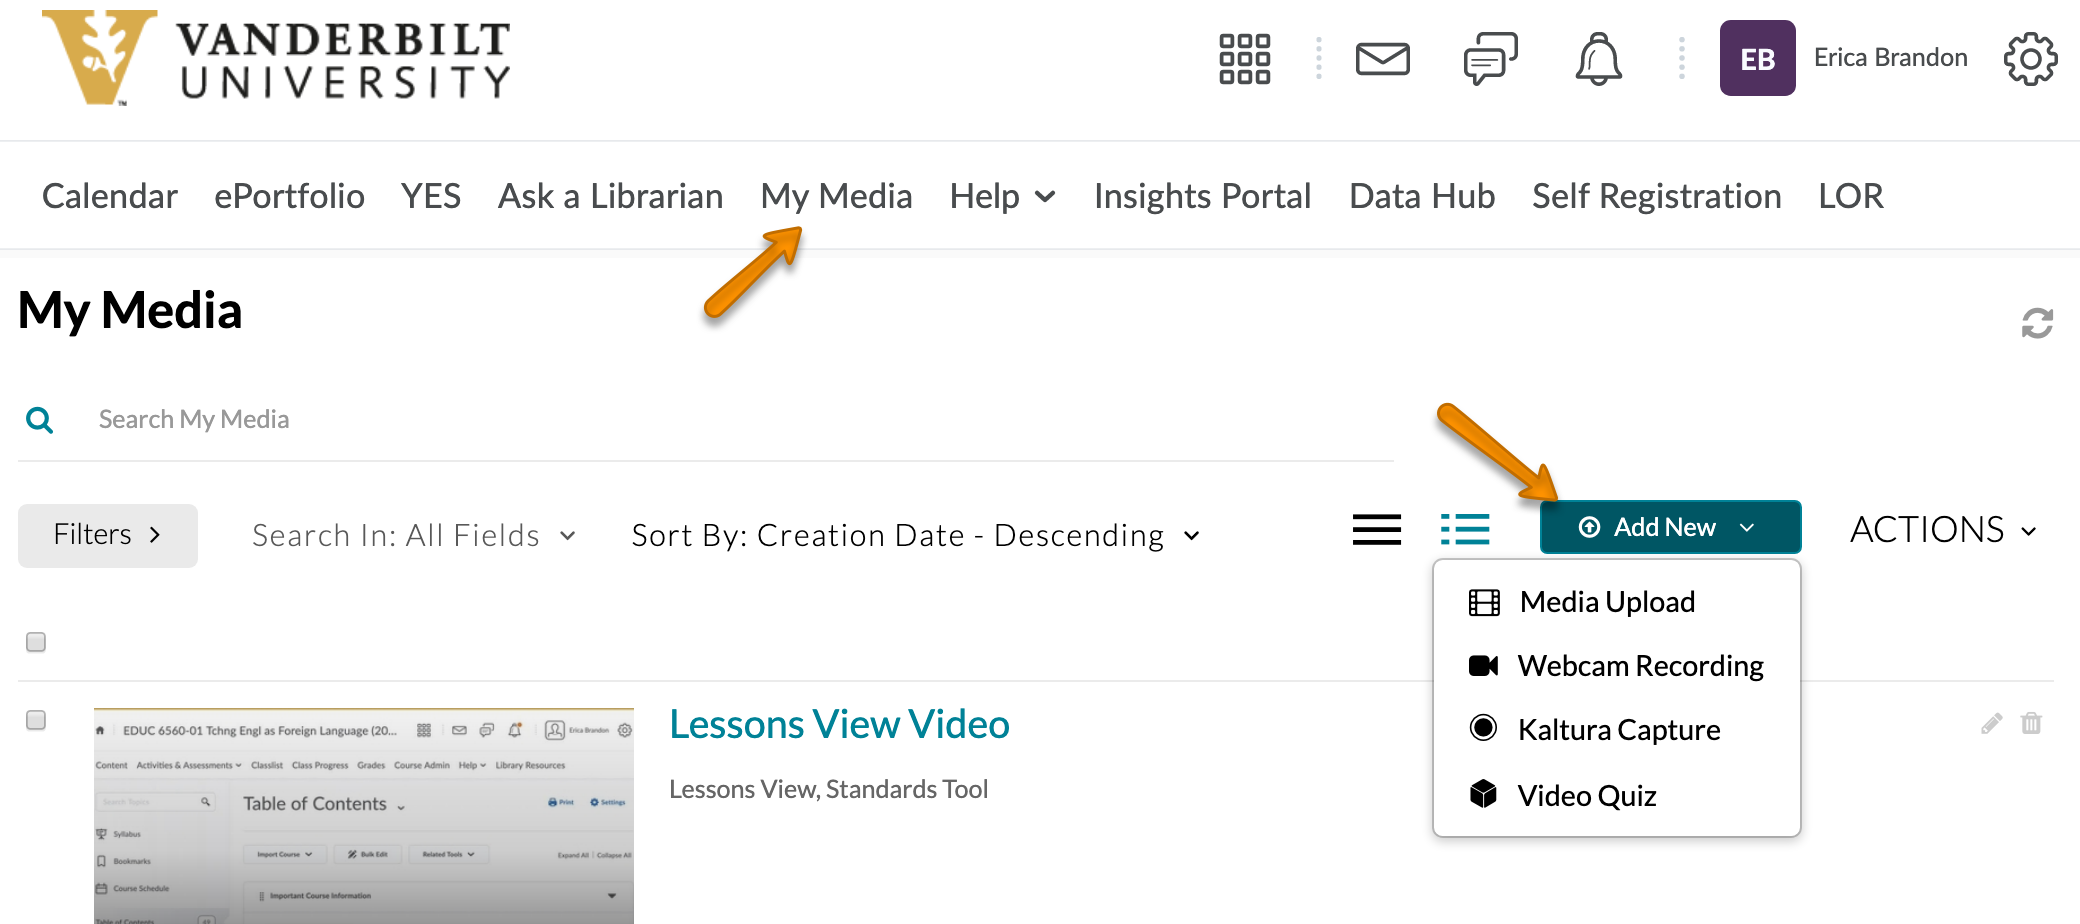
The options are:
- Media Upload – This allows a user to upload media from their local computer. Media that can be uploaded includes video, audio, and image files.
- Webcam Recording – This allows a user to record their webcam.
- Kaltura Capture – This allows a user to record their screen and add audio narration.
- Video Quiz – This allows users to embed questions within their videos. These questions are newly able to connect to the gradebook!
- After adding media from one the above choices, a list of your available media will be presented. From this page you can sort, search, view, edit, and delete media.
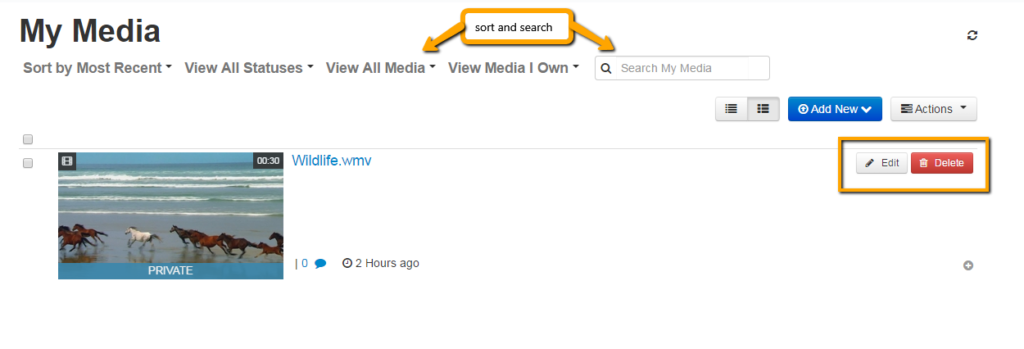
Editing media allows for changing the file name, adding collaborators, editing thumbnails, trimming video, making a copy of videos, downloading media, and adding captions.
Use the Media Gallery within a Course
- The Media Gallery is accessed from the navbar within each course.

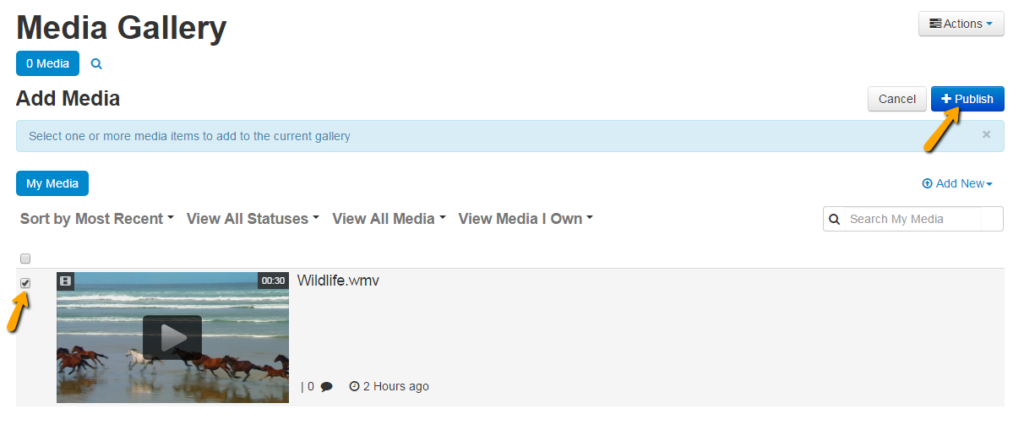
- The Media Gallery contains any media that has been published to the Media Gallery and is viewable to all users in the course. To begin publishing media, click Add Media.

- All media that has been added to your “My Media” is available for selecting and publishing. Select the desired media, then click Publish.
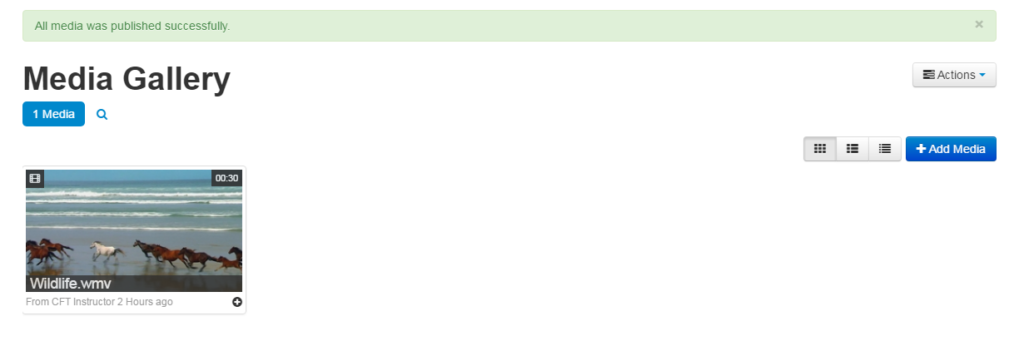
- The media has now been published to the Media Gallery for all course users to view.
Add Kaltura Media to the Content Area
- First choose a module to put the video in. Here is a guide to walk you through the process of creating a module if you do not already have one.
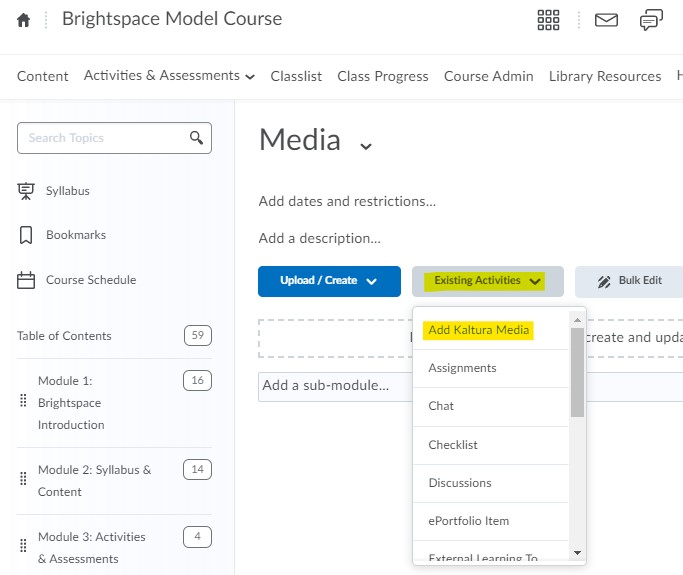
- Click the Existing Activities button inside the module. Then select Add Kaltura Media.
- Click on the desired media from the list. You will now have a link to that video in your module for students to click on. If you click on the link, you can edit the name of the video, add a description, add a due date, and see a completion summary just as with any other item in your Content area.
Use “Insert Stuff” to link your media
- Insert Stuff allows users to insert files, media, etc. into the course, including media from My Media.
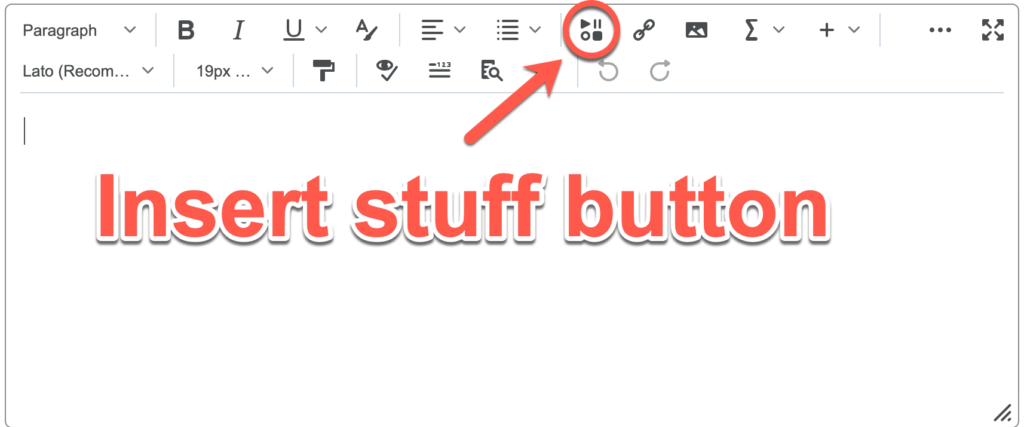
- When presented with the text box editor in a course, click the Insert Stuff icon.
- Scroll down to click on Insert Kaltura
- Select the desired media, then click next.
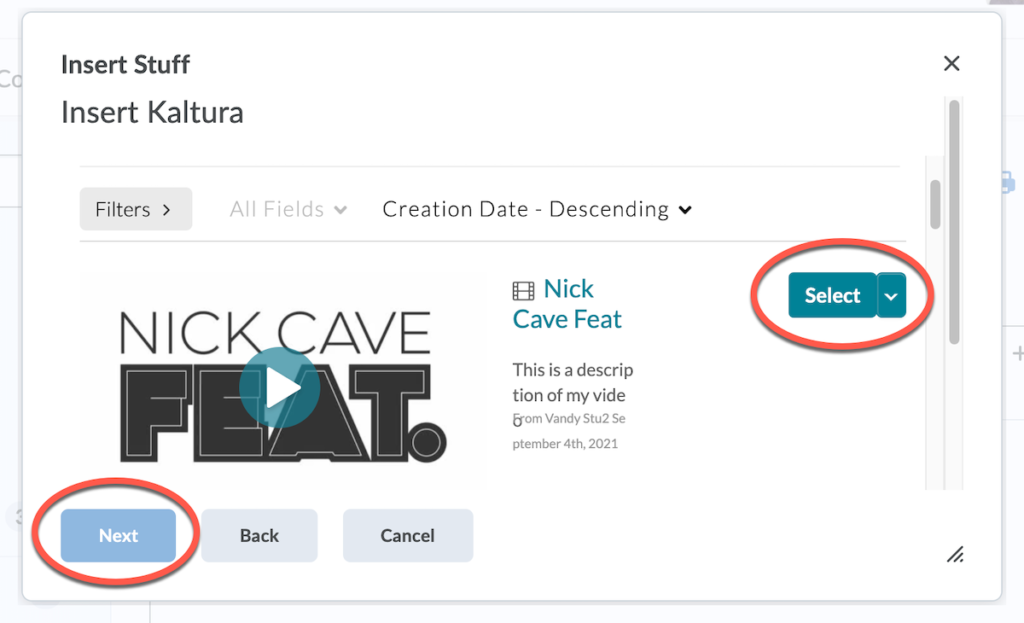
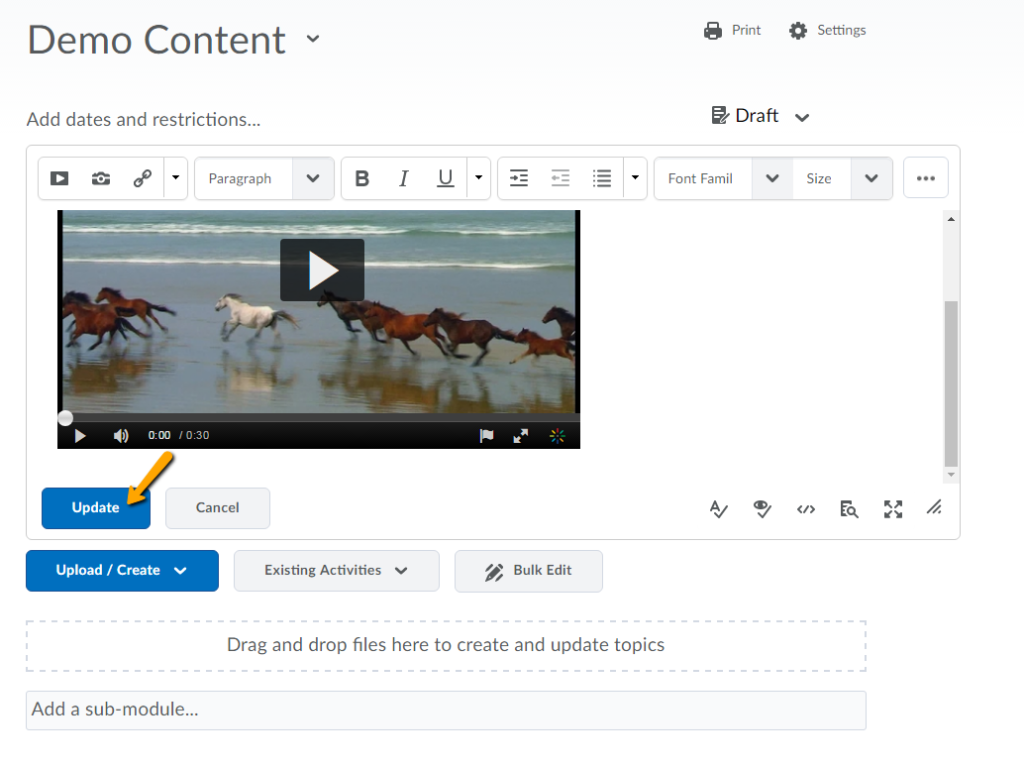
- Click Insert. You should now see the video displayed in the edit area.
- Click Update to save what you’ve done.
