
How to Track Attendance in Brightspace
Instructors may want to track student attendance throughout a semester. For this reason, there is an Attendance tool in Brightspace. Note that this tool does not allow students to enter their own attendance status – attendance data must be entered manually by an Instructor or TA.
Here is a step-by-step guide on how to use the Attendance tool in Brightspace:
- Step 1: Create an New Attendance Scheme
- Step 2: Create an Attendance Register
- Step 3: Entering Attendance
Created Fall 2023
Create an New Attendance Scheme
Note: if you want to use the default System Scheme of present/absent, you can skip ahead to the Create an Attendance Register.
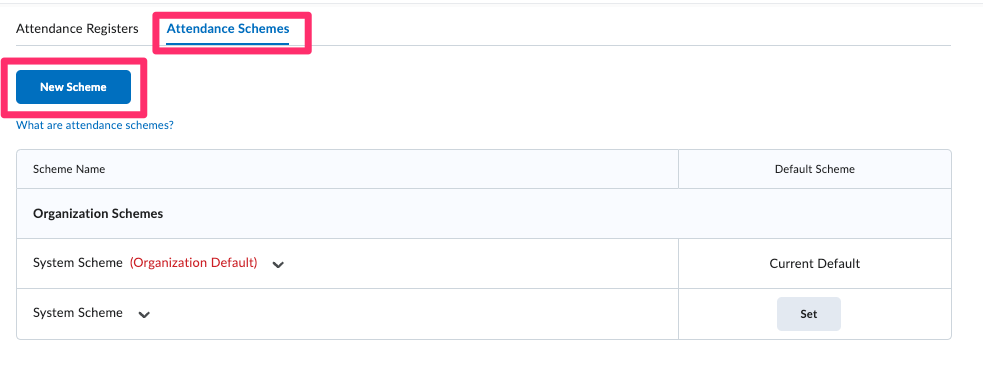
- Enter your course and go to Course Admin -> Attendance
- Click on the Attendance Schemes tab
- To create a custom scheme, click Attendance Schemes and New Scheme.
- Add symbols and names for each status (e.g. – A for Absent, P for Present, T for Tardy, etc). You have the option to assign percentages if you want Brightspace to calculate an attendance percentage for each student, but this field is not required.
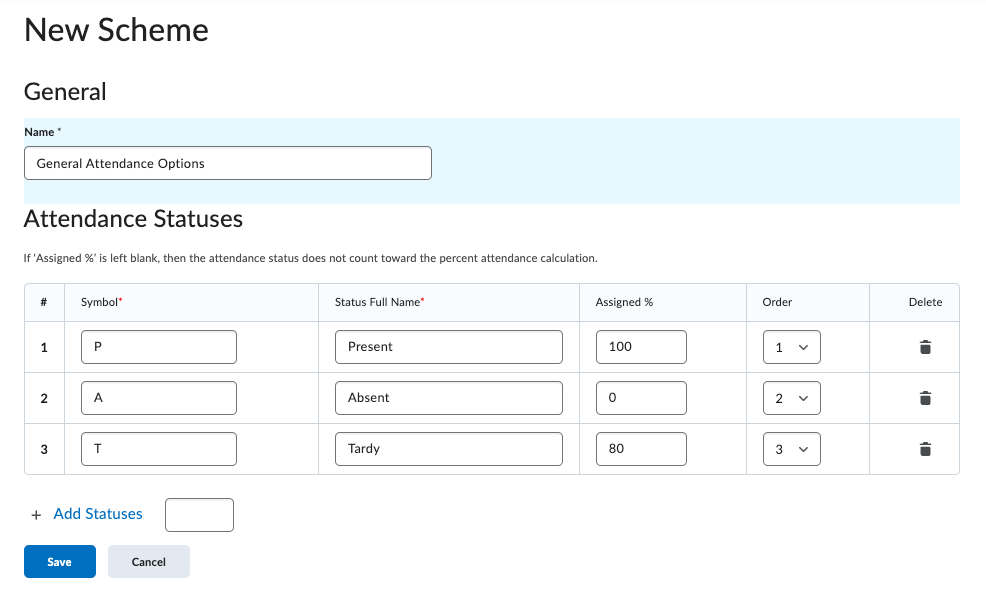
- Click Save, then Close.
Create an Attendance Register
An Attendance Register allows you track attendance for different sessions in your course. For example: you could create multiple registers for different things (lectures, labs, etc.).
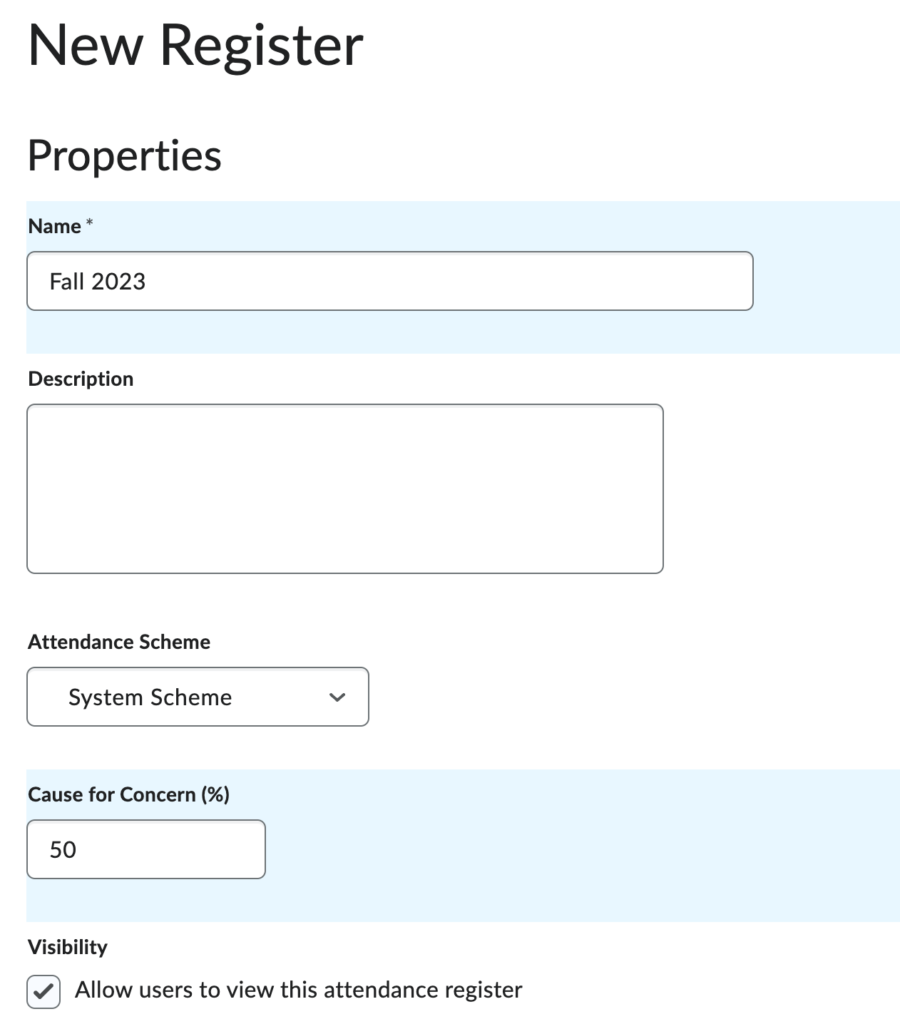
- Click New Register

- Give your Register a name (e.g. – Fall 2023 attendance)
- Choose an attendance scheme (either the system scheme or one you created)
- Enter a “cause for concern” percentage if you’d like to see an alert for anyone whose attendance rate is at risk
- Indicate whether you would like this Attendance Register to be visible to student
- Scroll down to add and name your sessions. Typically this would be the date each class meets. Add a description if needed. If you need more than 3 sessions, fill out all required information, add the number of additional sessions needed, then click Add Sessions.
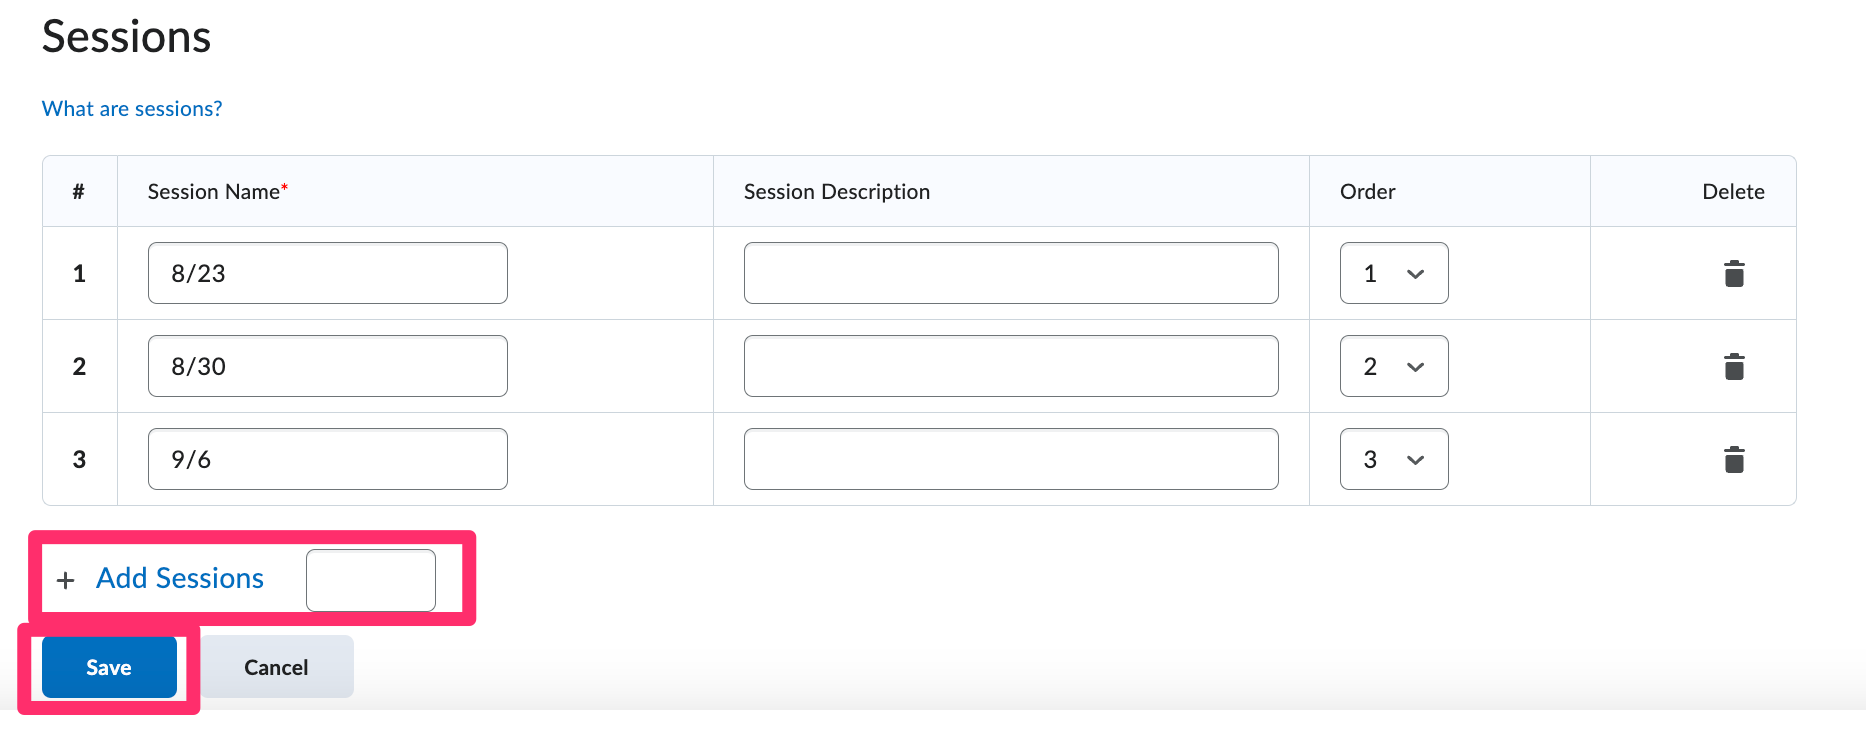
- Click Save, then Close.
Entering Attendance
-
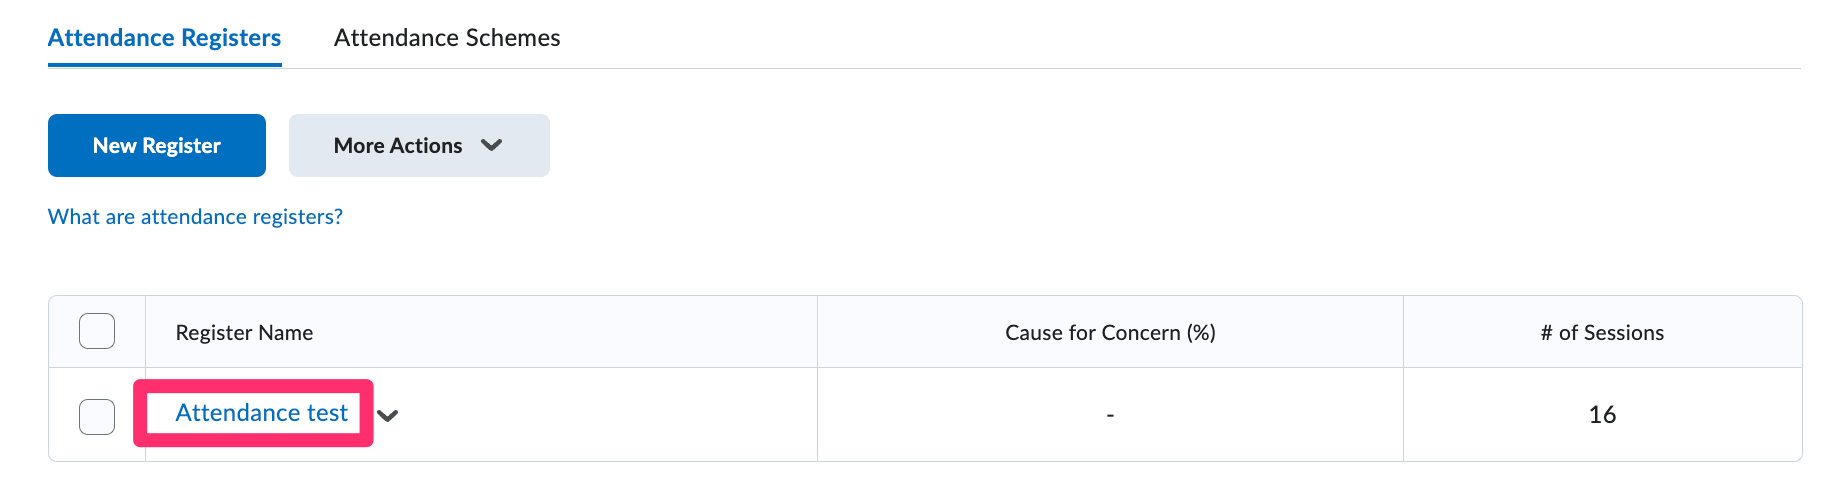
- Click on a Register name to enter data
- Click the
 icon next to a session name (usually a date) to enter student attendance for that session.
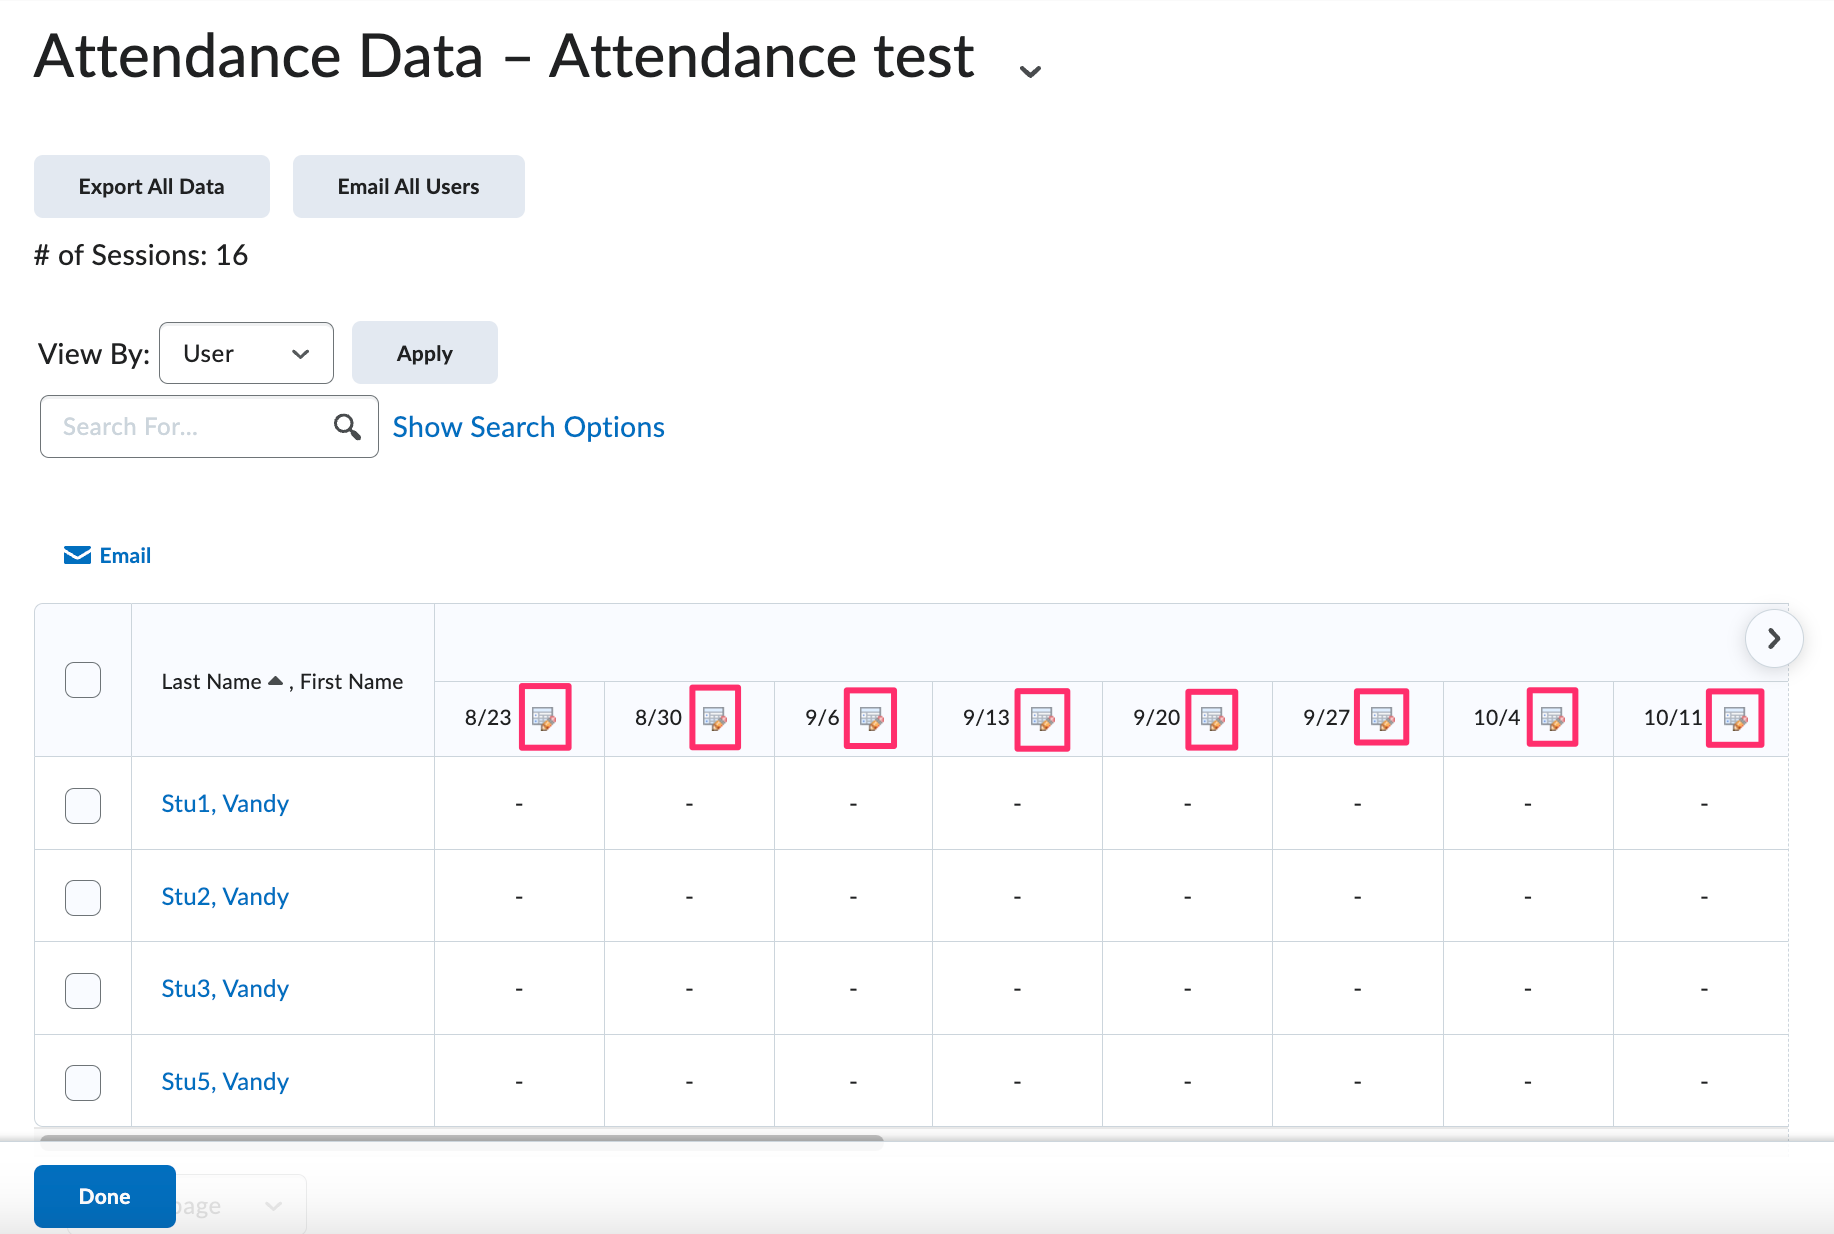
- Select the appropriate Attendance Status for each student (P = Present, A = Absent, etc.)
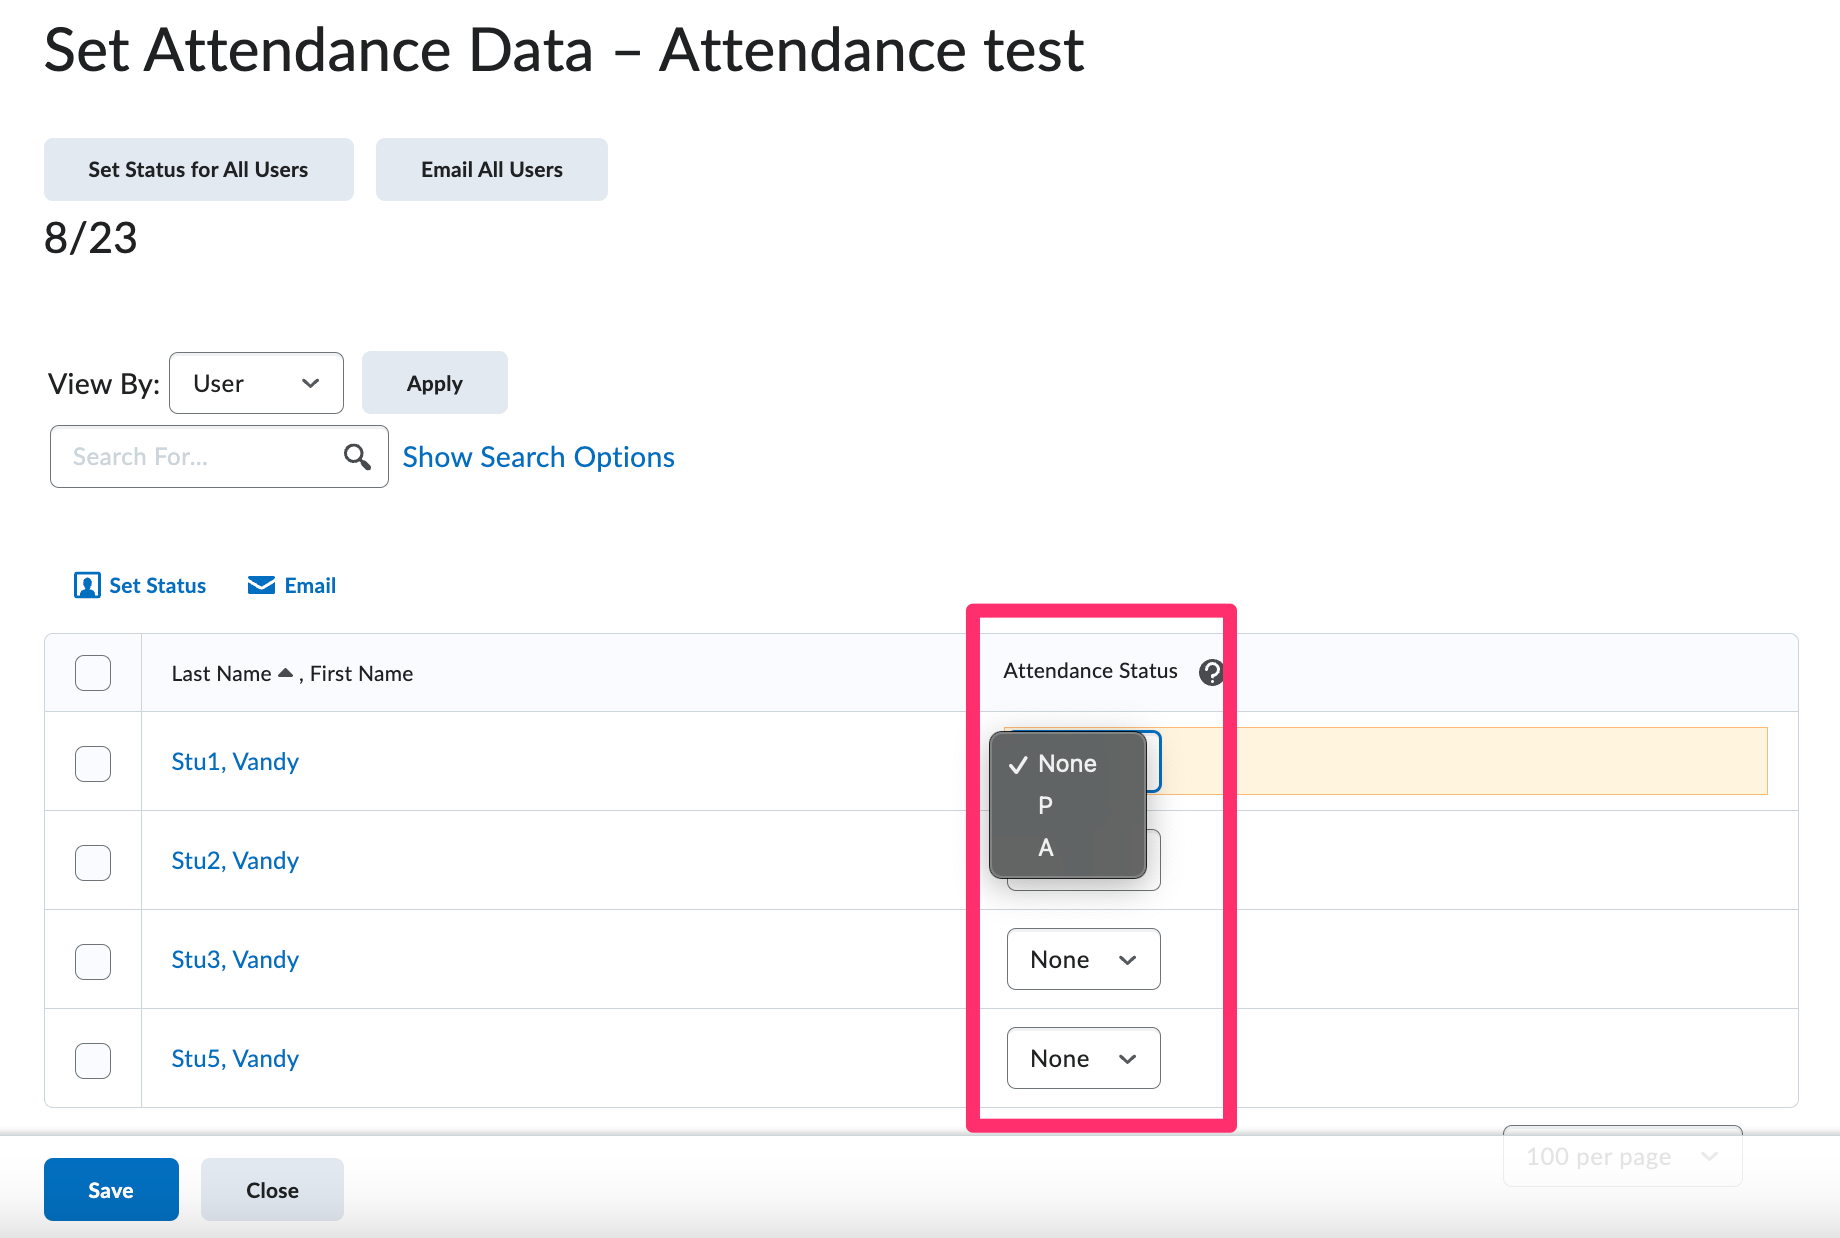
- Once you have all attendance entered for that session, click Save and then Close.
- Click on a Register name to enter data