Placing an image in a quiz question
There may be occasions when you would like to include a visual in a Quiz question. This guide will walk you through the step-by-step process of adding your image to the quiz question.
Before you create this quiz question, have your image file prepared:
- Clarity – Make sure the image you use is clear and focused.
- Size – You will be able to change the size during this process if needed, but if possible start with a large image.
- Easy to understand – You may want to crop the image so that it is providing necessary information, and omitting anything extra.
Updated Summer 2023
Place an image in a Quiz question
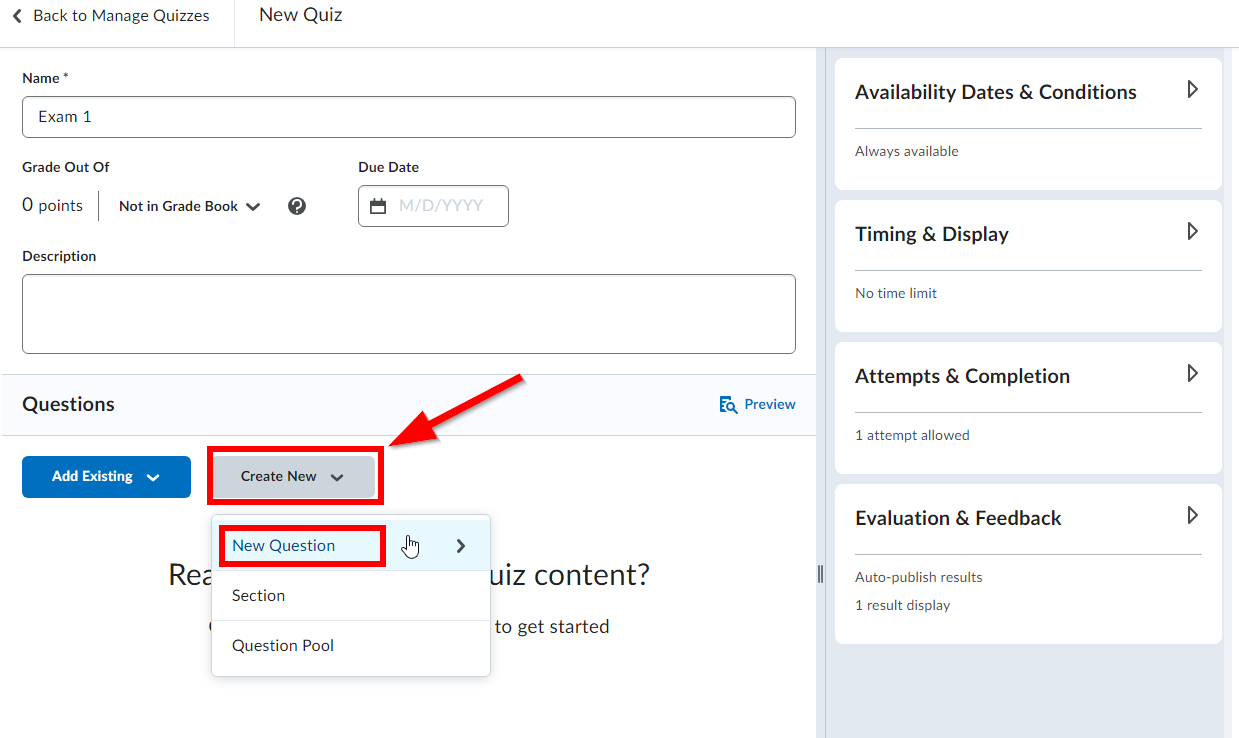
- Open the Edit screen for the Quiz you want to edit. Click on Create New > New Question to create a new quiz question, or click on an existing question to edit it.
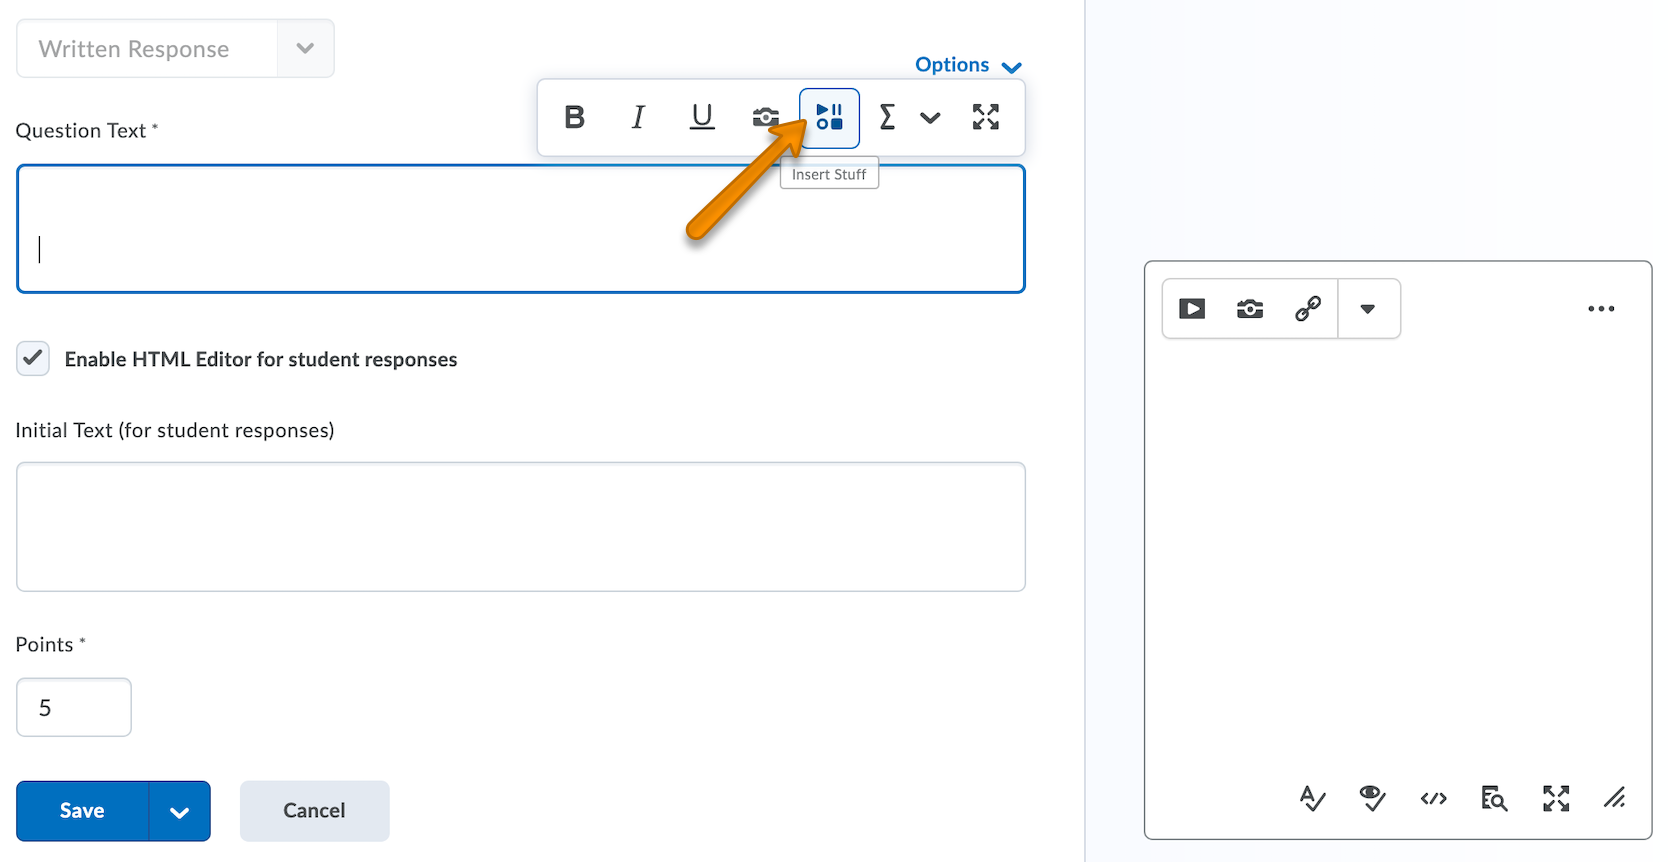
- In this example, we are making a Written Response question. Click on the Insert Stuff icon to upload an image file.
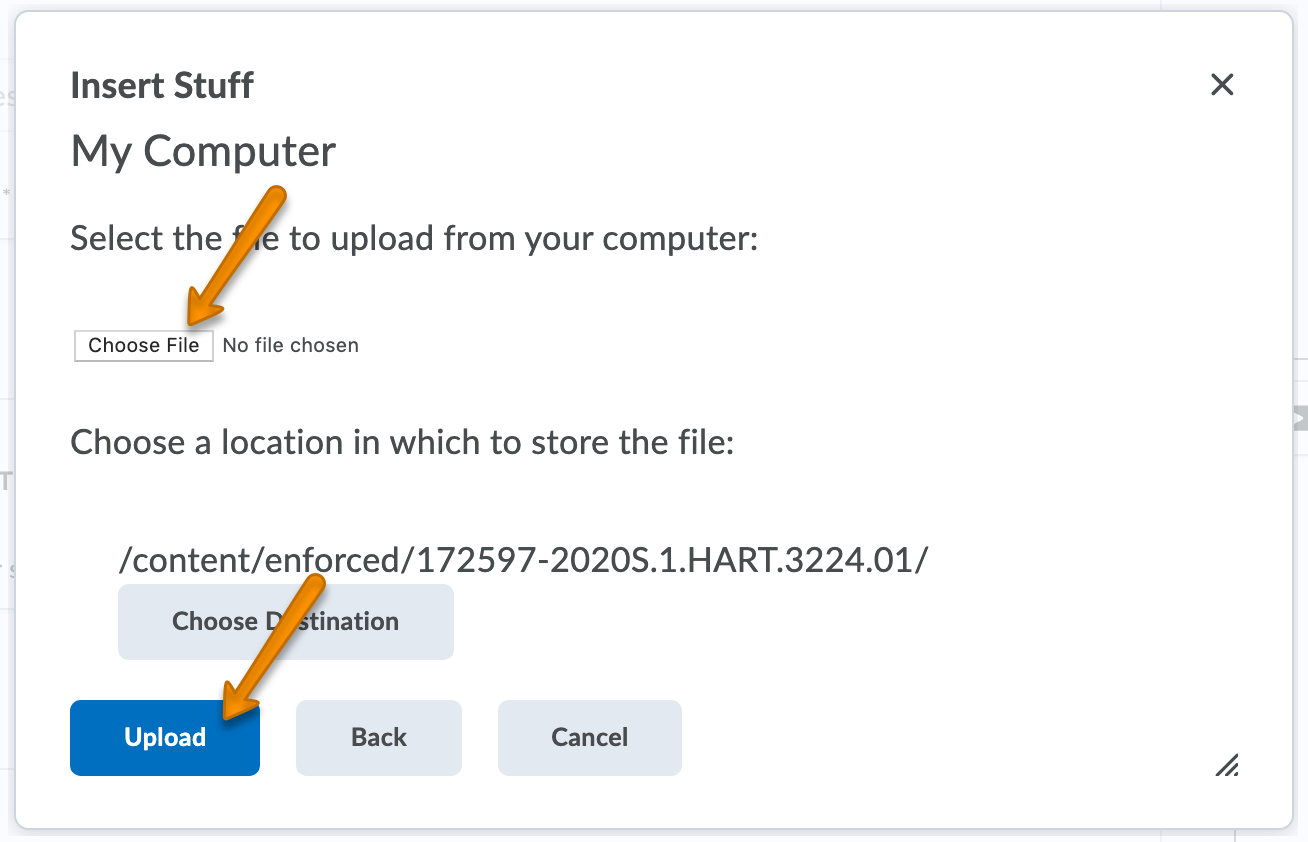
- Click on My Computer to upload a photo.

- Browse to your file and click Upload.
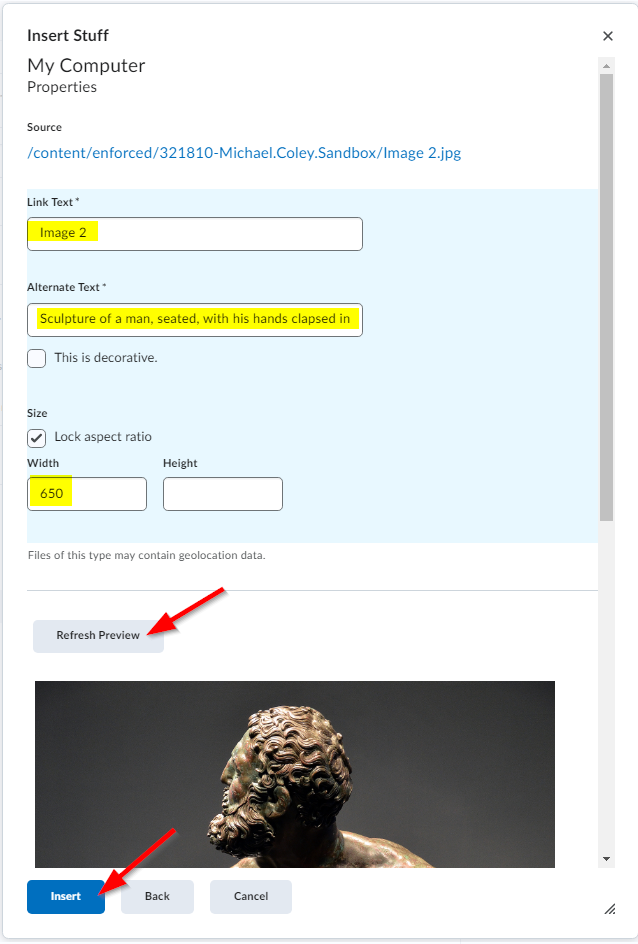
- Now you are at the properties window. Do not give the image a description that will reveal the quiz answer.
- Link text: Image 1 (or something similar that won’t give away answers)
- Alternate text: While you want the Alt text to be generic enough to not inadvertently give away an answer, you do still want to have enough information so that students with visual impairments who use screen readers can still participate effectively and equitably.
- Check the box to Lock aspect ratio
- Width: 650 pixels is a good starting place
- Click Refresh Preview
- If your image does not work well with 650 pixels, try 450 or 300. We don’t recommend making an image larger than 650 pixels, or it may not display well in a browser.
- Click Insert
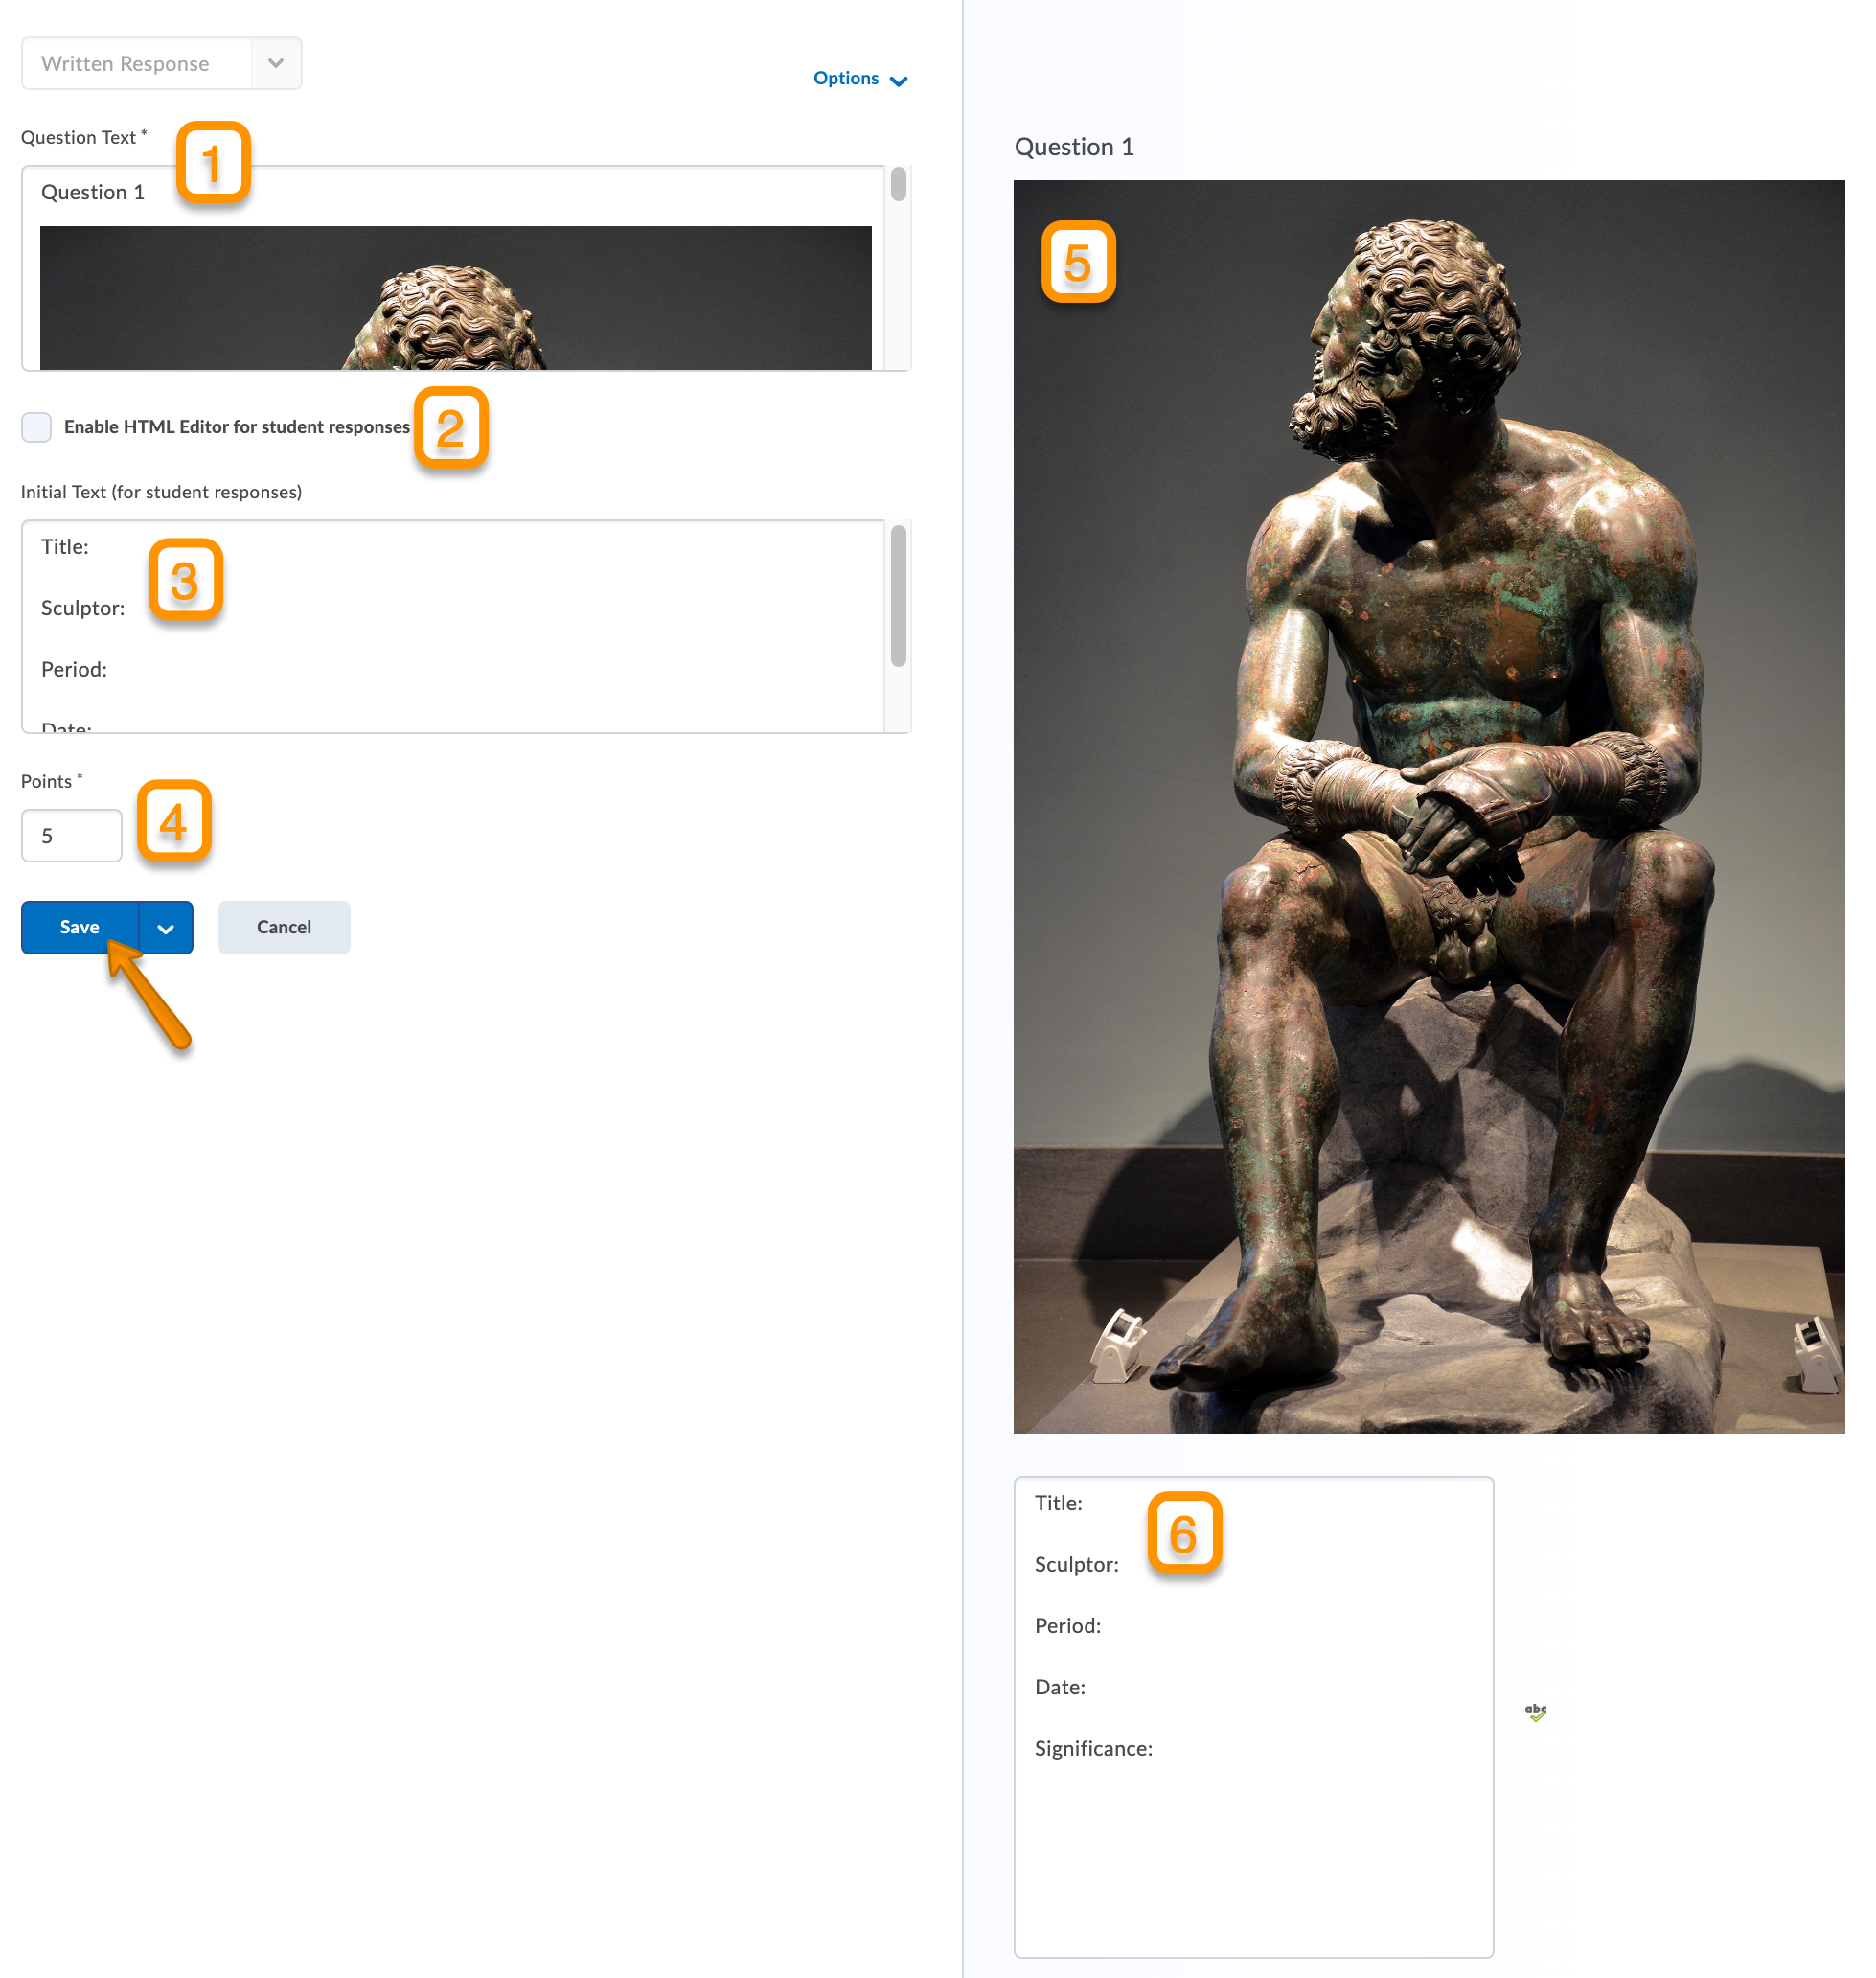
Now you are back to your question edit screen, but you should see the image displayed. You have the following options before clicking Save. Refer to the image below:
- Write the question text here. In this example, students are filling in a response rather than answering a question. So we’ve entered “Question 1”.
- Students do not need an HTML editor unless you want them to upload something or use font tools. Typically this does not need to be checked.
- In this example, the instructor would like the students to essentially “fill in the blank” about the sculpture.
- Enter your question point value
- Your image is displayed here, as the students would see it.
- The response field is displayed here, as the students would see it.
- Click Save when you are finished.
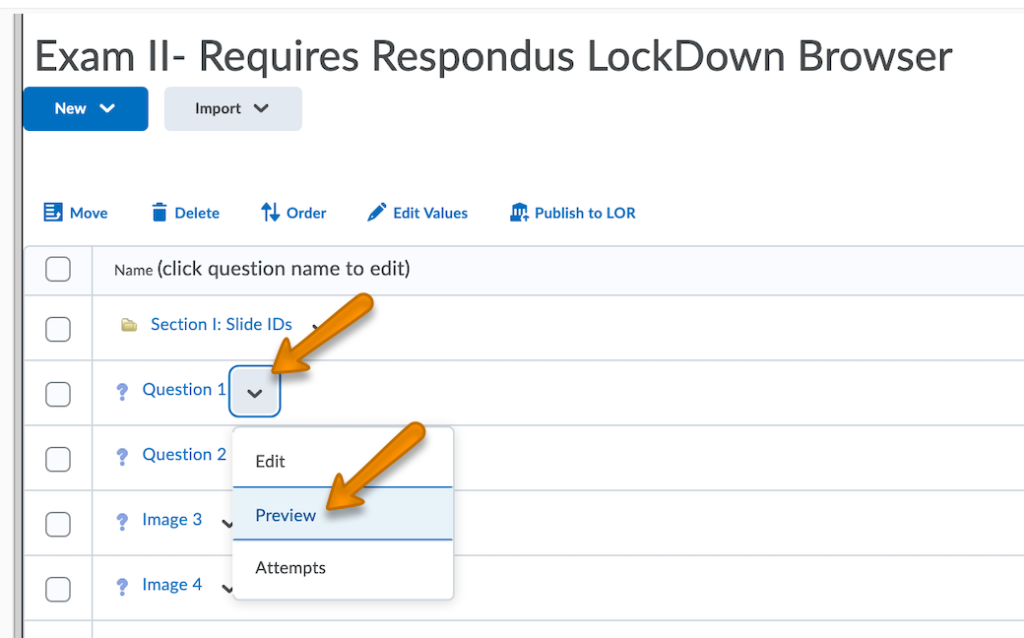
You can preview a question by selecting Preview from its dropdown menu
