
Creating private discussions for student journals and one-on-one communication
Beginning in May 2023, a new interface for creating and editing discussion topics is available. Check out our guide on this new interface to learn more!
Brightspace discussions can be used to achieve a variety of different goals, and in this guide we’ll be exploring their use for private journals and discussion between instructors and individual students. This style of discussion creates a discussion space for each student that can only be viewed by themselves and the instructors or TAs of the course.
In order to set up a Discussion for this, you’ll need to create groups of one student each. Then you will create a discussion for those single-user groups. This guide will outline both steps for this process.
Updated Fall 2023
Create Single User Groups
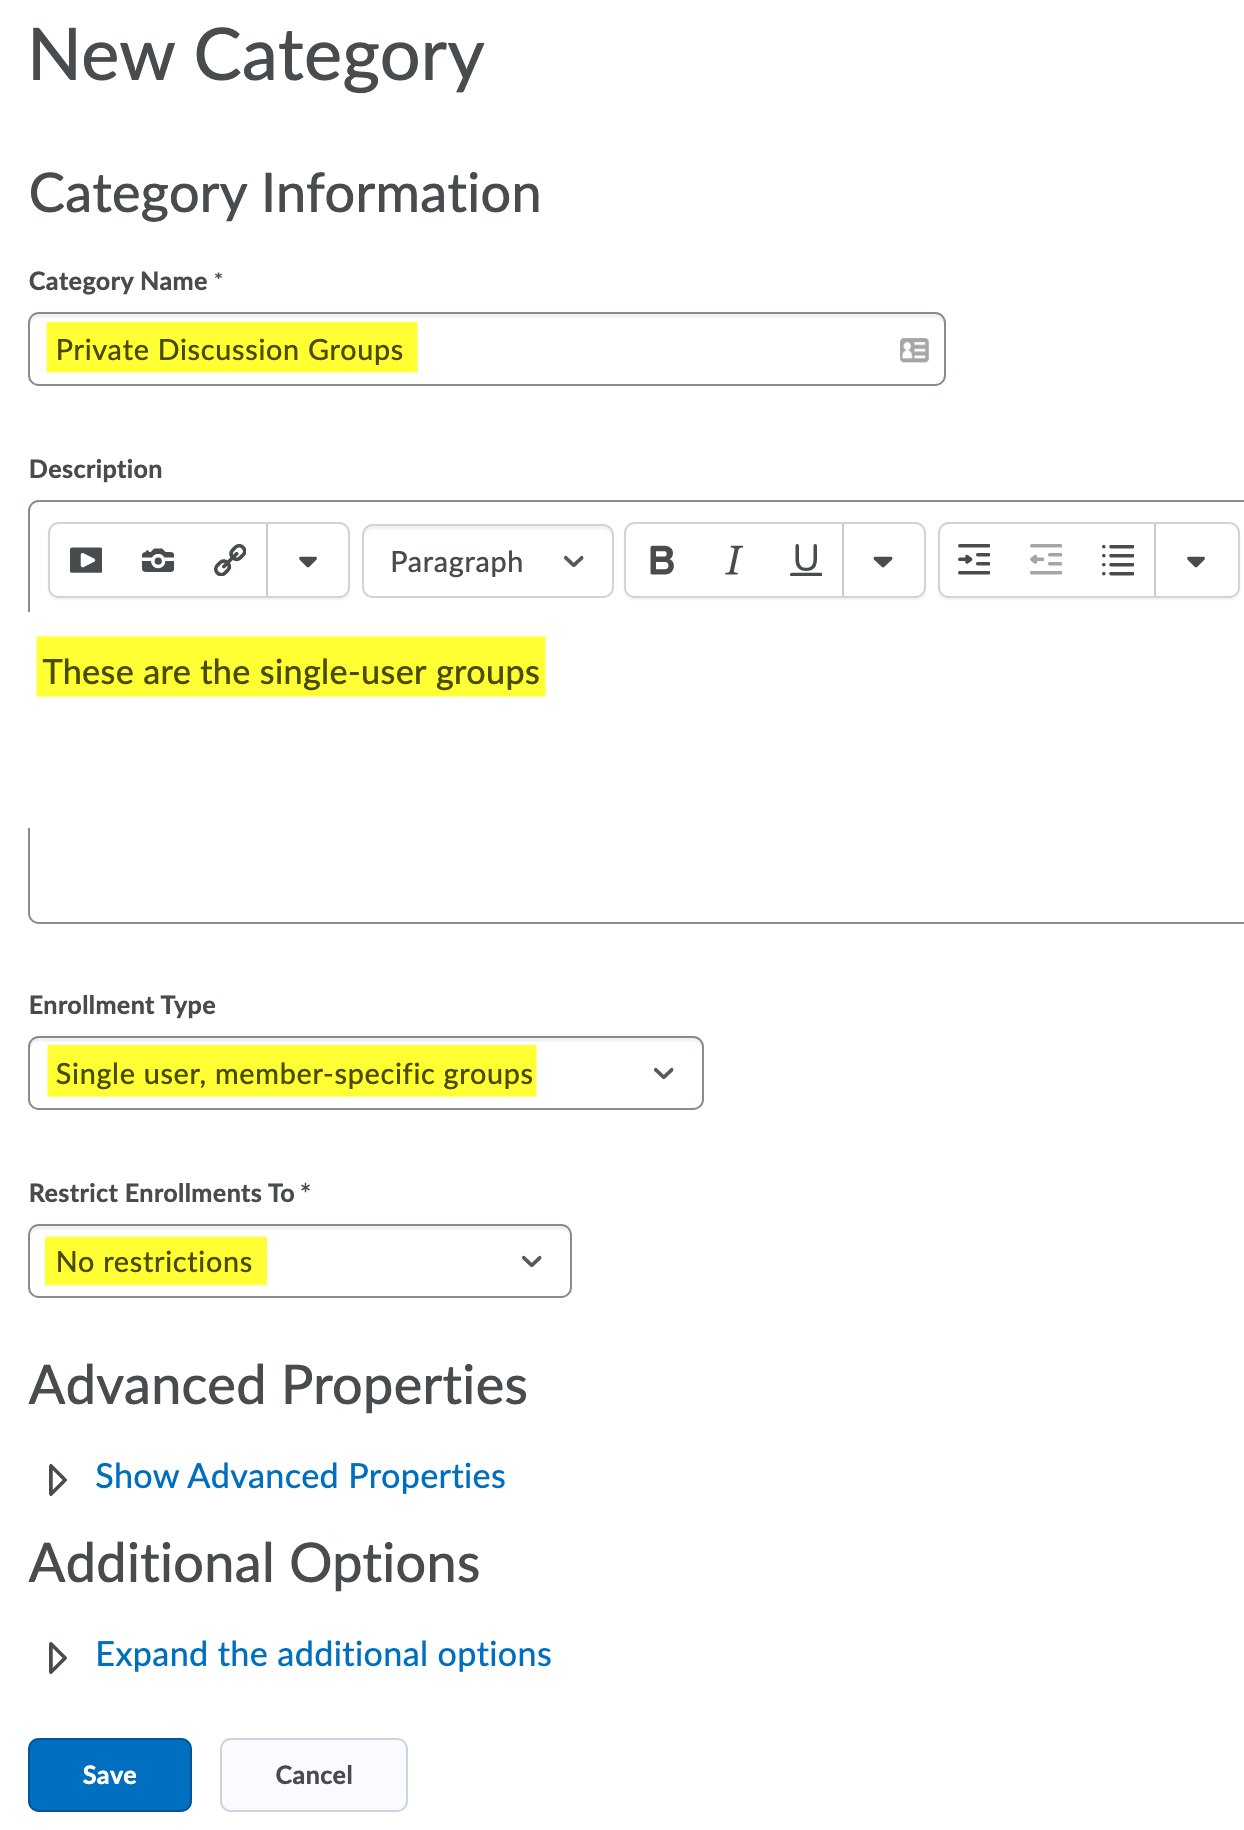
- To create a new group category, navigate to Activities and Assessments → Groups in your course Navbar.
- Select New Category to create a new group category.
- Give your group category a name. A good example would be “Private discussion groups” or “Single user groups”.
- Add a description if desired.
- Under Enrollment Type choose Single user, member specific groups.
- For Restrict Enrollments to, select No restrictions (unless you are only doing this for a select group of students).
- Click Save to create your group category.
- Your single-user groups are now ready for a Discussion. Follow the next step to set up your Discussion.
Create a Discussion for Single User Groups
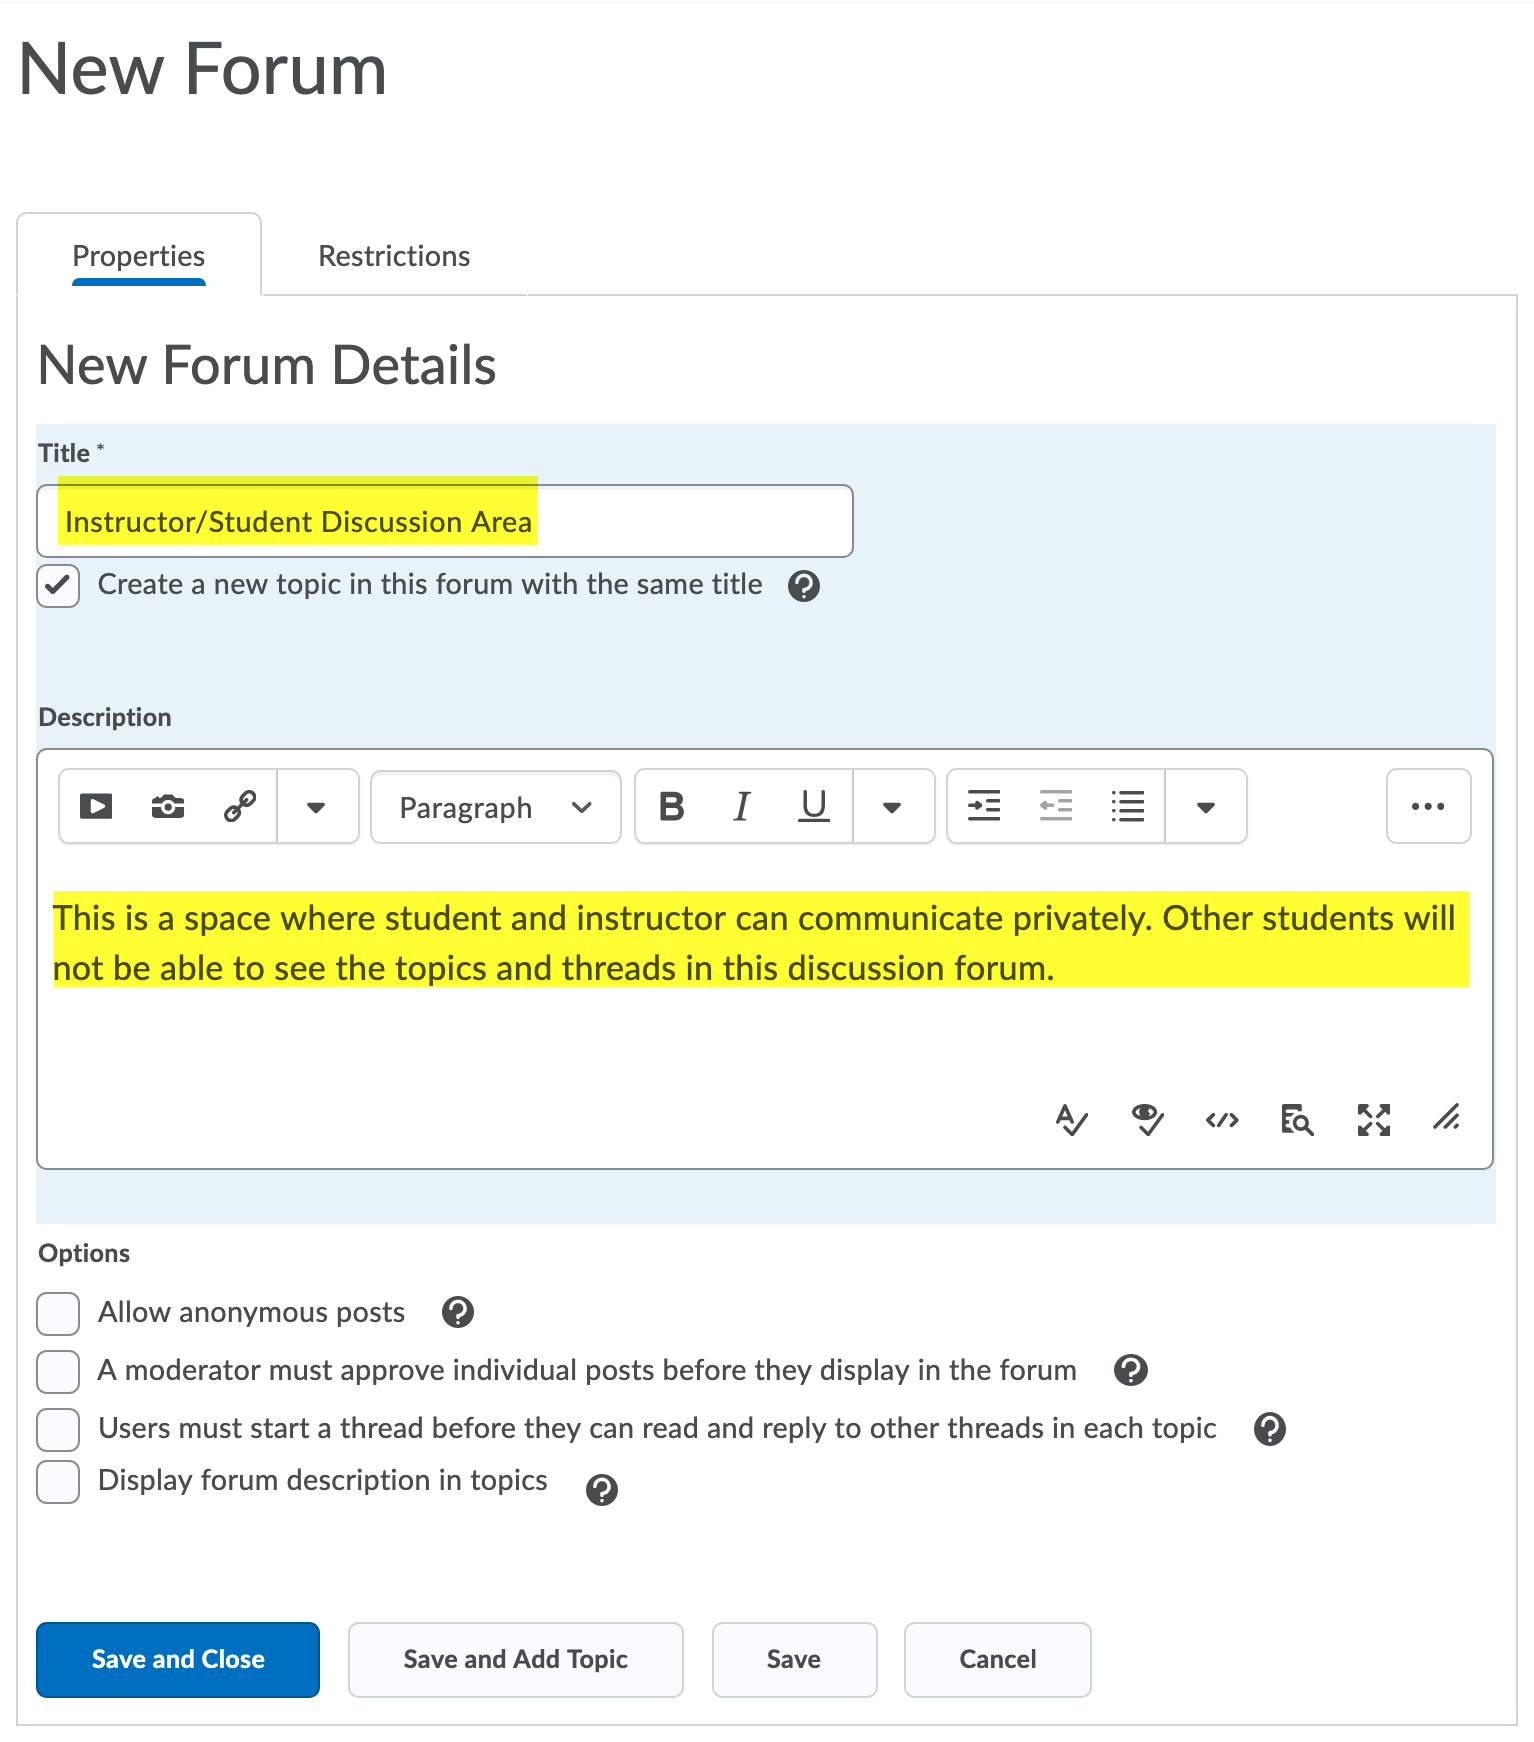
- Go to Activities & Assessments → Discussions. If you’ve already created a Forum, you can skip to step 6.
- Select New → New Forum.
- In the Properties tab under New Forum Details, give your forum a name and description.
- Select the box for Create a new topic in this forum with the same title.
- Click Save and Close.
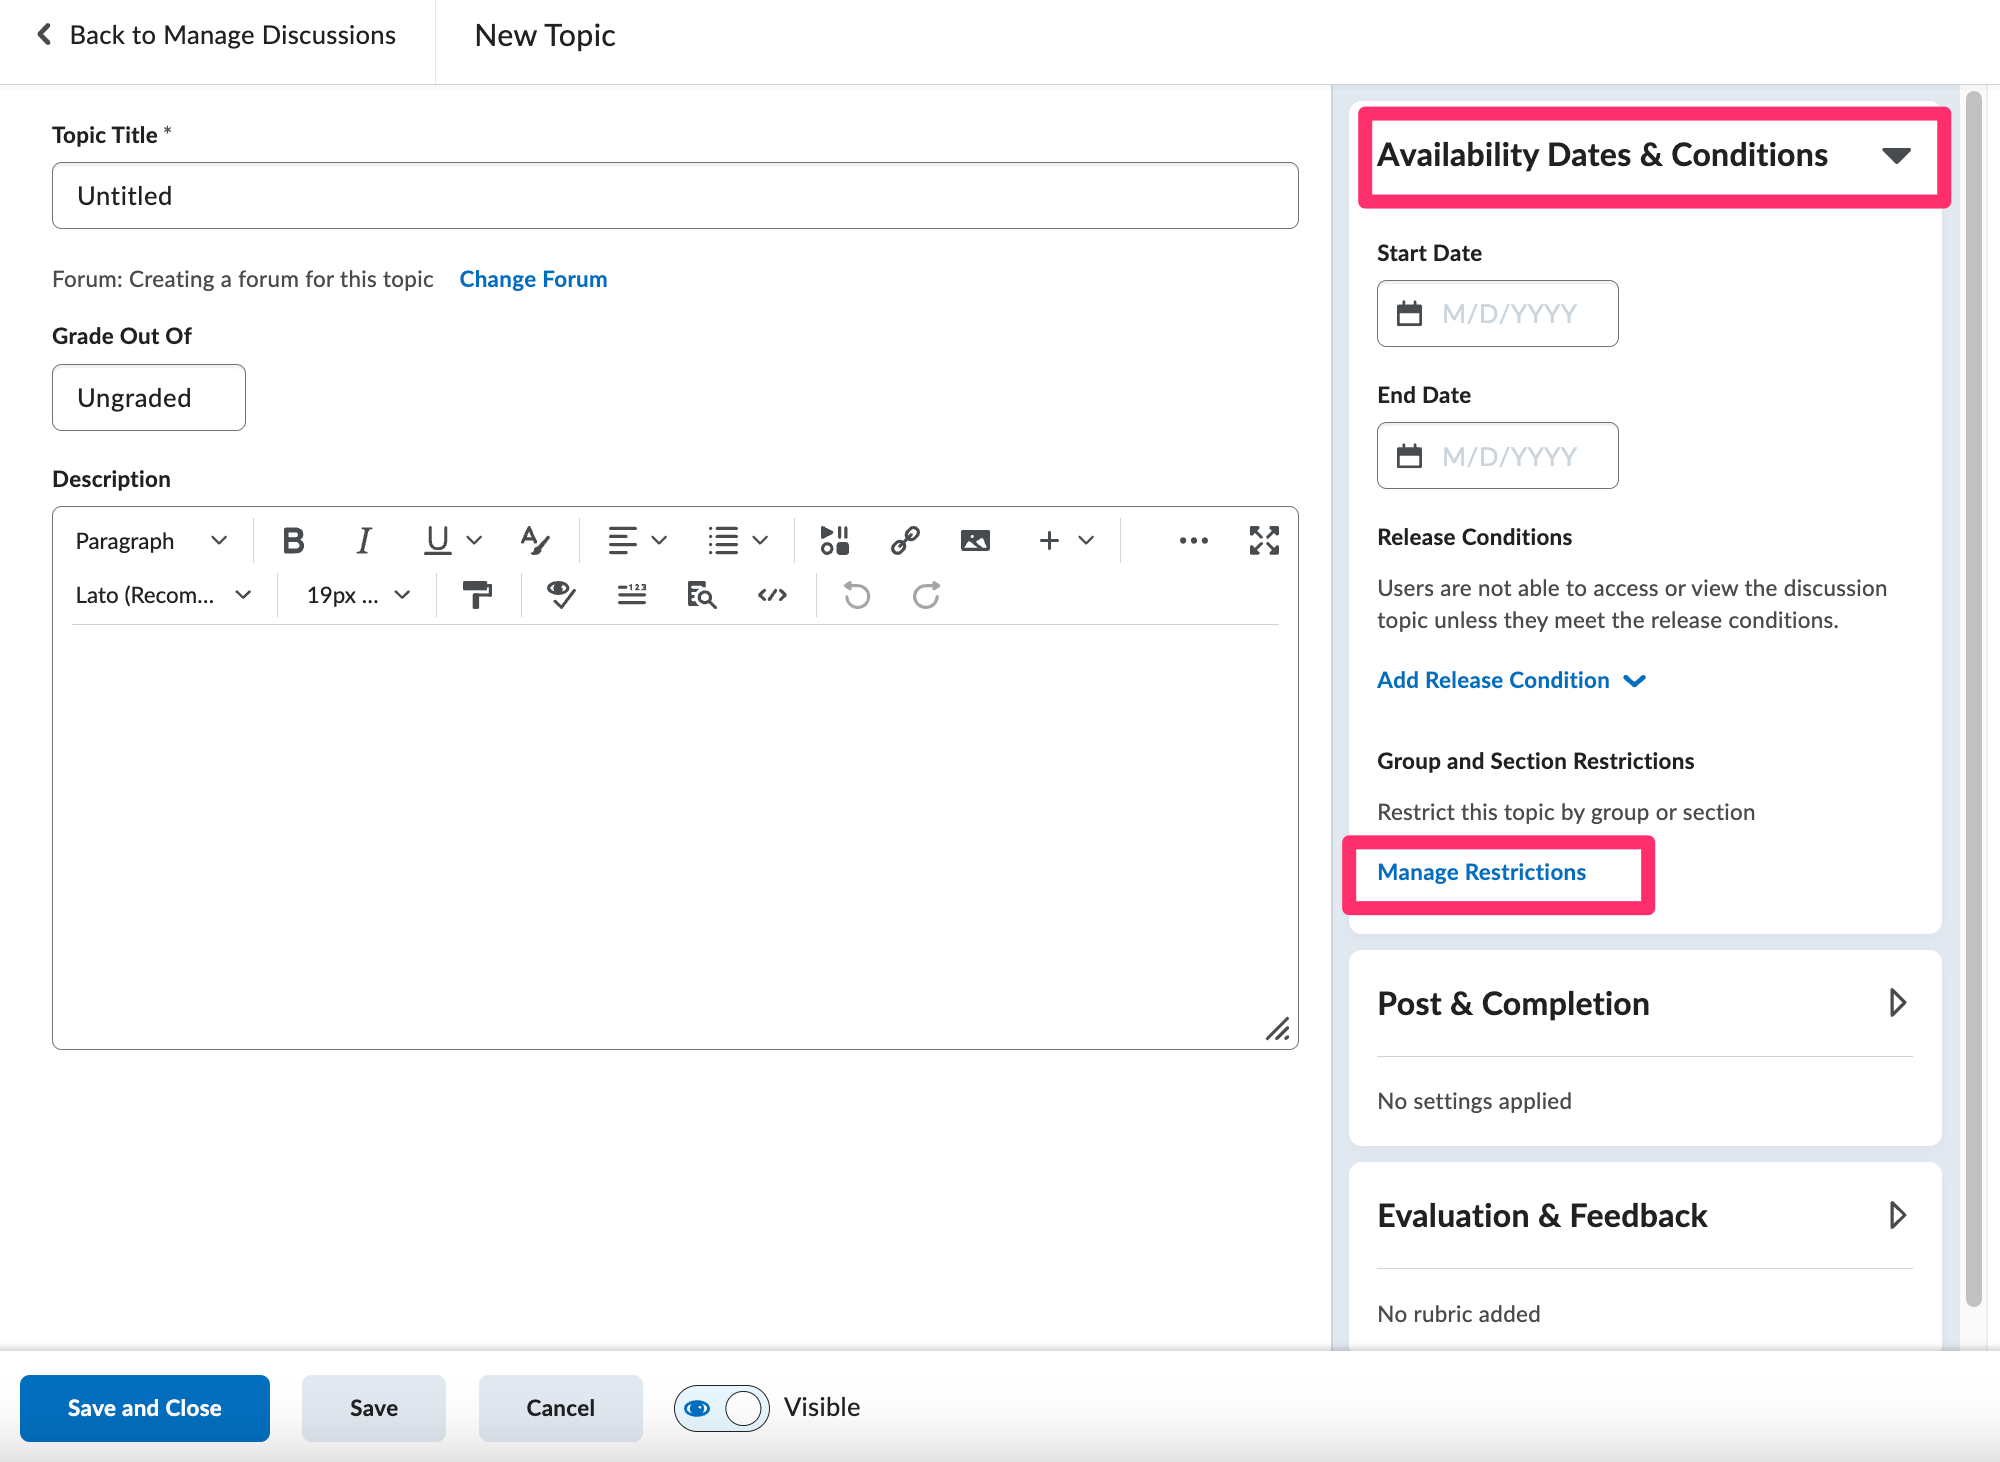
- Navigate to the Forum and Topic you’ve just created. From the Topic dropdown menu, choose Edit Topic.

- Under Availability Dates & Conditions, select Manage Restrictions.
- Under Group and Section Restrictions, select Restrict topic and separate the threads, then select the name of the groups you set up earlier.
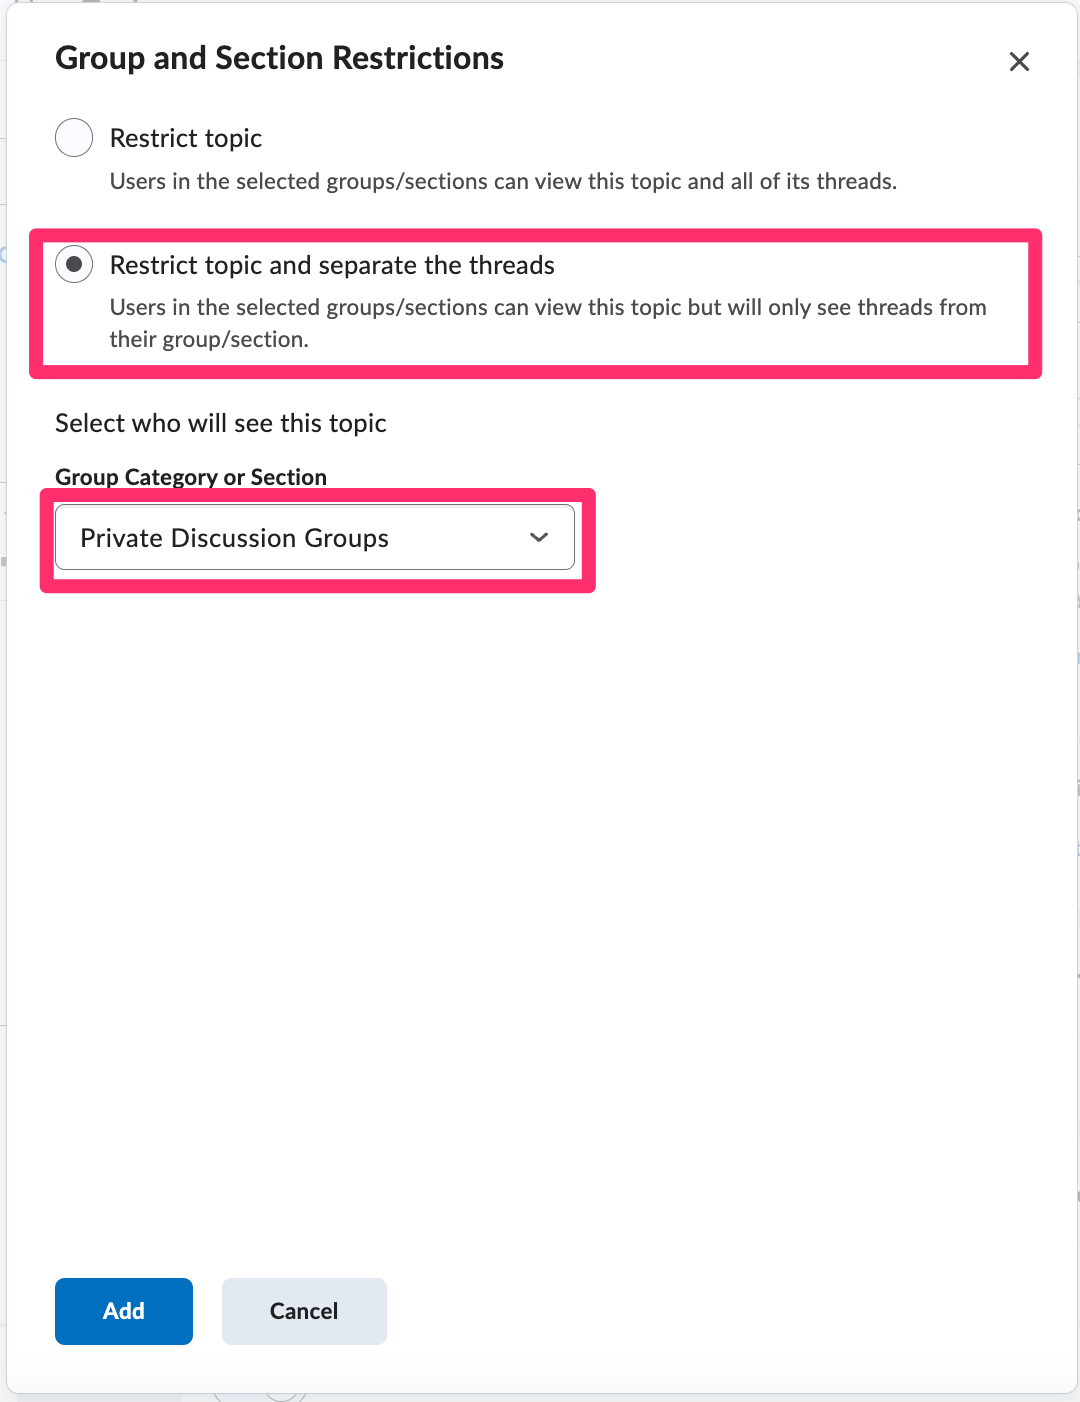
- Click Add.
- Click Save and Close.