Hosting a Virtual Classroom – Quick Start Guide
During a Virtual Classrooms meeting, you may have questions regarding how to achieve a goal or utilize a tool. The Quick Start Guide below may help provide some answers, and the printable version is a great resource to print out and keep on your desk during your class sessions.
Please note: Recorded Virtual Classroom meetings are available only within the course they were created, cannot be downloaded or edited, and are retained for only 14 days. If you would like to retain recordings of these meetings for longer periods, please consider using Kaltura Capture to record your Virtual Classroom meetings.
Virtual Classroom: “How do I…”
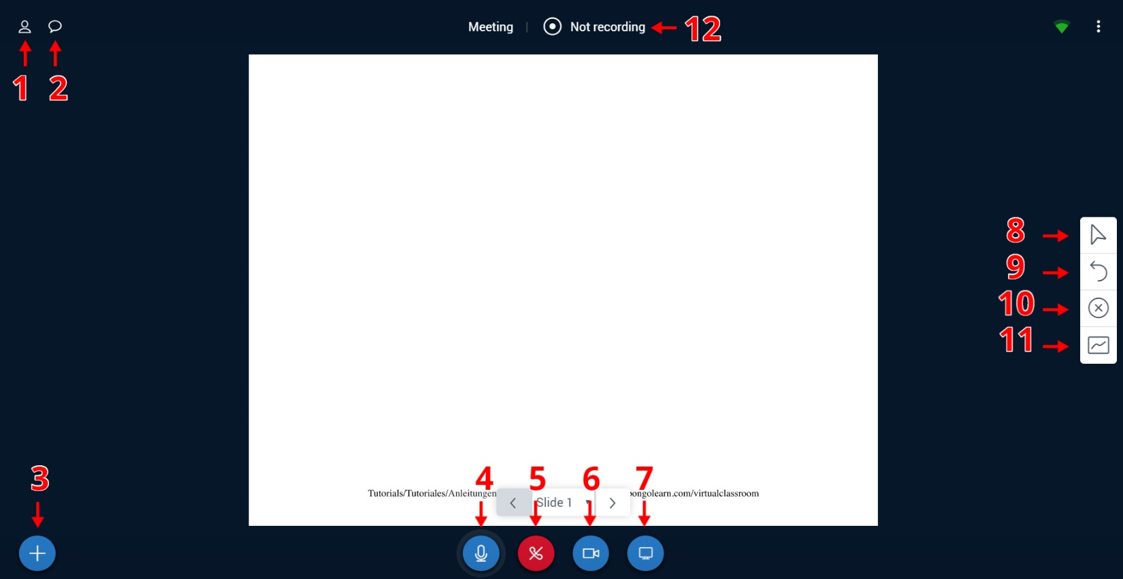
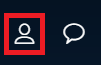
- …see who’s in my meeting? Select the icon of a person in the top left corner of the screen.
- …view the chat? Select the chat bubble icon in the top left corner of the screen.

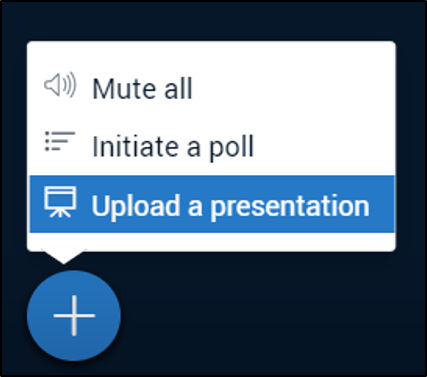
- …upload a slides presentation, start a poll, or mute my students’ microphones? Select the + icon in the bottom left corner of the meeting screen and choose the appropriate item for your needs. If you select the ‘Mute All’ option, clicking on the + icon again will instead present you with the option to ‘Unmute All’.
- …mute/unmute my microphone? Click on the microphone icon on the far left of the icons at the bottom of your screen to toggle mute/unmute
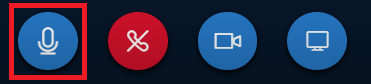
- …end the meeting? Click on the red phone icon to end the meeting and leave Virtual Classroom.
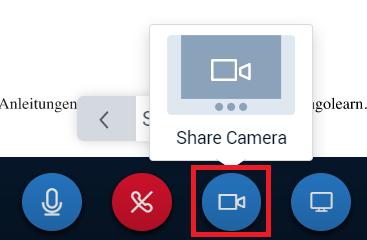
- …turn on my camera? Click on the video camera icon and choose ‘Share Camera’
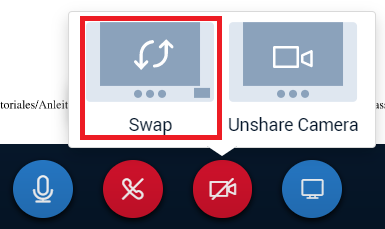
- …swap my webcam and presentation to determine which one displays larger on my screen? Once your webcam is enabled, select the red video camera icon with the line through it. From here, you can choose ‘Swap’ to switch your webcam and presentation to determine which one is larger on your screen. Please note that this only changes your view and does not affect that of other users in the meeting.
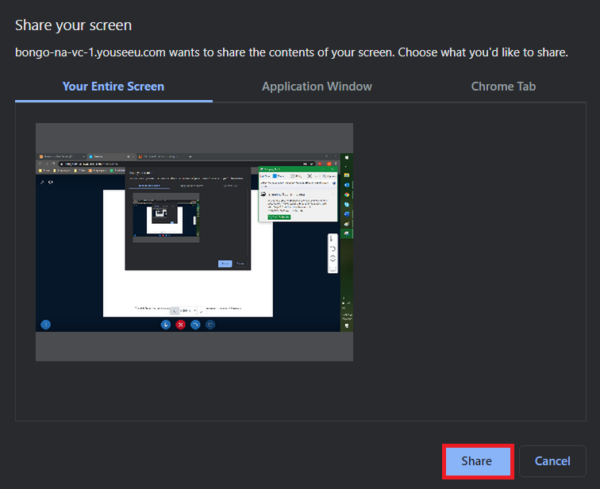
 …share what’s on my screen with my students?
Click on the computer screen icon on the far right of the icons at the bottom of your screen. You’ll see a pop-up asking which portion of your screen you’d like to share. Choose your entire screen, a specific application, or a specific tab in your browser, and choose ‘Share’.
- …use the annotation tools on the presentation area? Select the mouse pointer icon from the vertical bar on the right side of your screen to view available annotation options. You can add text or draw lines, ellipses, triangles, rectangles, and free-form drawings.

- …undo something I drew or typed? Click on the back arrow
- …clear all my annotations? Click on the X circle
- …allow others to write in the presentation area? Click on the bottom icon
- …record my meeting? Select the ‘Not Recording’ option at the top of the meeting screen to begin recording.Note: The virtual classroom tool does offer a recording option, but these recordings are limited in duration and how long they’ll remain available. Please download your meeting recordings
Before the meeting, How do I…
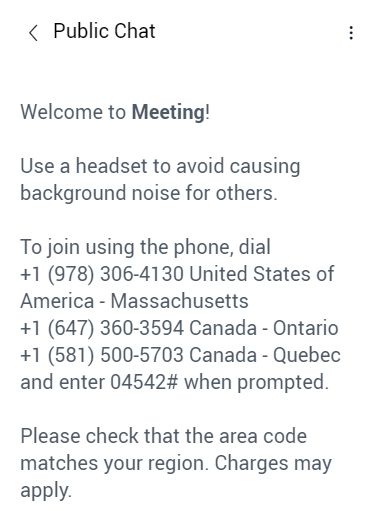
…find the phone number to allow students to call into my meeting?
Open the chat and provide the proper phone number to your students based upon their current location.
After the meeting, How do I…
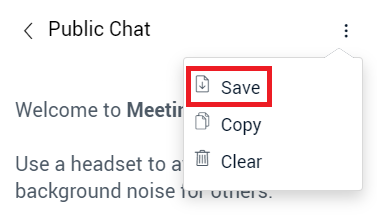
…save the contents of the chat for later reference?
Open the chat and select the three vertical dots in the top right corner. Select ‘Save’ and a file will be downloaded to your computer.