How do I copy content from one Brightspace course to another?
Brightspace offers two methods for copying content from previous courses. You can copy all components of the course, which is useful if the course requires all files, assessments, and configurations. You can also transfer pieces of the course from other Brightspace courses. This is helpful when all the course components do not need to be copied over (i.e. a new gradebook needs to be created, new announcements need to be created, etc.). As long as you are the instructor for both courses, this is a simple process you can do yourself.
If you want to transfer content from a course where you are not the instructor, please contact Brightspace Support for assistance. The permission of both instructors or a department chair is required for this.
Copy content from one course to another by copying all components
1) Login to Brightspace and access the course you need content copied to.
2) Click the Course Admin link in the navbar.

3) Under Site Resources, click Import/Export/Copy Components.

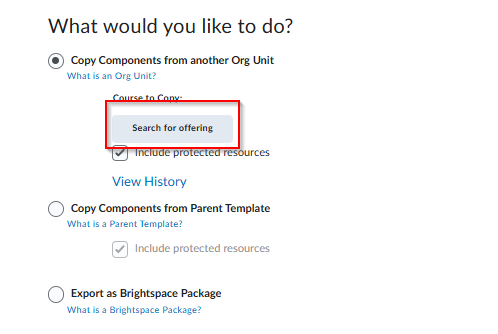
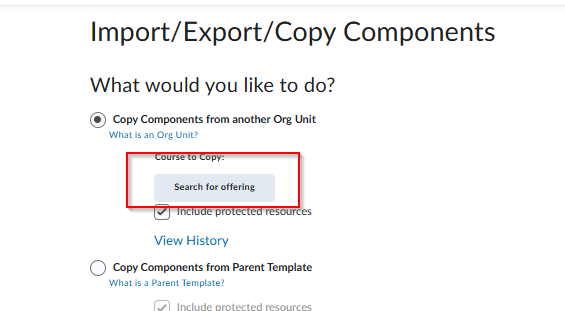
4) Select the Copy Components from another Org Unit
option, and then select search for offering.
5) Search and select the course offering you need content from.
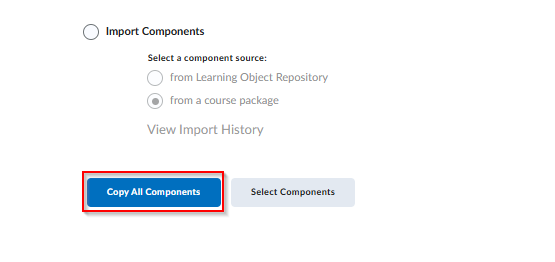
6) Select Copy All Components and wait for process to complete.
Copy content from one course to another by Selecting Components
- Login to Brightspace and access the course you need content copied to.
- Go to Course Admin -> Import/Export/Copy Components.

- Select Copy Components from another Org Unit, and then click on Search for Offering. This will open a window where you will search for the course that contains the material you desire.
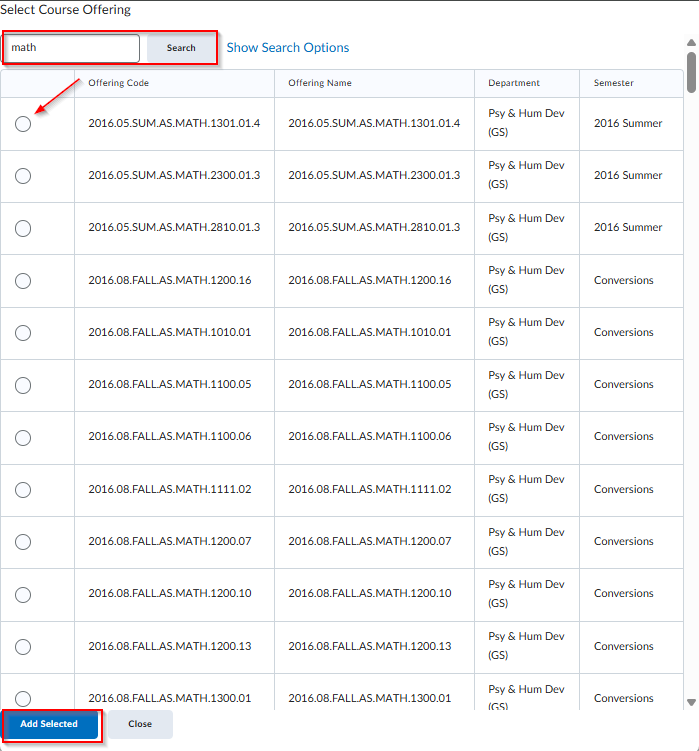
- Enter the course prefix, number, and section (ex. ECON 1010-01) and click the search button to perform your search. Select the course you want and click Add Selected.
- You are now back at the original window. At the bottom, click Select Components.

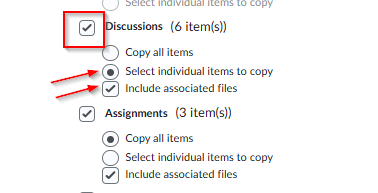
- At this new window, you will select the specific components you want to transfer. Make your selections and click Continue when you are ready to proceed. In this image, we are transferring a discussion. It is a good idea to check Include Associated Files.
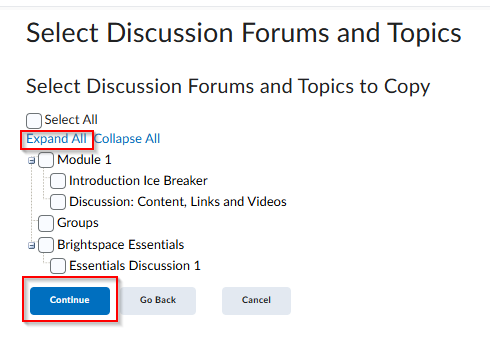
- On the following page you will view the components – in this example they are Discussions. Check the boxes next to the components you want to transfer. You may need to click Expand All to see these components. When you are ready, click Continue to proceed.
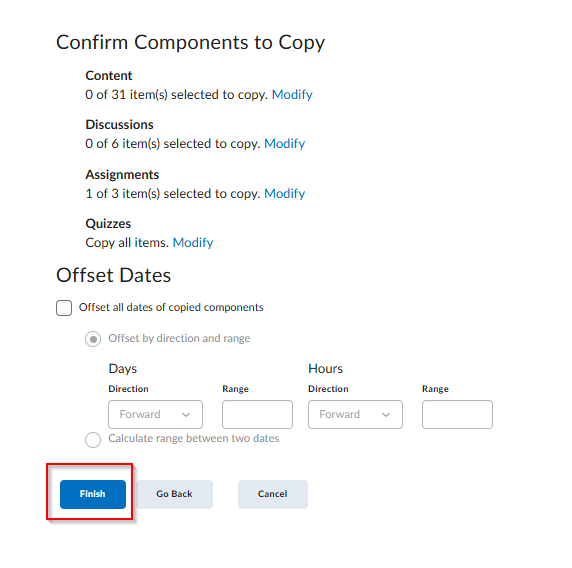
- Finally, you will arrive at a confirmation page. If you are satisfied, click Finish. You will see a window displaying your transfer, along with a report of prior transfers of content. Do not close this window until it has completed the process. You will receive a message on this screen when the process has been completed.