Creating Self-Enroll Groups for your Students
Self-enrollment allows users to enroll in groups on their own. Use this option when you want users to choose their own group members or to be a part of a group on a topic that interests them.
Create a Self-Enroll Group
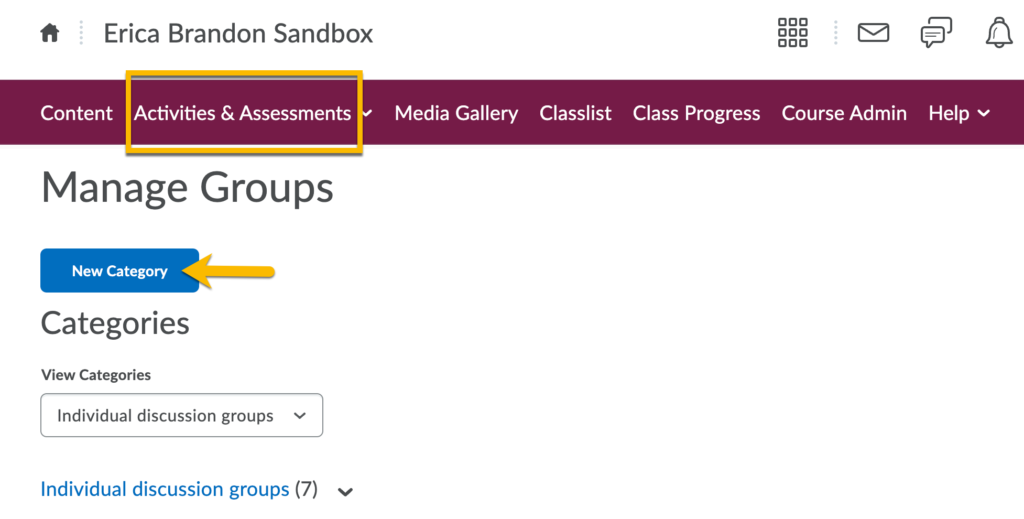
- Find the Groups tool under the Activities and Assessments tab on your Navbar.
- On the Manage Groups page, click New Category.
- Enter a Category Name and Description.
- Select one of the following options from the Enrollment Type drop-down list:
Groups of # – Self Enrollment
# of Groups – Self Enrollment
# of Groups, Capacity of # – Self Enrollment
- Enter the number of groups or capacity, depending on what you selected.
- Click Save.
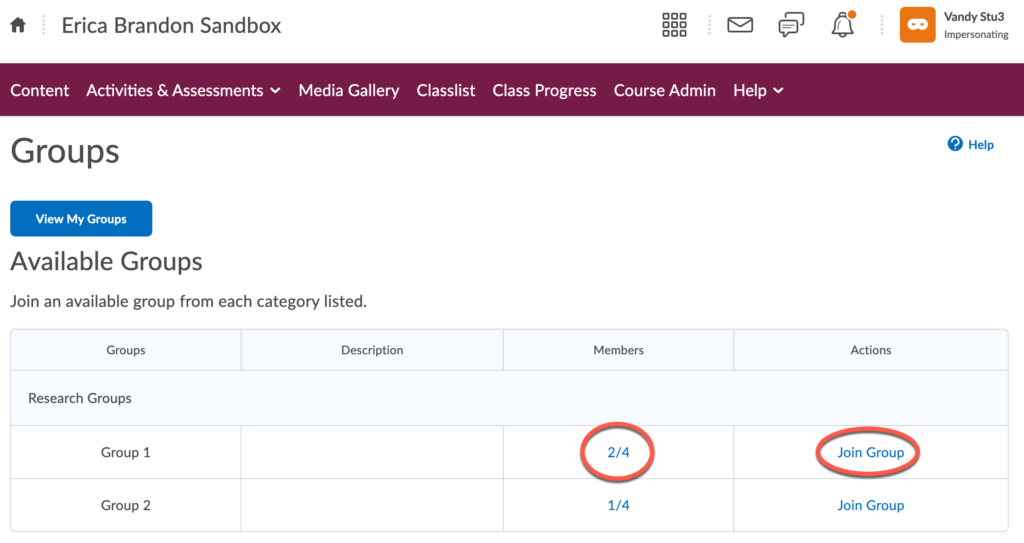
Enroll in a Group (Student Instructions)
Once a Self-Enroll group is set up, students will be able to enroll.
- Go to the Activities and Assessments tab and select Groups.
- Click on View Available Groups
- Look at the groups that are open for enrollment. Click the number of members (ex. 2/4) to see who has already enrolled. Click Join Group to join.
- You are able to Leave Group if the instructor has made that option available.