
Entering Grades into Excel
Step Two
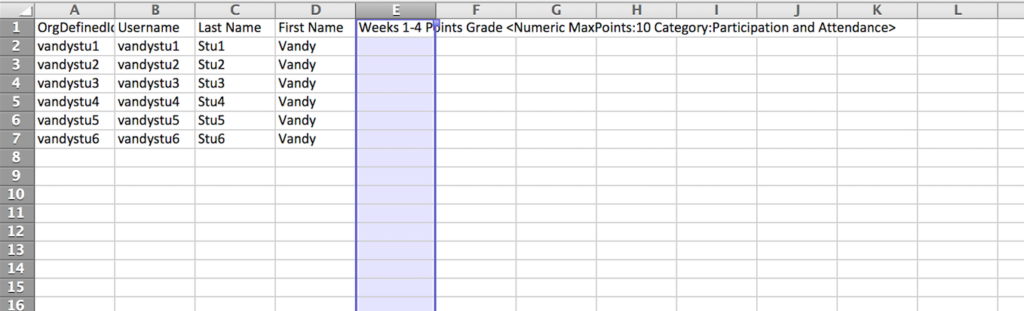
Once you have exported your gradebook, open it with Microsoft Excel. We recommend not using Google Sheets, Numbers, or other spreadsheet programs if possible. Your spreadsheet should have the following columns:
- Column A – OrgDefinedId
- Column B – Username
- Column C – Last Name
- Column D – First Name
- Column E+ – (Your Grade Items)
If you exported as a .CSV file:
You must manually remove the # in front of both the OrgDefinedId and Username columns
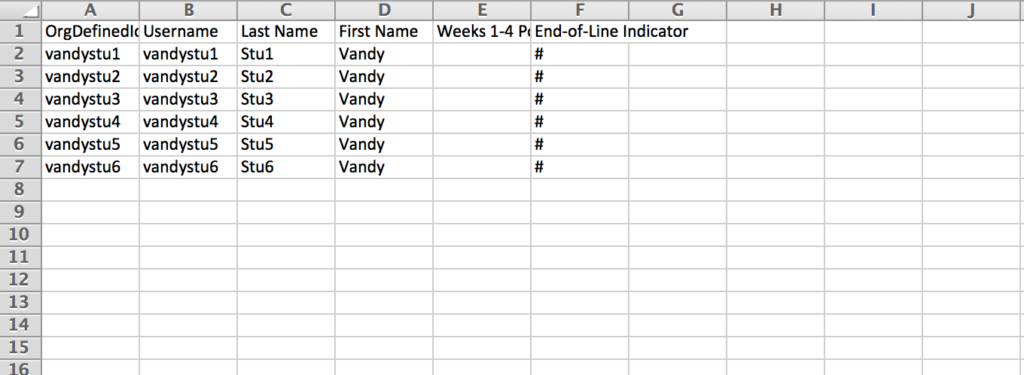
If you exported as an Excel (.XLS) file:
You must copy/paste the following text after your final column: End-of-Line Indicator
Next, you will place a pound sign (#) in each cell below. This will indicate to Brightspace that there is no additional data in columns after Column F.
Your gradebook should now look like this, with the grade item columns you selected.
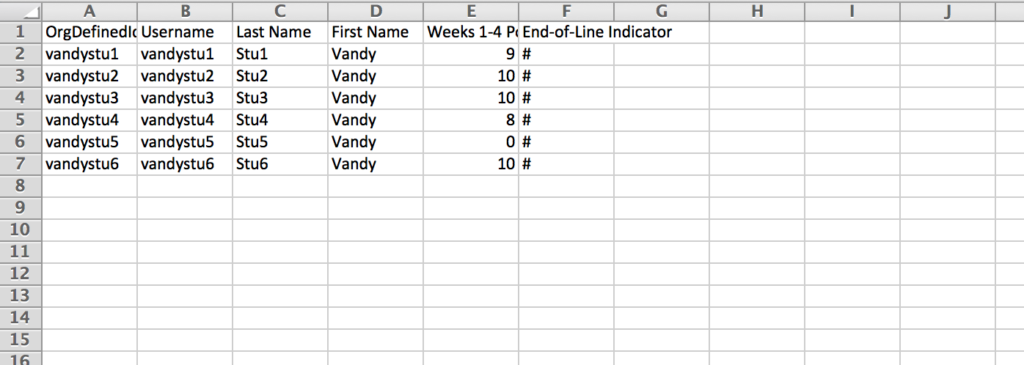
Entering Grades: Note: Names do not always export in alphabetical order
Now you are ready to enter grades. Even though it may appear that your students names are in order, it is a known issue that Brightspace does not always export with an alphabetical sort. You should do an A-> Z sort by Last Name (Column C) before entering grades. Then you will enter numeric values into Columns E+ as needed.
When you have finished entering grades, you must save this file as a .csv. If you exported as an Excel (.XLS) file, you must convert the file type to .csv.
After you have converted it to .csv, Exit the Excel program completely. Proceed to Step Three.
………………………………………………………………………….