
Kaltura Workflow – Instructor
This document provides a recommended workflow for using Kaltura in a course. Use it conjunction with the Kaltura Instructor Guide.
Updated Spring 2022
Printable version
This workflow includes 3 areas inside Brightspace: My Media, Media Gallery, and Insert Stuff.
1) Upload or create media in My Media.
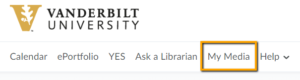
- Click My Media from the Brightspace homepage.
- Click Add New to begin uploading or creating media.
2) Now that you have media uploaded to My Media, you can publish this media in multiple locations within the course. One consideration is to use the Media Gallery inside the course. The Media Gallery serves as a central location in the course where all Kaltura media can be viewed by the course users.
- Click Media Gallery in the course navbar.
- Click Add Media.
- Select desired media, click Publish.

3) An additional place for inserting media in a course is the text box editor. This can be found anywhere in a course that allows typing, for instance: content description, discussion post, assignment instructions, or quiz question. The text box editor has a button called Insert Stuff. This button will allow you to insert your Kaltura media.
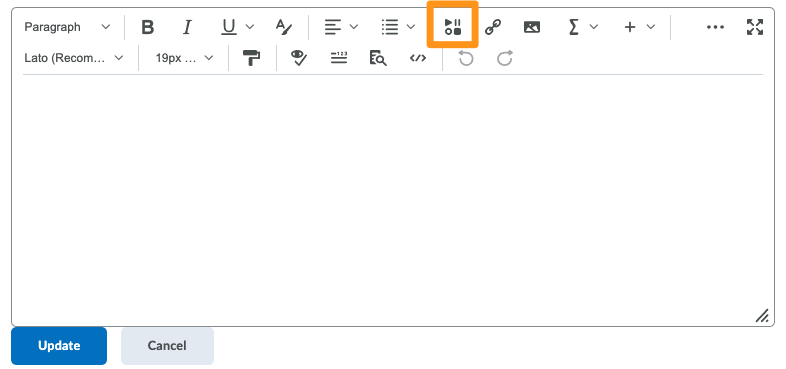
- Click the Insert Stuff icon in the text box editor.
- Click My Media from the left-hand menu.
- Select the desired media, then click Next.
- Click Insert.
- Click Update.
REVIEW: Your media lives in My Media. Upload and create all of your media there. You can then publish your media to a course via the course Media Gallery or embed it in various locations in the course via Insert Stuff.